One of the coolest features in vSphere 6.5 is the vCenter High Availability. This solution provides automated failover from active to passive vCenter node with expected RTO < 5 mins. The mechanism uses synchronous replication so there is no data loss and it operates in an Active/Passive configuration with a Witness node. vCenter High Availability feature is only available on the vCenter Server Appliance.
Requirements for vCenter High Availability
- At least 3 ESXi version 5.5 or later
- DRS anti-affinity rules are strongly recommended
- Requires 2 network adapters on the vCenter Server, one for the “public” network and one for the “private” network.
- Dedicated subnet, separate from the management network and an IP address for the “private” network for each node.
- Latency between the nodes must be less than 10 ms.
- Deployment can use an embedded or external PSC. See this link for more information about setting vCenter High Availability with different PSC topologies.
Enable vCenter High Availability
When you click the Configure button you will be presented with 2 options:
- Basic: automatic configuration, nodes will be cloned and configured automatically
- Advanced: manual configuration, nodes will be cloned and configured manually
Before you continue, I assume you have created a dedicated, private portgroup for vCenter High Availability. Also, SSH must be enabled on the vCenter Server Appliance.
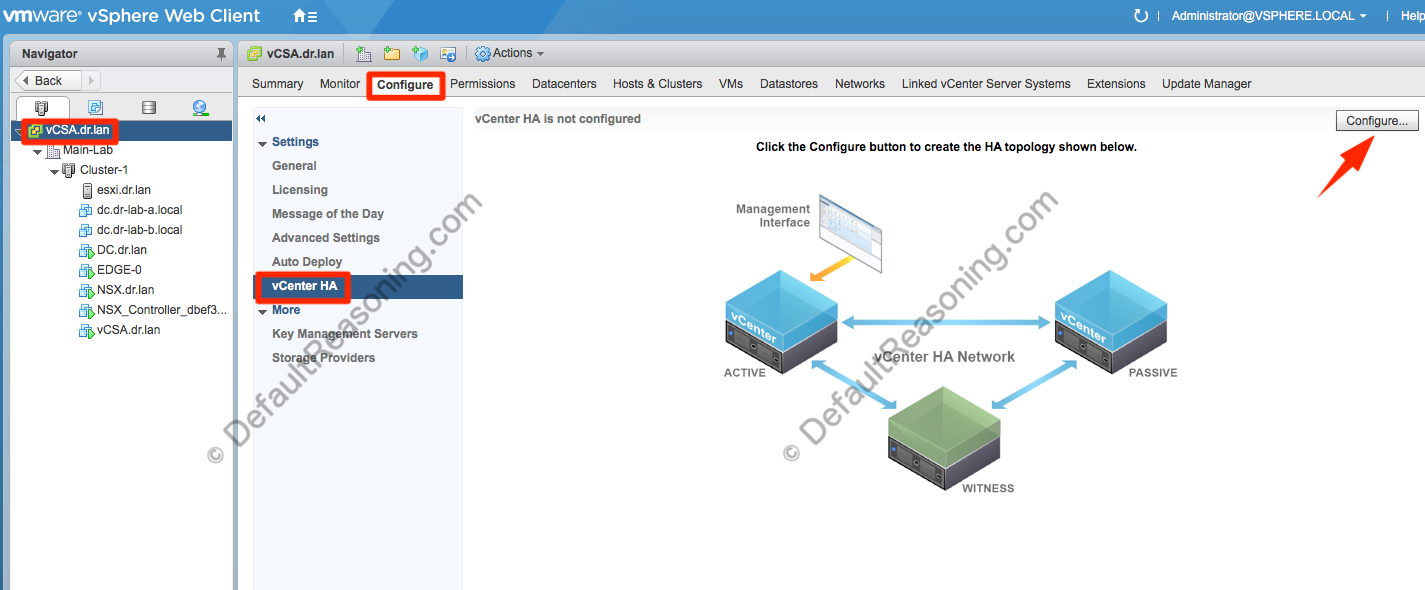
- Login to the vCenter Server Appliance with the administrator account.
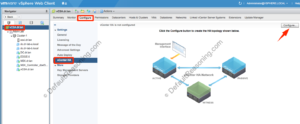
- From Home, go to Hosts and Clusters. Make sure the vCenter Server object is selected on the left pane. Click the Configure tab and under Settings, select vCenter HA. Click the Configure.
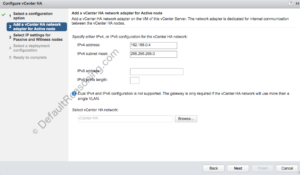
- For sake of simplicity, select Basic as the configuration option and click Next.
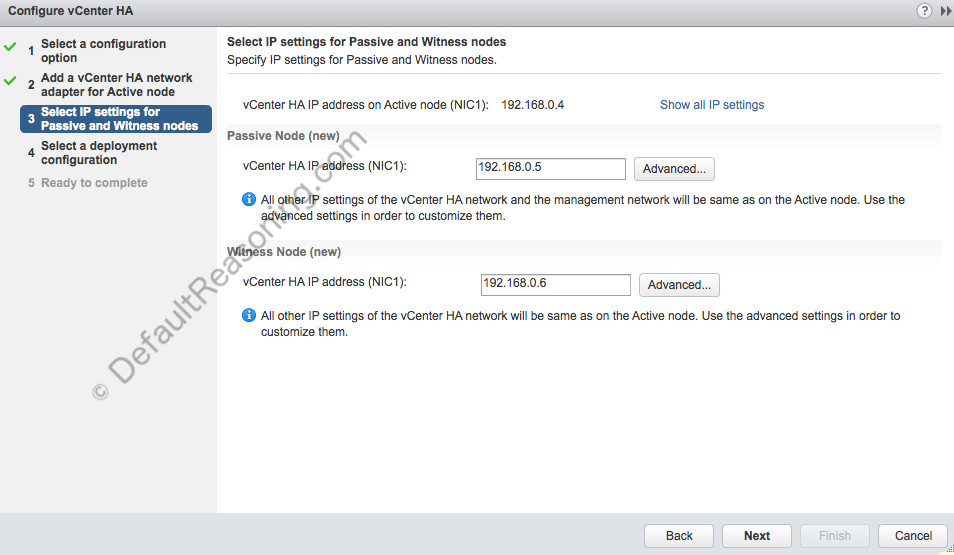
- Provide the IP address, subnet mask and select the vCenter HA network.
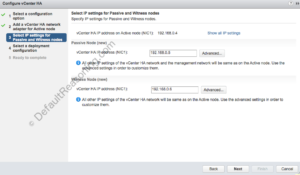
- Next, enter the IP address for the Passive and the Witness node. Note that you can change some additional settings like DNS etc. after the failover when you click the Advanced button.
- Select the location, network and storage for each node. Click Next.
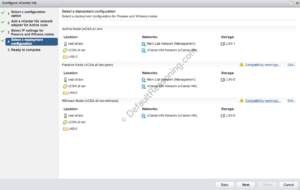
- Review the configuration and click Finish to start the deployment process.


Cloning the passive and witness nodes, configuring the vCenter HA cluster will take some time.
The next step is configuring the anti-affinity rules. Make sure that all nodes are separated and running on a separate ESXi host. Enforce this setting with the DRS VM/Host rule.
Test vCenter High Availability
If you want to simulate a host failure, you can use this blog post that I wrote some time ago. It is used to test the dump collector but the test procedure remains the same.
Cheers!
– Marek.Z
Be the first to comment