In the last weeks, I’ve been doing a lot of migrations to vSphere 6.0 for our customers and most of them were migration to the vCenter Server Appliance version 6.0 using the migration tool. This post is the first one in the migration series I am starting and I am kicking off with how to migrate vCenter 5.5 with external SSO to VCSA 6.0 with external PSC.
Note – If you are still running on vSphere 5.0 or 5.1 upgrade ASAP to vSphere 5.5 as the support for those older versions ended.
Prerequisites
- Install the Client Integration Plug-in on the Windows machine that will be used for the migration process. The installer is located in the vcsa directory on the ISO file.
- If you are using any other solutions that is registered with the vCenter Server, verify if they are compatible with vSphere 6.0 before the upgrade by checking the VMware Interoperability Matrix.
- Check the vCenter Server 6.0 Appliance migration tool FAQ.
- Estimate vCenter Server 5.5 to VCSA 6.0 migration time using KB 2146420.
Scenario
This is how my vSphere infrastructure looks now and how it will look after the migration to VCSA 6.0 with external PSC.

Note that the Syslog, ESXi Dump Collector roles will be consolidated into the vCenter Server Appliance and VUM is already a stand-alone VM.
Migrate SSO to PSC
This procedure describes the first step in the migration process and in this case the SSO role will be migrated to PSC.
- Mount the ISO file on the SSO host and go to the Migration-Assistant folder. Execute the VMware-Migration-Assistant.
- Enter the credentials for Administrator@vsphere.local user account.
- Wait for the Migration Assistant until it finishes with the pre-check scripts. Read the output of the checks carefully as it contains important information about the migration process and the migration steps. Also, if there are any warnings displayed in the output, resolve them first before you proceed with the migration.
- Next, on a different Windows machine, open the vcsa-setup.html from the ISO file and click Migrate.
- Click OK on the migration information.
- Accept the EULA and click Next.
- Specify the ESXi host or vCenter Server on which to migrate the existing vCenter SSO role. In my case, I specified the ESXi host.

- Accept the certificate.
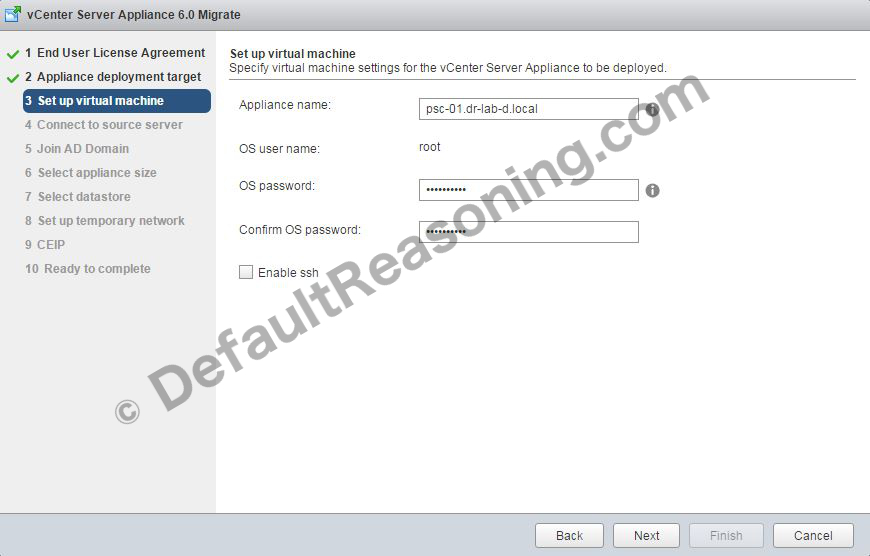
- Next, provide the name and password for the new vCenter PSC host.
- Enter the source machine FQDN or IP address. In this case, this is the stand-alone SSO host. Enter the credentials for the administrator account and click Next. Optionally, you can also migrate the performance and other historical data at this step.
- Accept the certificate.
- Enter the Windows domain admin credentials to add the new vCenter Server Appliance to the Windows domain and click Next.
- Click Next on the appliance size. Note that it recognised the vCenter SSO role and it will be migrated to a PSC.

- Select the datastore where the new vCenter PSC should be stored and enable thin disk mode if applicable.
- Next, set up the temporary network by providing the requested information. Click Next.

- Check if you want to join the VMware Customer Improvement Program or not and click Next.
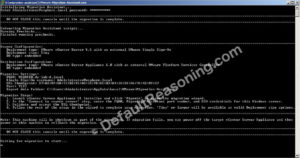
- Review the summary page and click Finish to start the migration process.
- This migration process can take some time. Once ready, log in to the new PSC by navigating to https://<FQDN_PSC>/psc and check the configuration settings. The settings should be exact the same as on the old SSO host.


Note – during the migration, the SSO virtual machine will be powered off.
Migrate vCenter to Appliance
This procedure describes the second step in the migration process. Basically, you will repeat the process described above but this time for the Windows vCenter Server host.
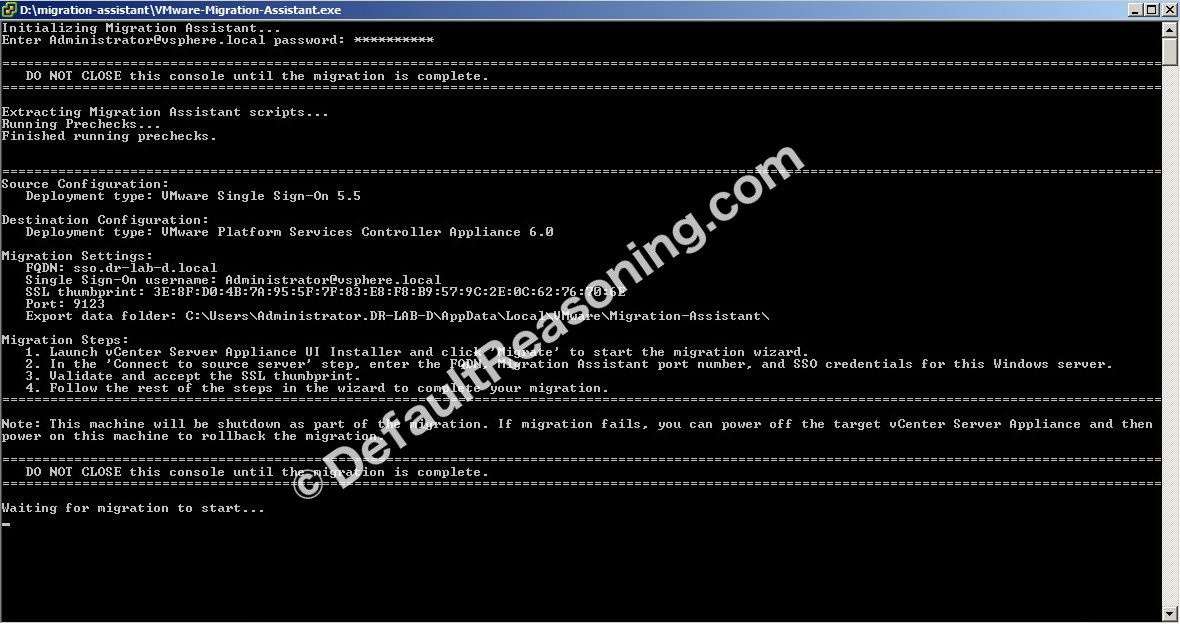
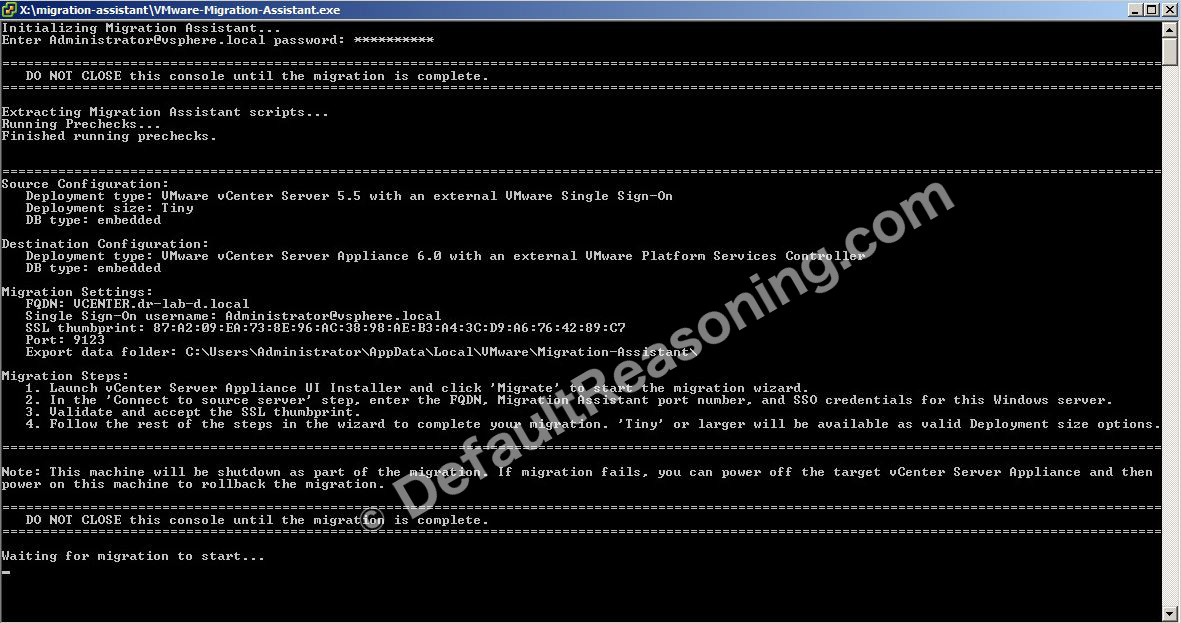
- Just like on the SSO host, mount the ISO file on the Windows vCenter Server host and run the VMware-Migration-Assistant.exe
- Enter the credentials and wait for the pre-check scripts. Once finished, verify the source and destination configuration. Again, solve any errors and warnings before you start the migration process.
- Next, on a different Windows machine, open the vcsa-setup.html from the ISO file and click Migrate.
- Click OK on the migration information.
- Accept the EULA and click Next.
- Again, specify the ESXi host or vCenter Server on which to migrate the existing vCenter Server. This can be the vCenter that you currently migrating. Just make sure you migrate to a DRS cluster and that the DRS automation level is set up to Manual.
- Accept the certificate.
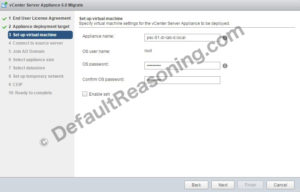
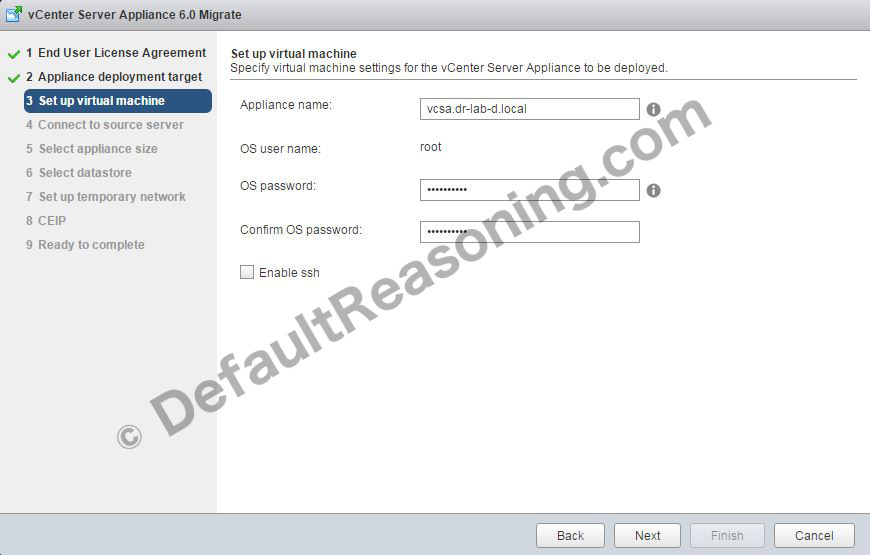
- Next, provide a host name for the new vCenter Server Appliance. Also, enter the password for the administrator account. Click Next.

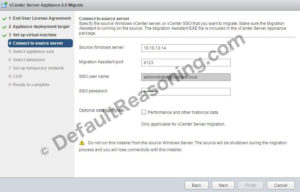
- Enter the source machine FQDN or IP address. In this case, this is the Windows vCenter Server 5.5 host. Enter the credentials for the administrator account and click Next.
- Accept the certificate.
- Enter the Windows domain admin credentials to add the new vCenter Server Appliance to the Windows domain and click Next.
- Select the desired appliance size.

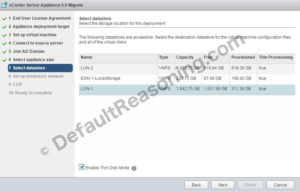
- Select the datastore where the new vCenter Server Appliance should be stored and enable thin disk mode if applicable. Click Next.
- Next, set up the temporary network by providing the requested information. Click Next.
- Review the summary page and click Finish to start the migration process.
- The migration process can take some time. It depends on the database size and if the other historical data that needs to be migrated was selected. Once ready, log in to the new vCenter Server Appliance by navigating to https://<FQDN_VCSA>/vsphere-client and log in with your administrator account.
- To complete the migration process, read the post migration steps as described in the message. Assign the license, update the DHCP/TFTP settings for Auto Deploy etc.
- Go to System Configuration, select Services and check if all services are running.

Note – The vCenter 5.5 will be powered off during the migration.
And that’s it! A nice and easy migration process!
Cheers!
– Marek.Z
Be the first to comment