In this article in the Workload Migration to VMware Cloud Foundation using VMware HCX series, we will create a site pair, network profiles, compute profile on the Source and Destination site and finally we will create a Service Mesh. This will enable us to migrate the virtual machines using different migration methods.
Create Site Pair
A Site Pair establishes the connection needed for management, authentication, and orchestration of HCX services across a source and destination environment. Site pair is initiated from the Enterprise (Source) HCX Manager.
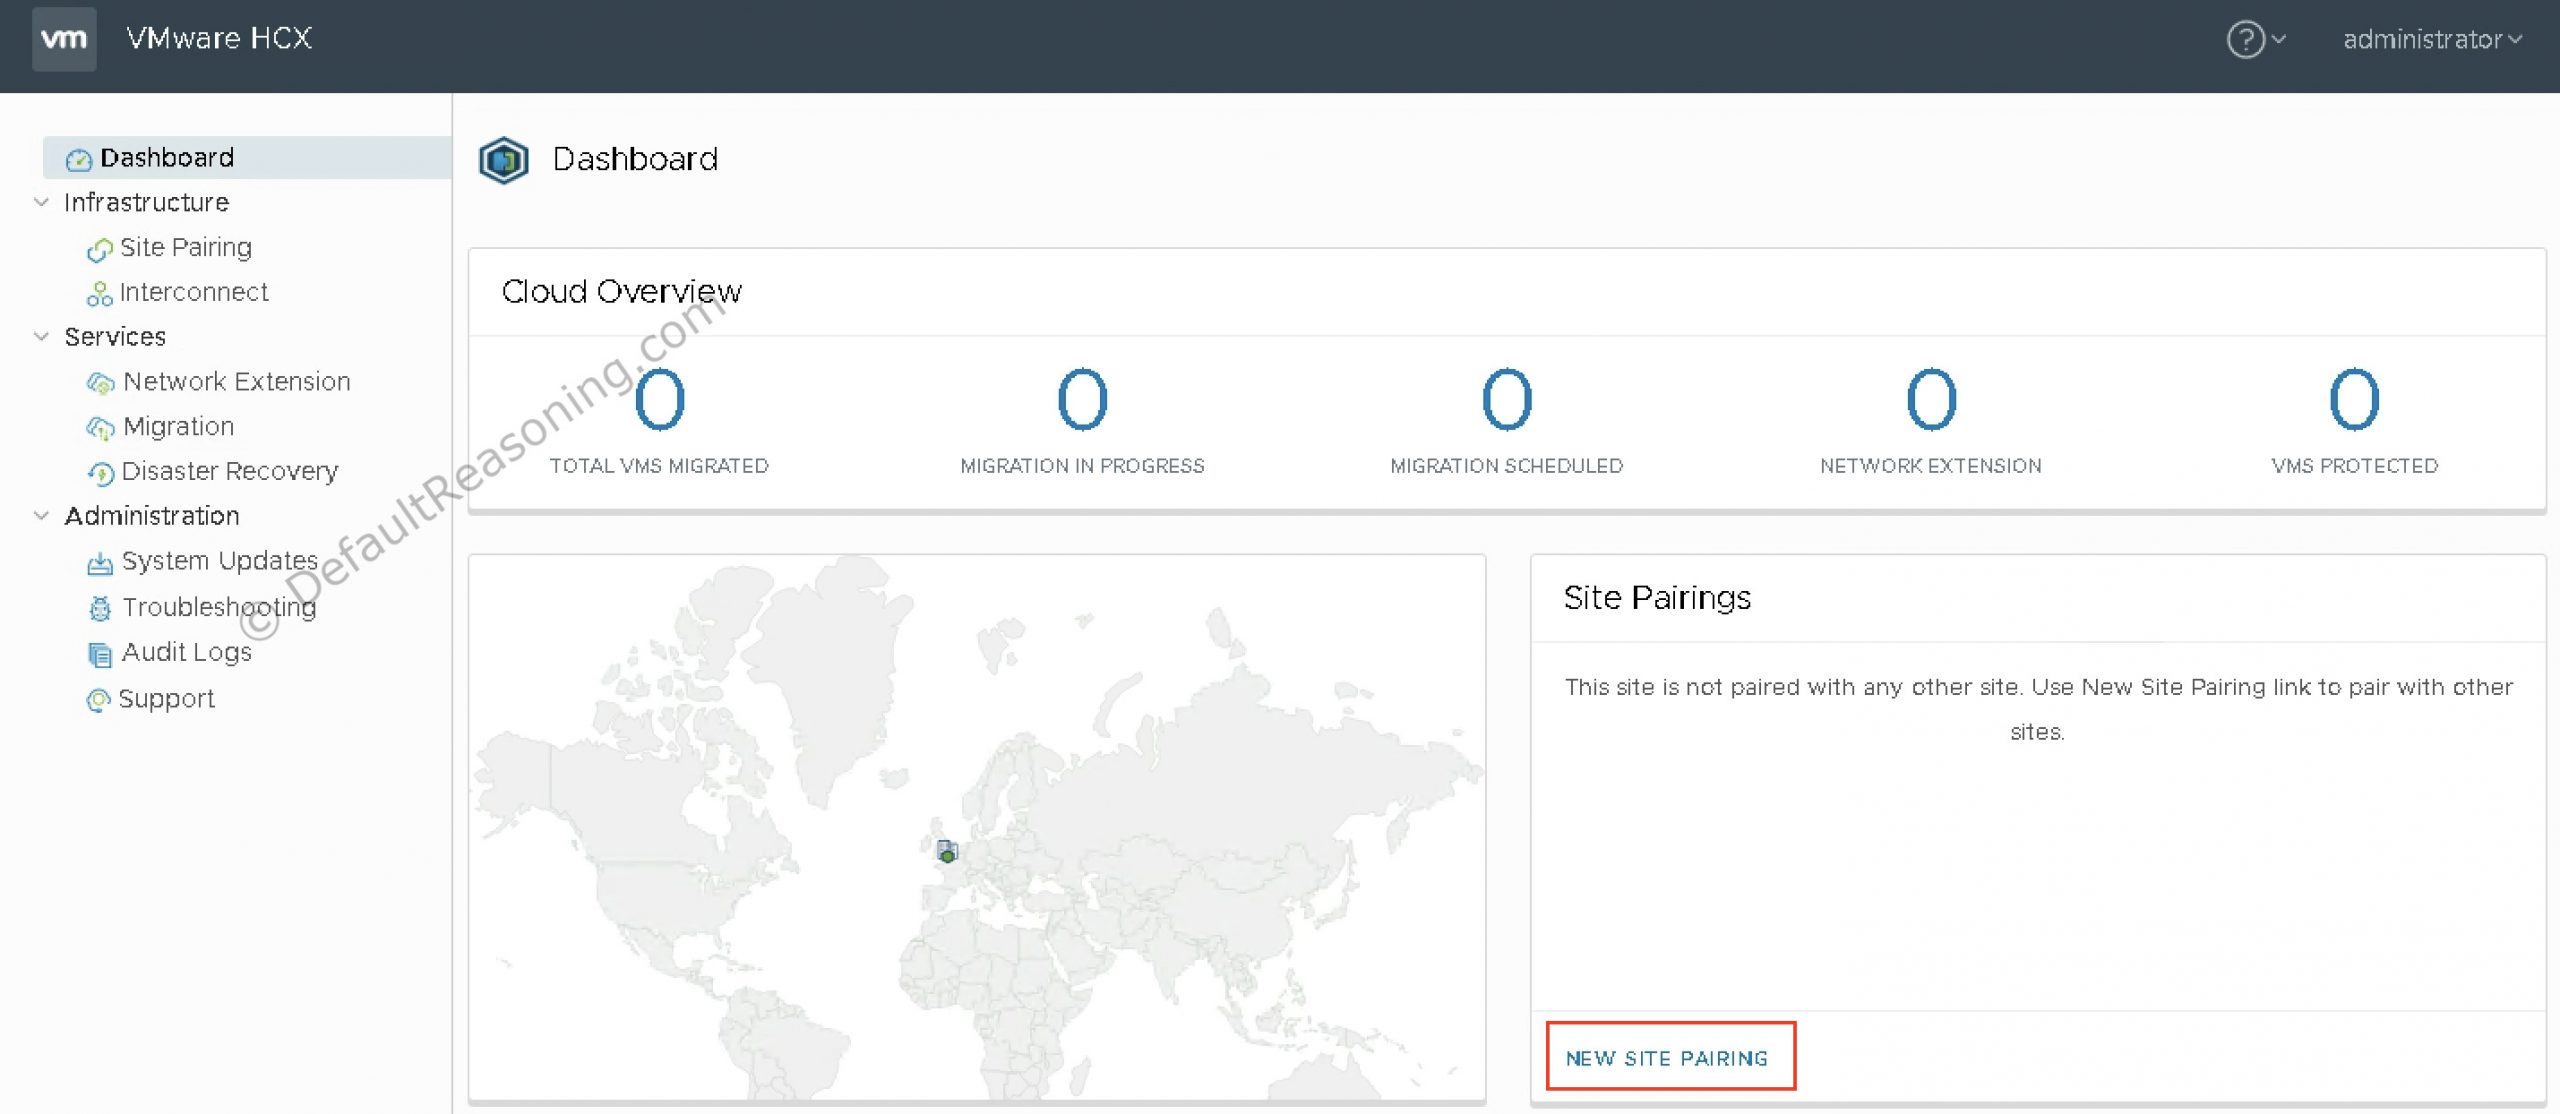
- Open the hybridity UI of the Enterprise HCX Manager and log in as administrator@vsphere.local.
- On the Dashboard, click New Site Pairing.
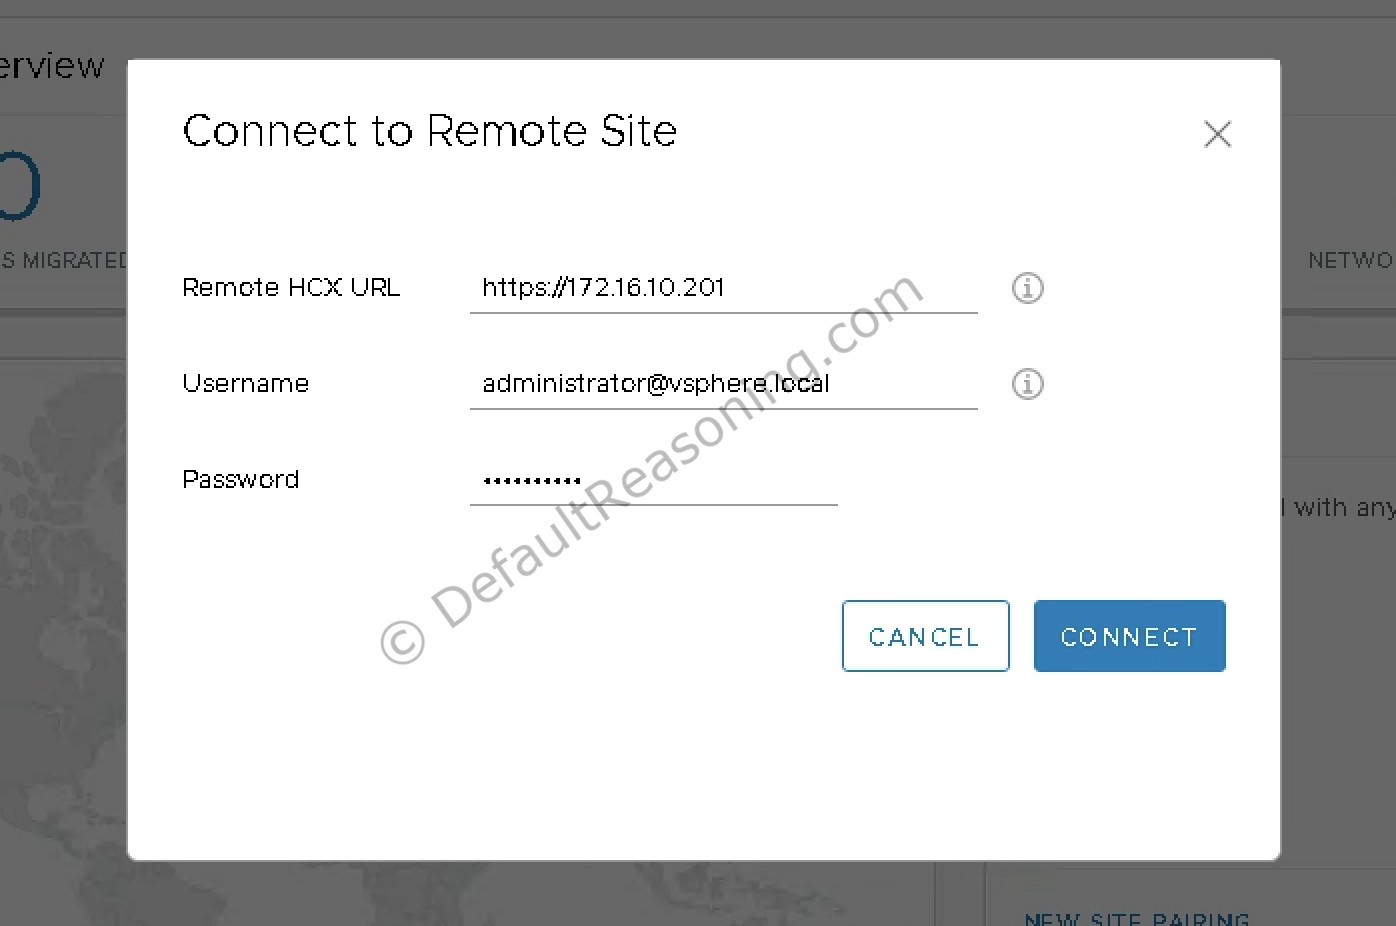
- Enter the Cloud HCX Manager FQDN or IP address and enter the username and password for the administrator@vsphere.local account on the VCF platform. Click Connect.

- Accept the certificate.
- Click Connect.
- Both sites should now be paired.
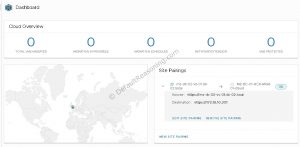
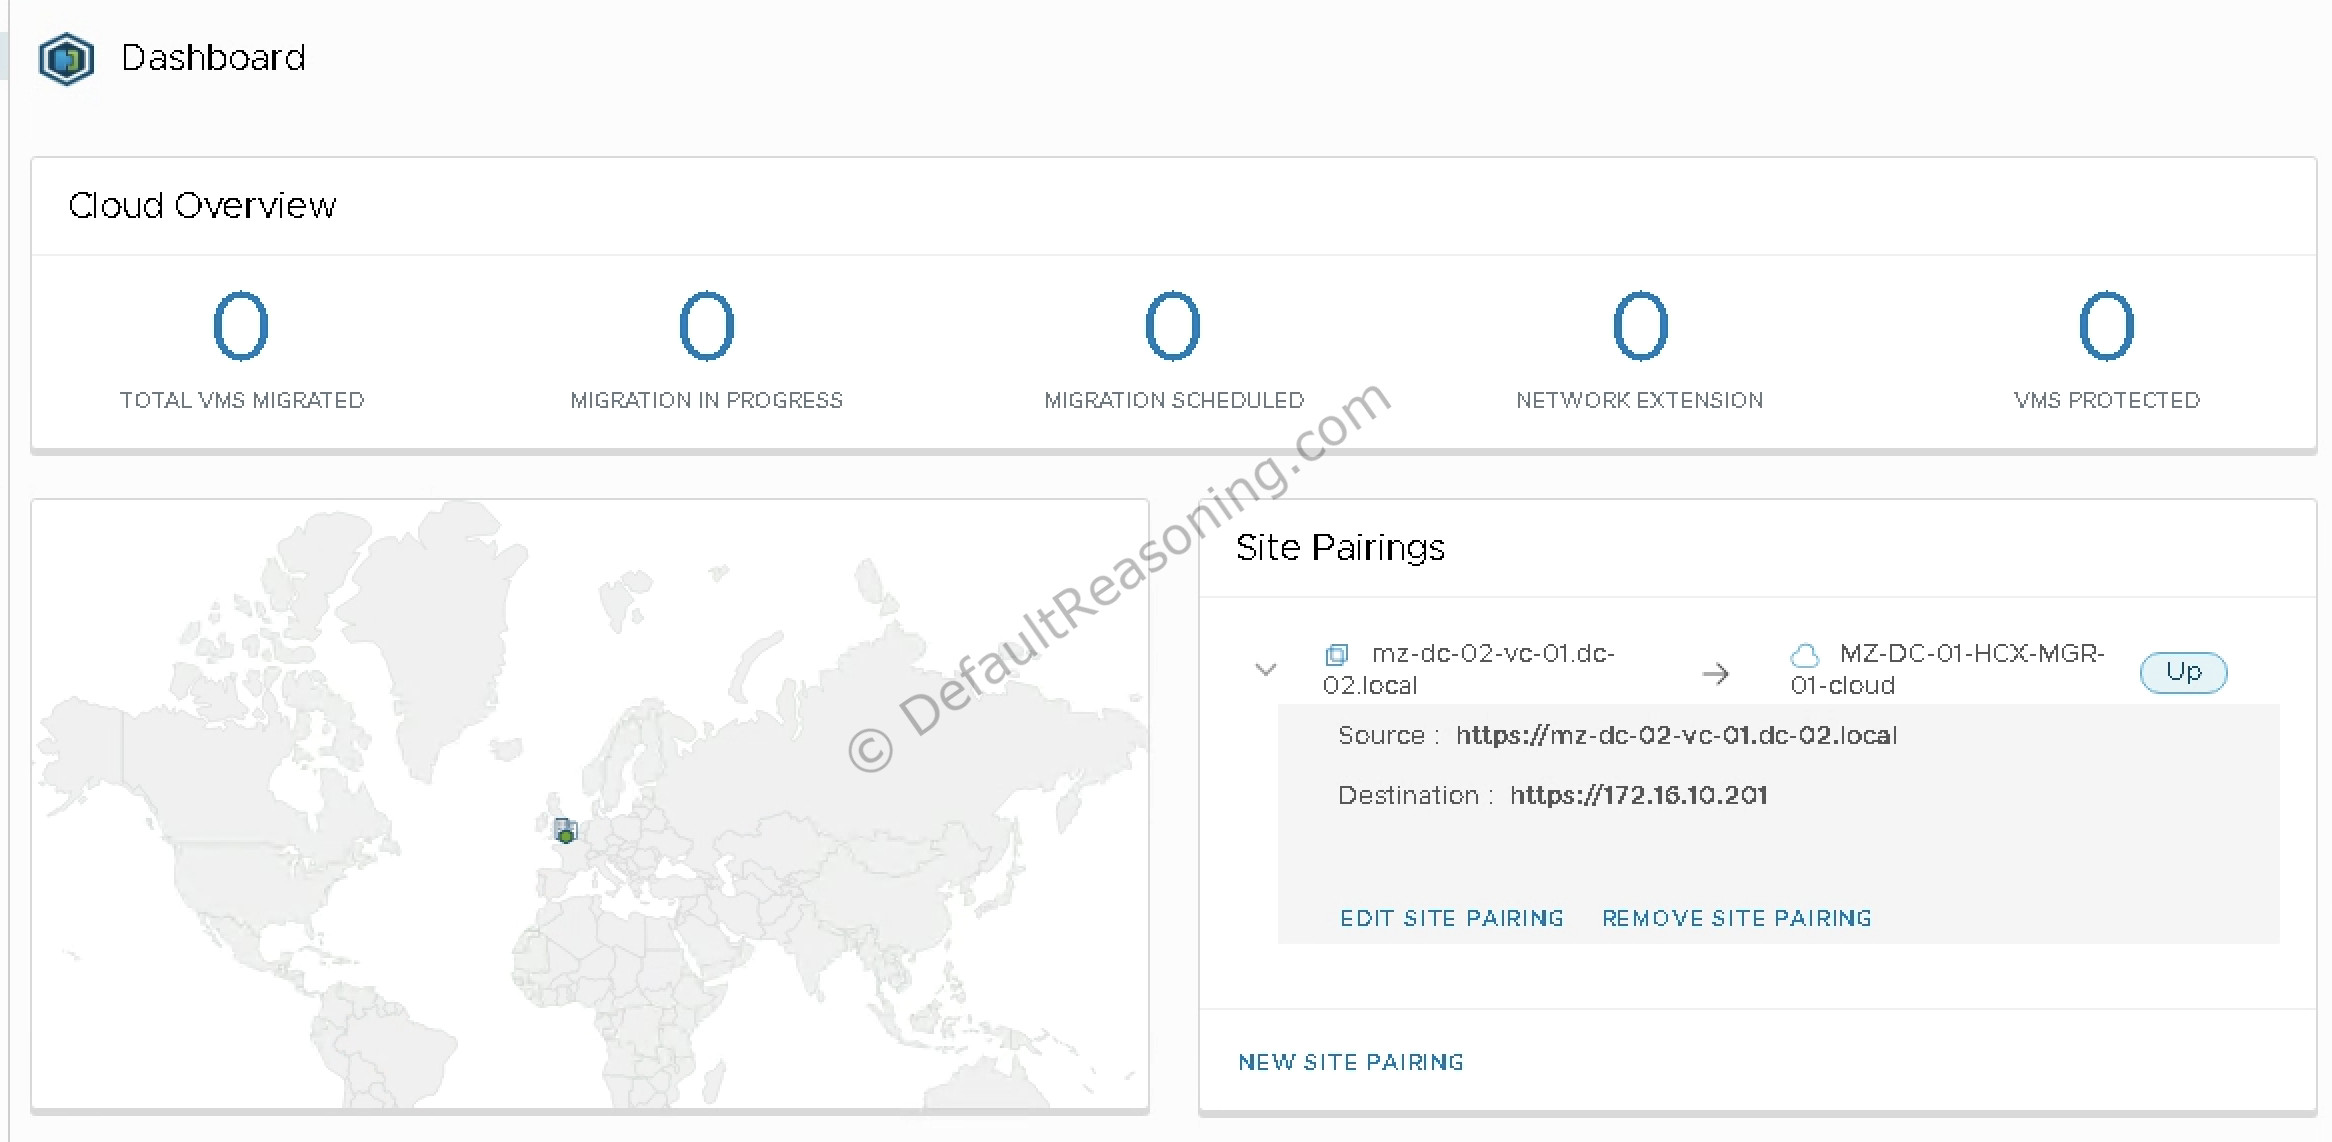
This concludes the site pairing.
Create Network Profiles
A Network Profile is a sub-component of a complete Compute Profile. You have to create a Network Profile for each network you intend to use with the HCX services. The HCX Manager selects these network profiles when creating a Compute Profile and assignes one or more of four Network Profile functions:
- Management Network
- Uplink Network
- vMotion Network
- vSphere Replication Network
- With your browser still open on the Enterprise HCX Manager, go to Infrastructure -> Interconnect -> Multi-Site Service Mesh and select the Network Profiles.
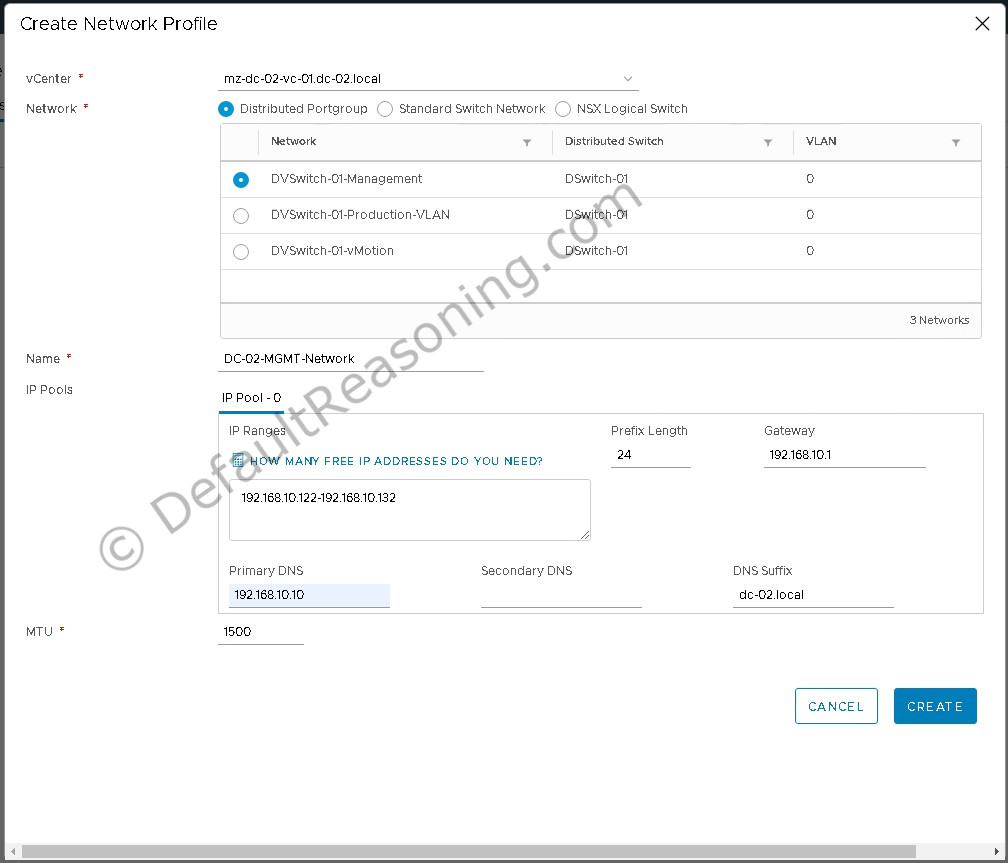
- Click Create Network Profile.
- First, let’s create a network profile for the Management portgroup.
- With you vCenter Server selected, select Distributed Portgroup, and select the portgroup that maps to your Management Network on the Distributed Virtual Switch. Provide a descriptive name, enter an IP range with free IP addresses in your Management Network along with the prefix length, gateway, primary and secondary DNS servers, and a DNS suffix. Make sure that MTU matches the setting on your physical network.

- Click Create.
- Next, we will create a Network Profile for the vMotion Network. The procedure is basically the same. Enter the values as required.
Note: if your Management or vMotion Network is configured on a Standard Switch, you will have to create an additional portgroup on every ESXi host to be able to use it in the Network Profile configuration. Using vmkernel ports is not supported by the HCX Manager.
- And finally, create the Uplink network profile. This network will be used by HCX interconnect appliances for WAN communications between the sites.
- Optionally, you can also create a vSphere Replication Network that will be used by the migrations performed using the Replication Assisted vMotion Migration.
This concludes the setup of the Network Profiles.
Create Compute Profile
A Computer Profile contains compute, storage, and network settings that HCX Manager use to deploy the interconnect appliances when a Service Mesh is added. A single Compute Profile can be used with multiple Service Mesh configurations.
- With your browser still open on the Enterprise HCX Manager, go to Compute Profiles under Multi-Site Service Mesh tab and click Create Computer Profile.
- Enter a descriptive name for this Compute Profile and read the information on the page. Click Continue.
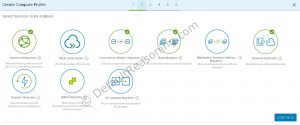
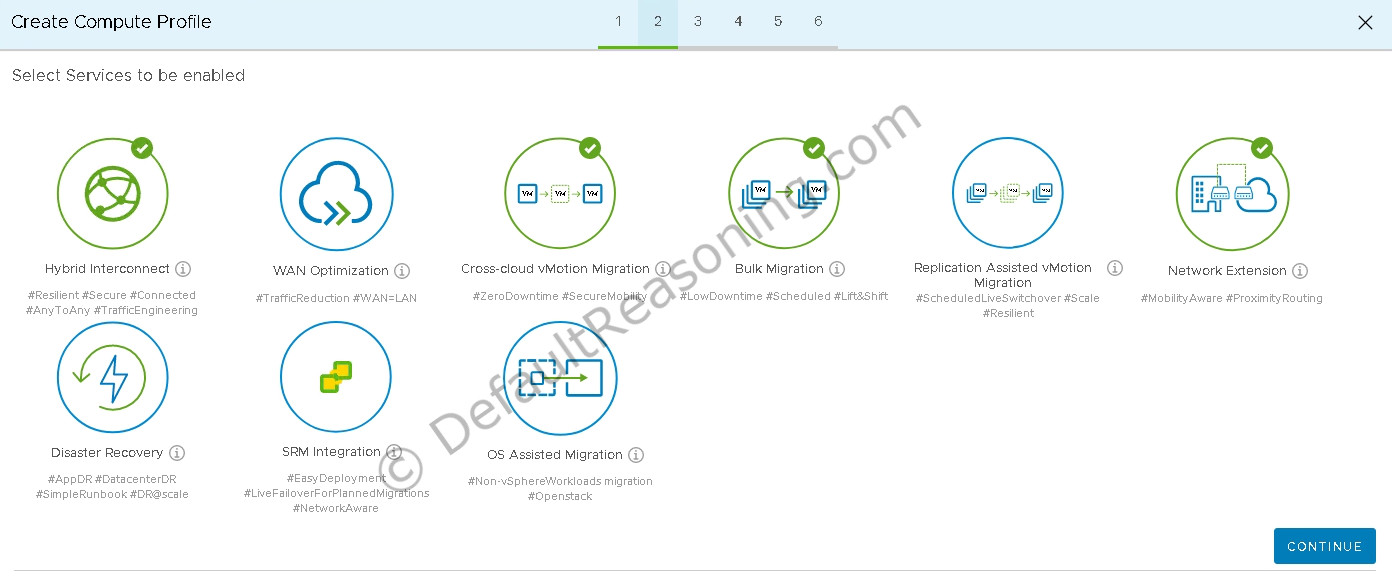
- On the Select Services to be enabled, select the HCX features you would like to use in this particular Computer Profile. Note that options available here are based on the license you used during the HCX setup. Click Continue.
- Next, select the Datacenter and Cluster resources from your vCenter Server inventory and click Continue. Select a Datastore from the drop-down list and click Continue.
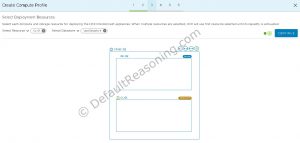
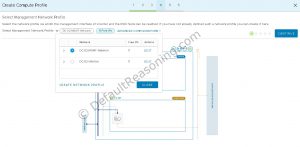
- Select the Management Network Profile created earlier from the drop-down list and click Close. Notice that the diagram below will start to change reflecting your setup.
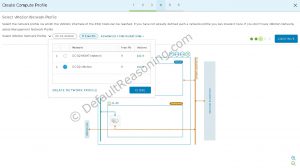
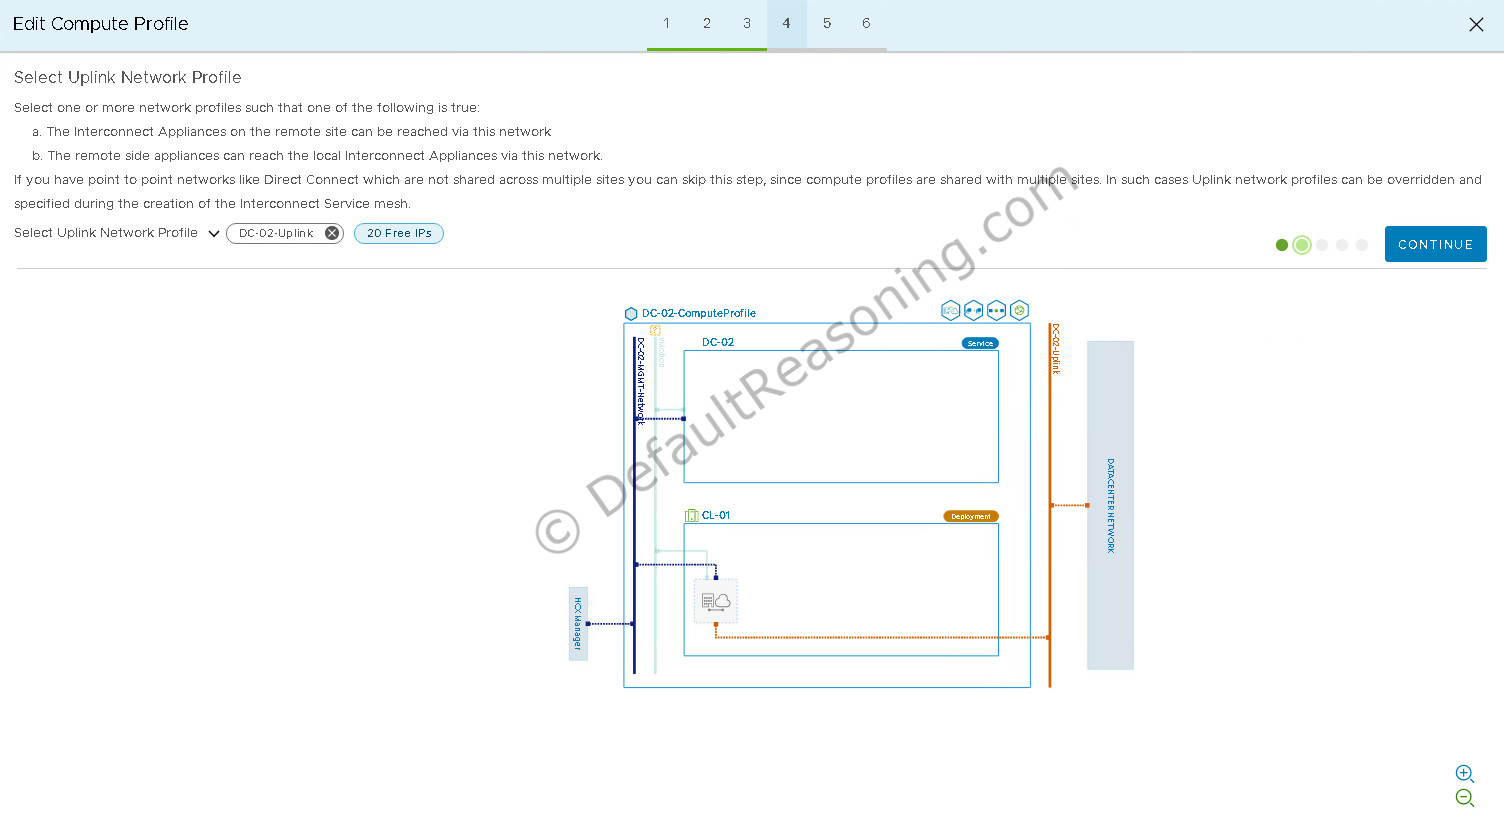
- Click Continue and select the Uplink Network Profile. Click Continue.
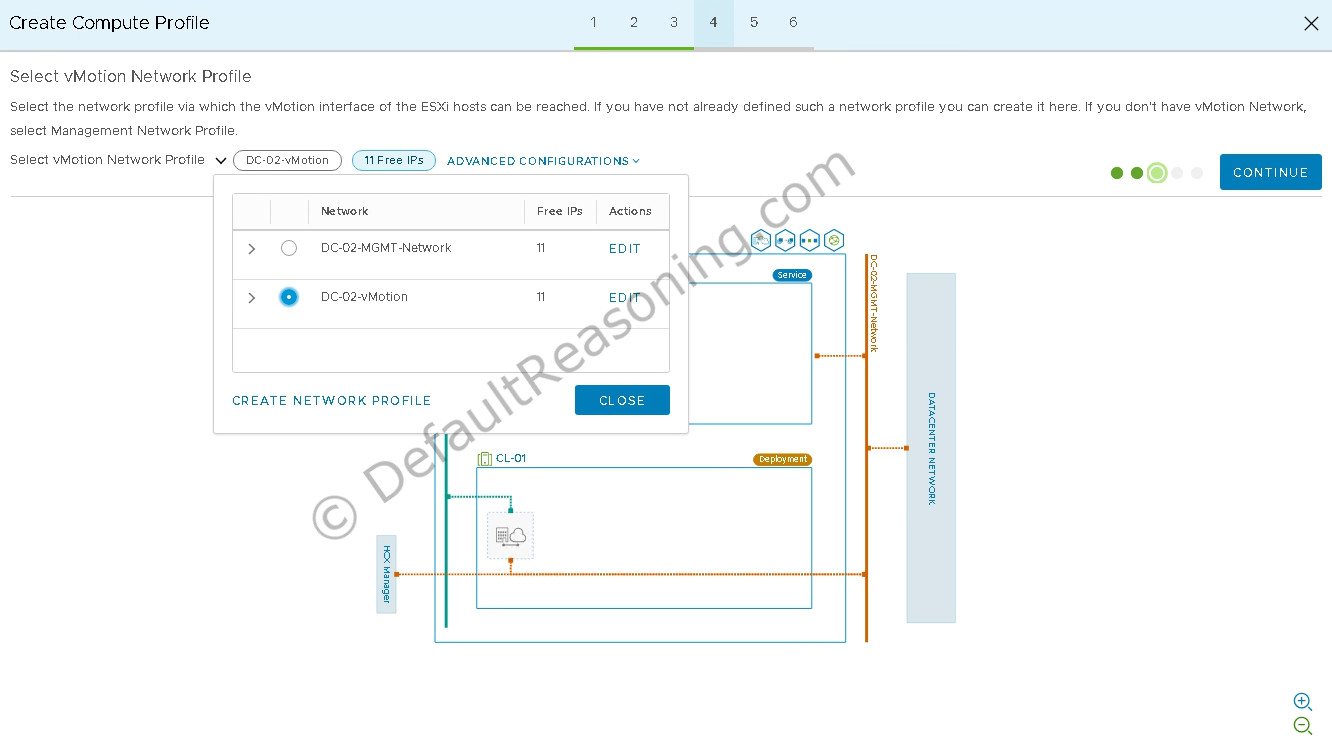
- Do the same for the vMotion Network Profile.
- Click Continue on the vSphere Replication Network Profile as it will not be used in this case.
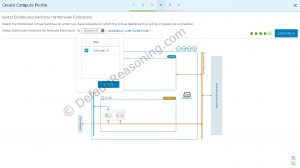
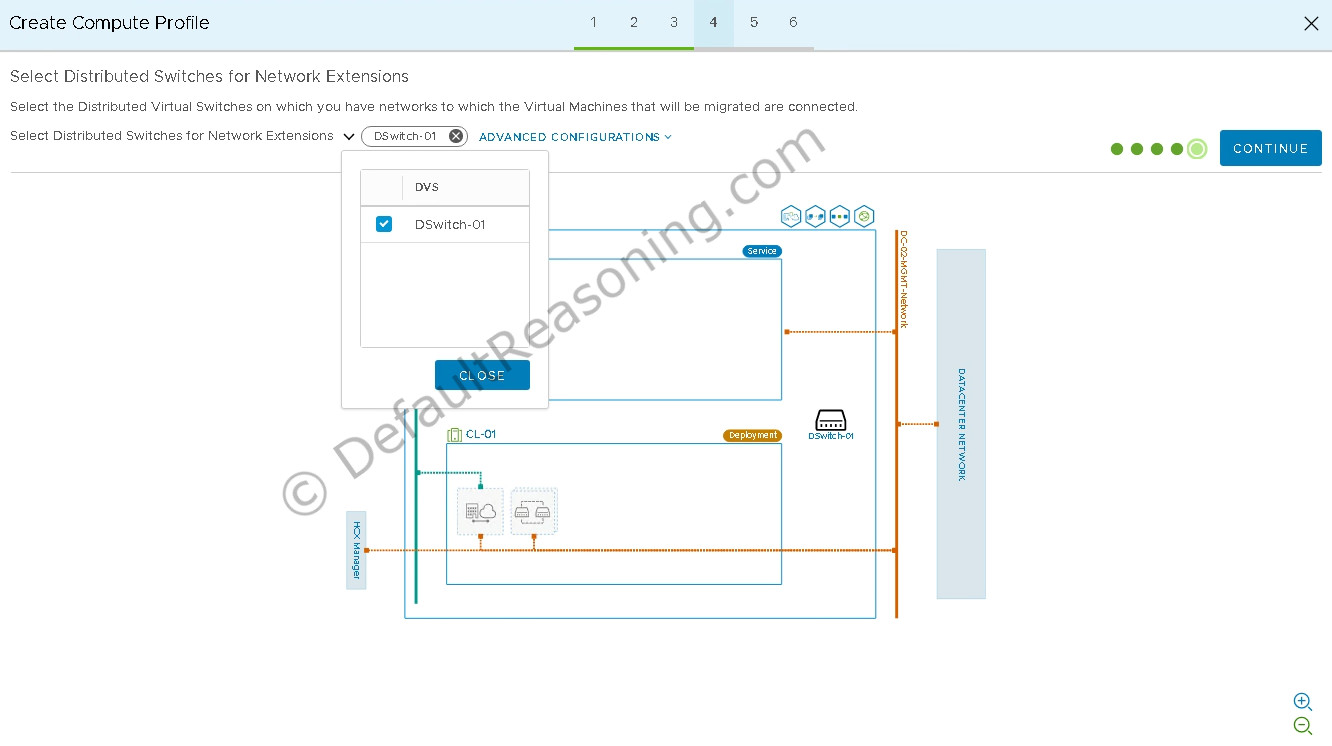
- And finally select the Distributed Virtual Switch for Network Extension. Click Continue.
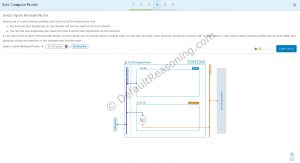
- Wait until the connection rules are generated. You can use this info as reference for opening ports on the firewall. Click Continue.
- Review the configuration and click Finish to create the Compute Profile for the Enterprise site.
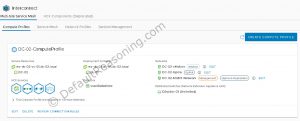
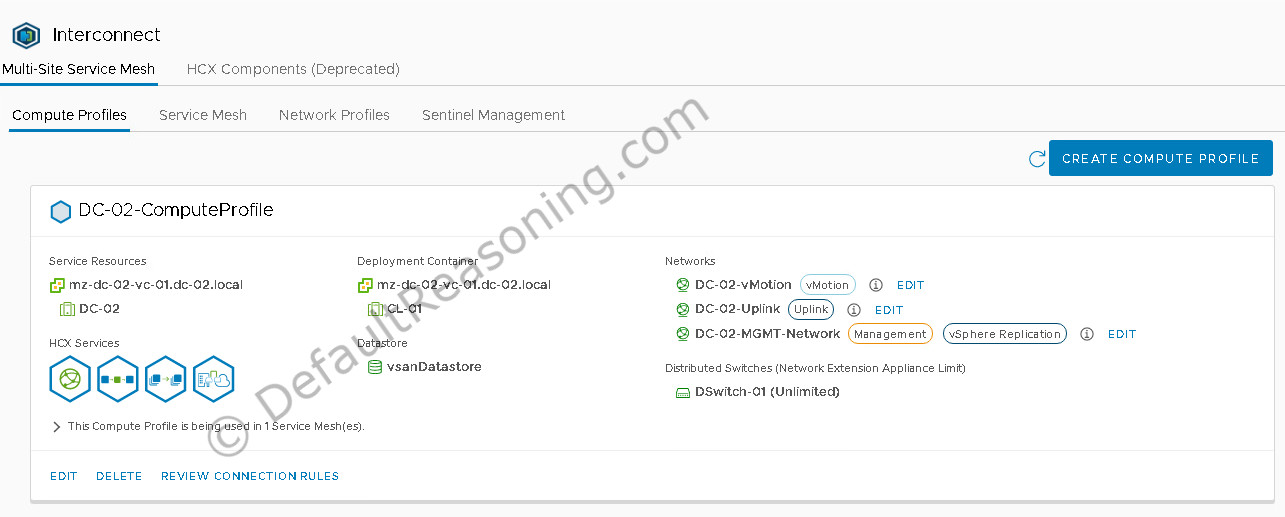
- An overview with all selected configuration settings will now be displayed under the Computer Profiles.


Before proceeding with the Service Mesh configuration, make sure that you have also created Network Profiles and a Computer Profile on the Cloud HCX Manager. The procedure is exactly the same.
Create Service Mesh
An HCX Service Mesh is the effective HCX Service configuration for a source and destination sites. A Service Mesh can be added to a connected Site Pair that has a valid Compute Profile created on both of the sites. Adding a Service Mesh initiates the deployment of HCX Interconnect appliances on both sites.
- Switch back to your Enterprise HCX Manager as the Service Mesh configuration should be initialized from the source site.
- Go to Infrastructure -> Interconnect -> Multi-Site Service Mesh and select the Service Mesh Click Create Service Mesh.
- Make sure the connect sites are selected properly. Click Continue.
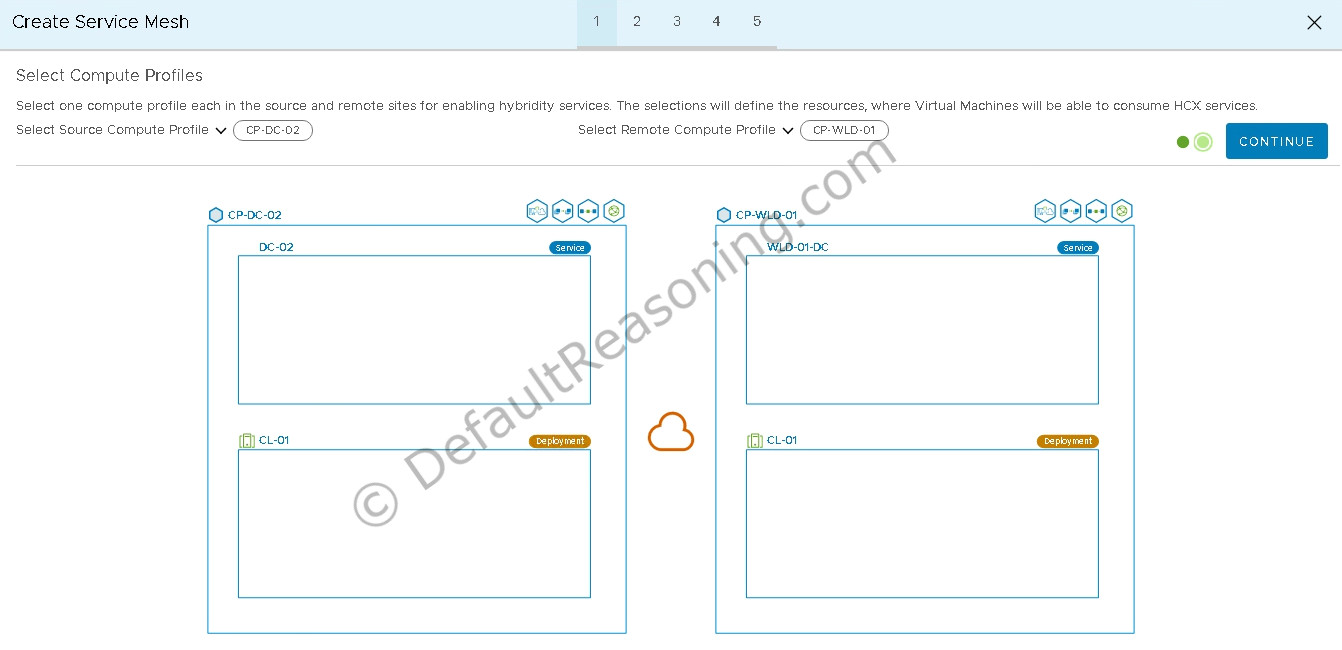
- Select the Source and Remote Compute Profile and click Continue.
- Click Continue on the “Services to be enabled page”. Note that only services selected in the Compute Profiles can be used in the Service Mesh.
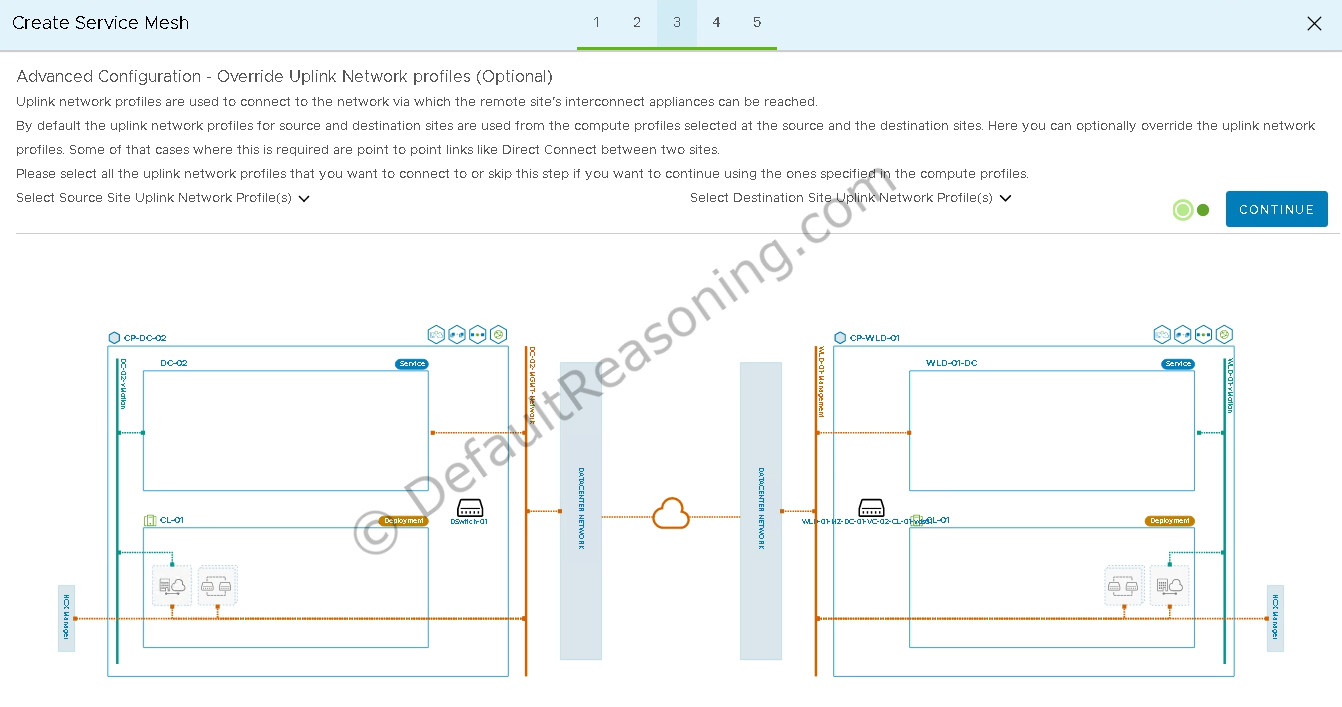
- Click Continue again on the “Advanced Configuration – Override Uplink Network Profiles” page as this is optional and not needed in this case.

- Click Continue on the “Advanced Configuration – Network Extension Appliance Scale Out” page as we only need one Network Extension appliance in this case.
- Optionally, you can configure HCX Traffic engineering features like Application Path Resiliency and TCP Flow Conditioning. Refer to the HCX documentation for more info about these features.
- Review the topology of the Service Mesh and click Continue.
- Enter a name for this Service Mesh and click Finish to start the configuration.
- You can monitor the progress under the Tasks tab.
Once the Service Mesh is configured, all HCX appliances are deployed, and network connections are established, HCX is ready to move the virtual machines from source to destination site!
This concludes the second part of this HCX series. Continue to part 3 where we will migrate virtual machines from the source to destination site using different migration methods.
Cheers!
Be the first to comment