In the previous part of the automated deployment of vRealize Suite in VCF 4.1, we deployed the vRealize Suite Lifecycle Manager. We have also deployed the Workspace ONE Access using the vRealize Suite Lifecycle Manager. In this part we will continue deploying other vRealize Suite products. This part will cover deployment and configuration of vRealize Operations Manager.
Before you begin, make sure that you have the vRealize Operations Manager bundle downloaded on the SDDC Manager and the vRSLCM has synchronized its inventory.
Prerequisites
Before you begin with the deployment, verify that your environment meets the following prerequisites and requirements.
Deploy vRealize Operations
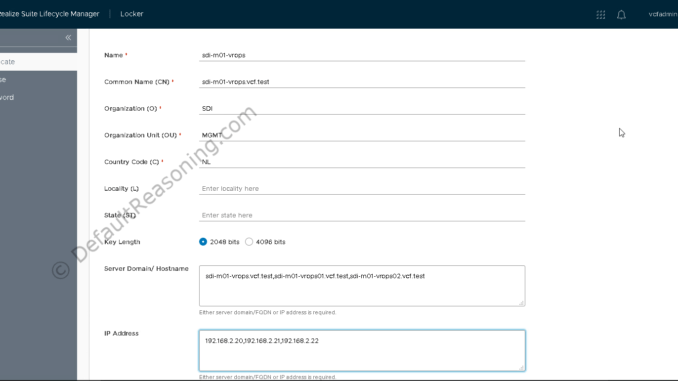
Create certificate
Note: in this exercise I am using a self-generated SSL certificate. In a production environment it is strongly recommended to use a CA signed certificate.
- Navigate to your vRealize Suite Lifecycle Manager and log in as vcfadmin@local user.
- Open the Locker.
- Make sure the Certificate pane is selected and click the Generate button to generate a certificate.
- Fill in the mandatory fields as required and click Generate. Note that according to the requirements, you need to create a Mulit-SAN certificate for the vROps cluster.
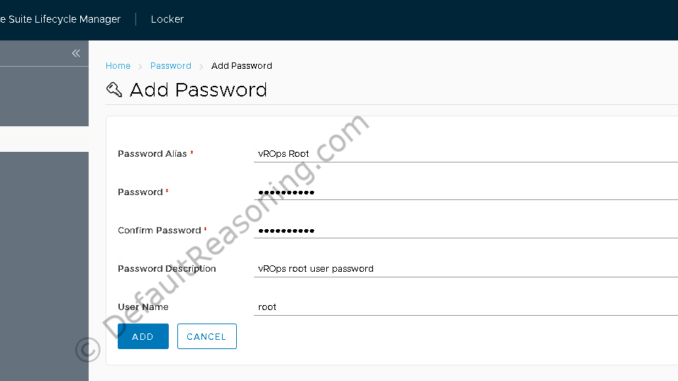
Add vRealize Operations Manager root password
- Next, select Password on the left pane and click the Add
- Enter the password alias, the password itself, description, and the username. In this case “root”. Click Add.

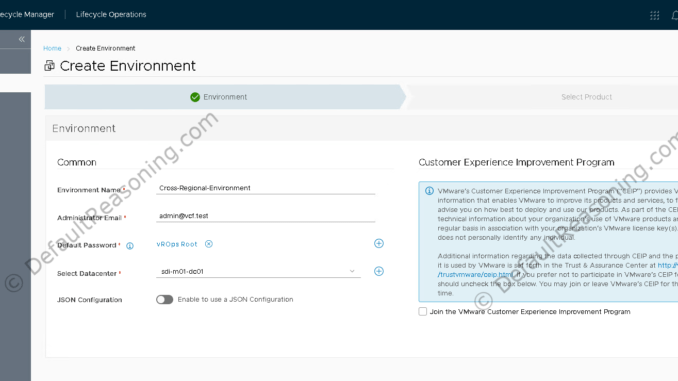
Create environment for vRealize Operations Manager
- Click on the vRealize Suite Lifecycle Manager icon on the top left and go to Lifecycle Operations under My Services.
- Click Create Environment.
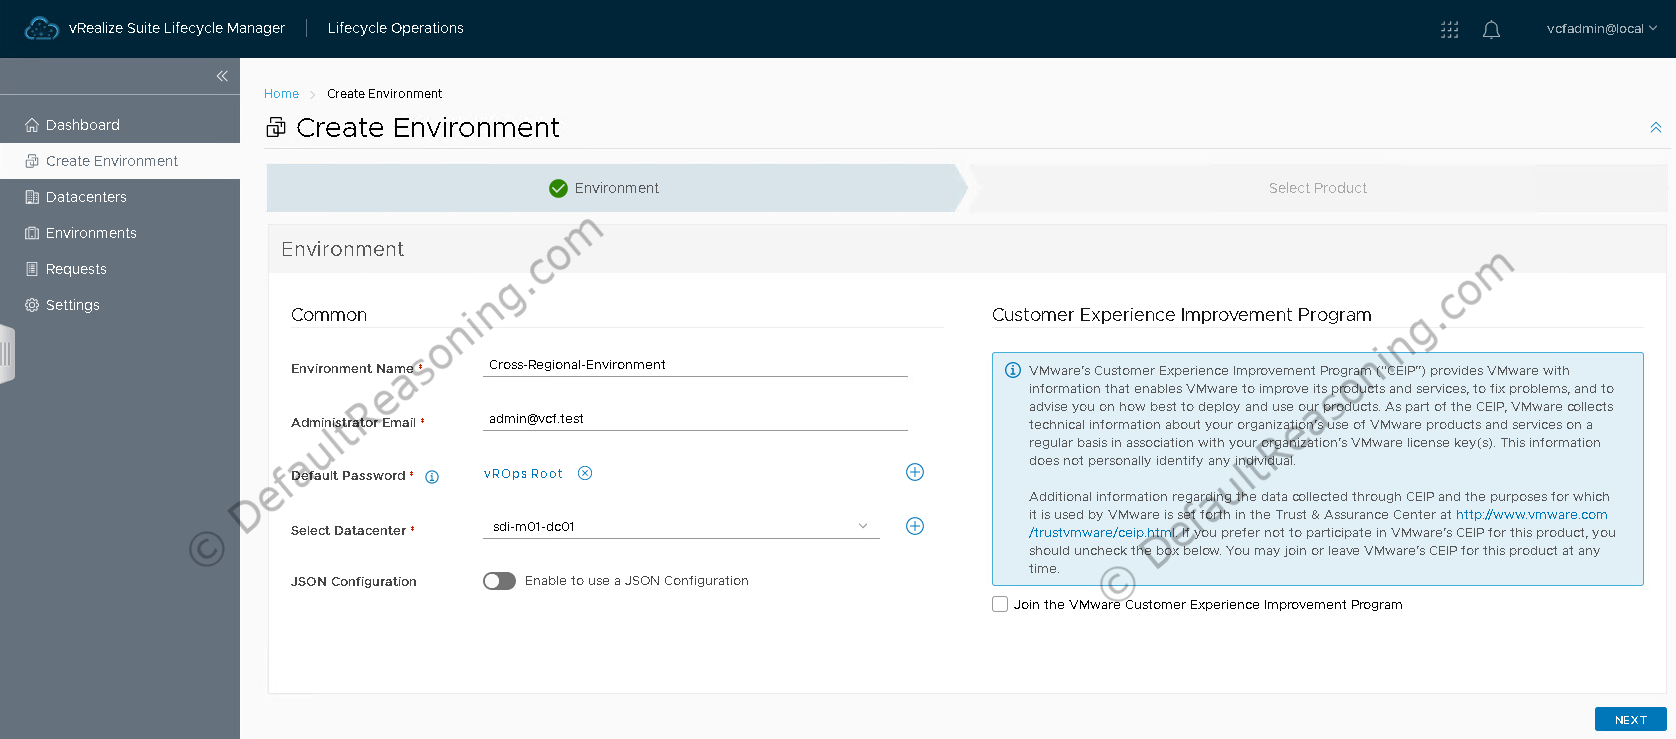
- Enter the environment name (in case of VCF this will be the cross-regional environment), admin email, select the default password created earlier, and select datacenter from the drop-down list. Click Next.
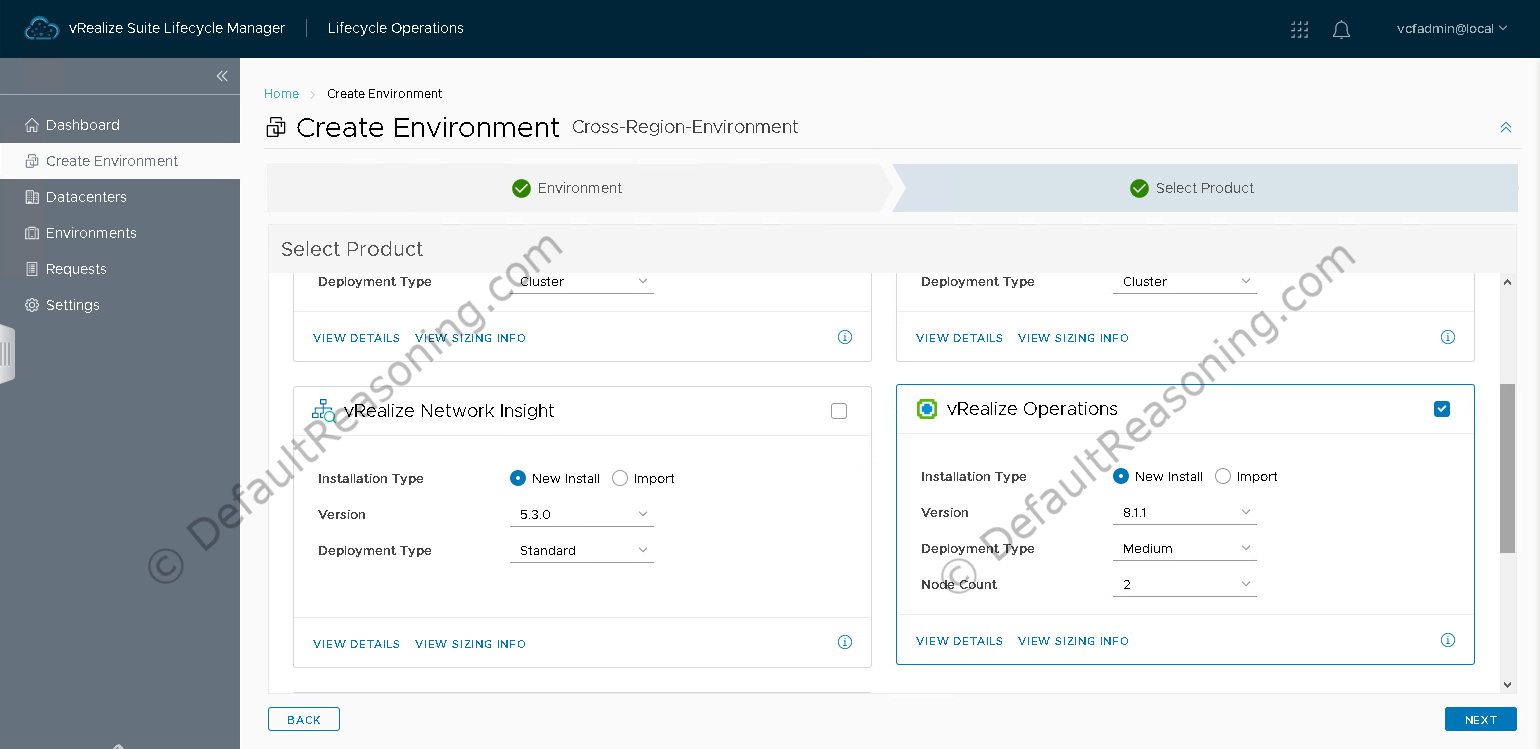
- Select vRealize Operations from the product list and select New Install. Review the sizing info and size you vROps cluster according to VMware guidelines. In this case, I am going with a medium 2-node cluster as my resources are limited.
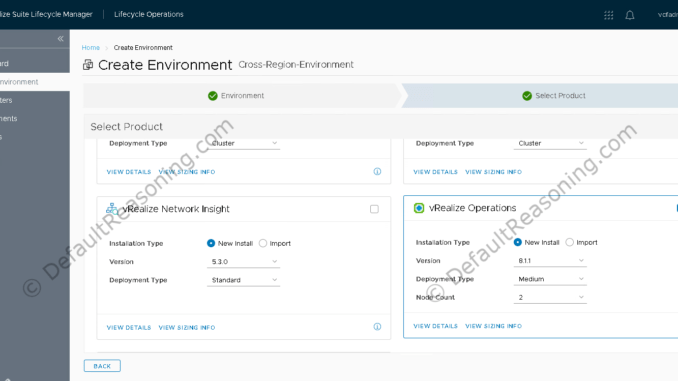
- Next, accept the EULA.
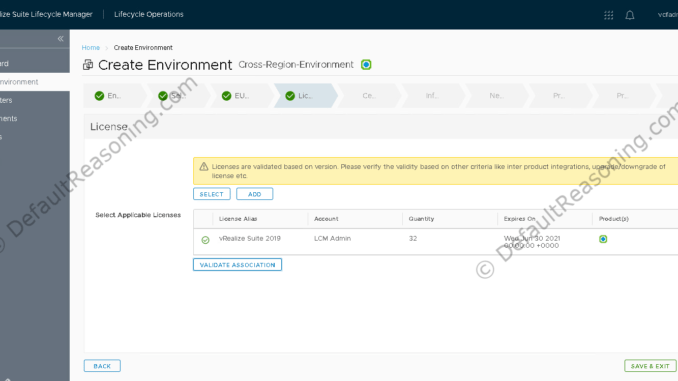
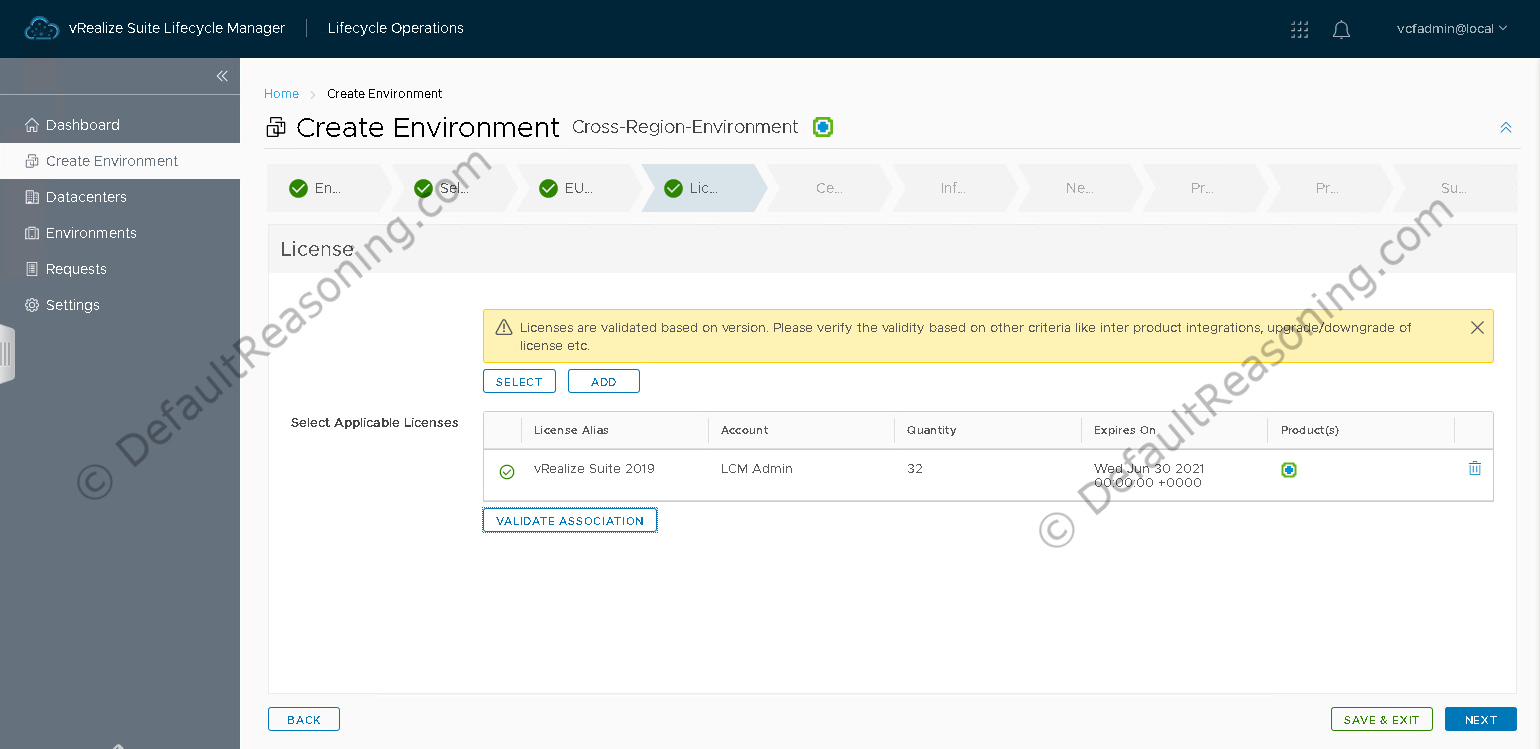
- Select the vRealize Suite license or add a new one. Click Validate Association to check if the selected license is applicable.
- Select the Multi-SAN certificate created earlier from the drop-down list and click Next.
- Click Next on the Infrastructure page as the info will be pre-populated from the SDDC Manager. Notice that the vROps cluster will be applied on the Cross-Regional network segment.
- Click Next once again on the Network This info is also automatically populated for you from the SDDC Manager.
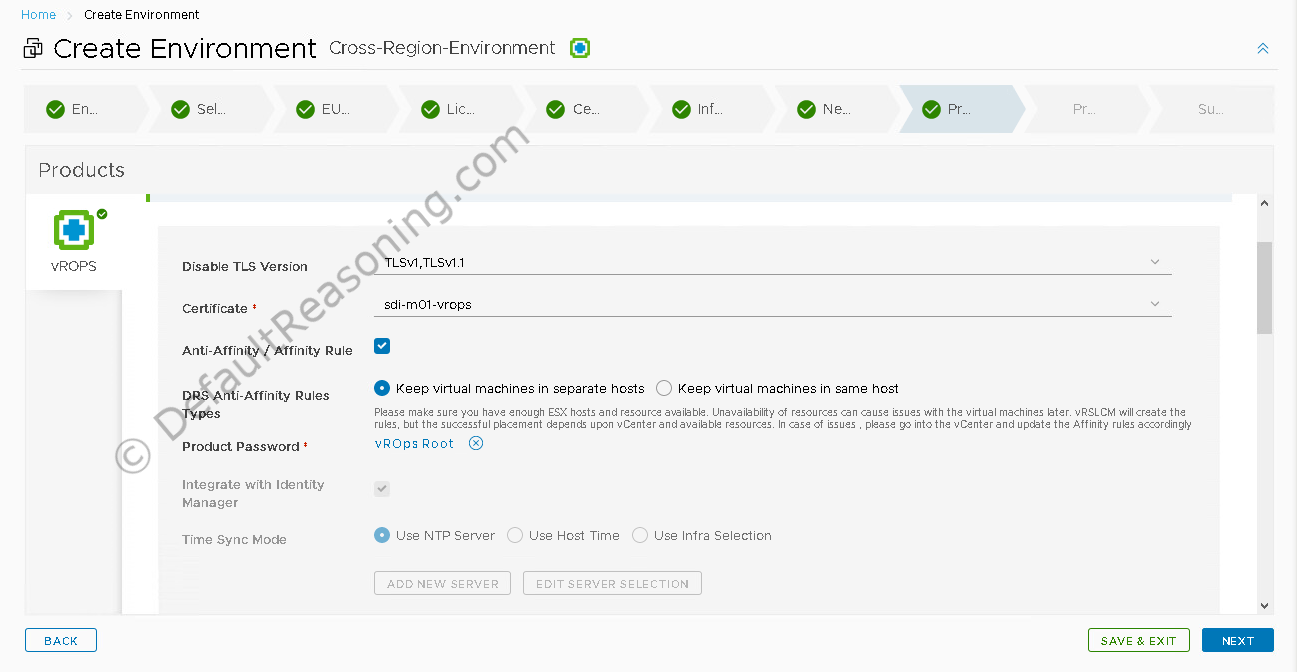
- On the Products page, set the following values:
- Disable TL Version: TLSv1, TLSv1.1
- Certificate: you vROps certificate created earlier (should already be filled in)
- Anti-Affinity / Affinity Rule: check
- DRS Anti-Affinity Rules Types: Keep virtual machines in separate hosts
- Product Password: your vROps root password created earlier.
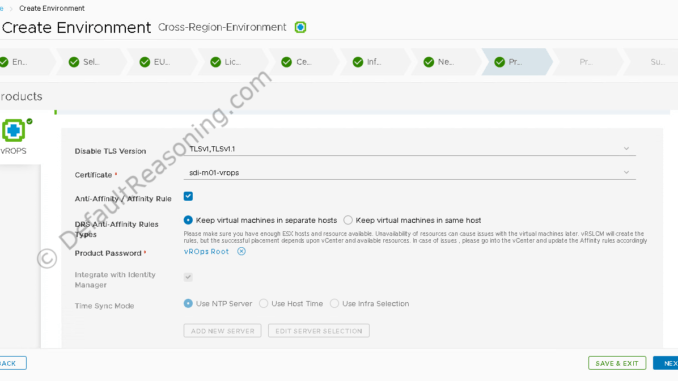
- Scroll down to the Cluster Virtual IP and enter the FQDN.
- Scroll down to the Components part and enter the VM name, FQDN, and IP Address for both vROps appliances.
- Click Next.
- Run the precheck. Wait for the precheck to complete. Fix errors if any.
- Click Next to advance to the Summary page.
- Review the settings, backup the deployment configuration if necessary and click Submit to start the deployment.
vRSLCM will switch to Request Details page where you can monitor the deployment progress. This process can take some time to finish. Once completed, the vRealize Operations product will now be added to the SDDC Manager inventory.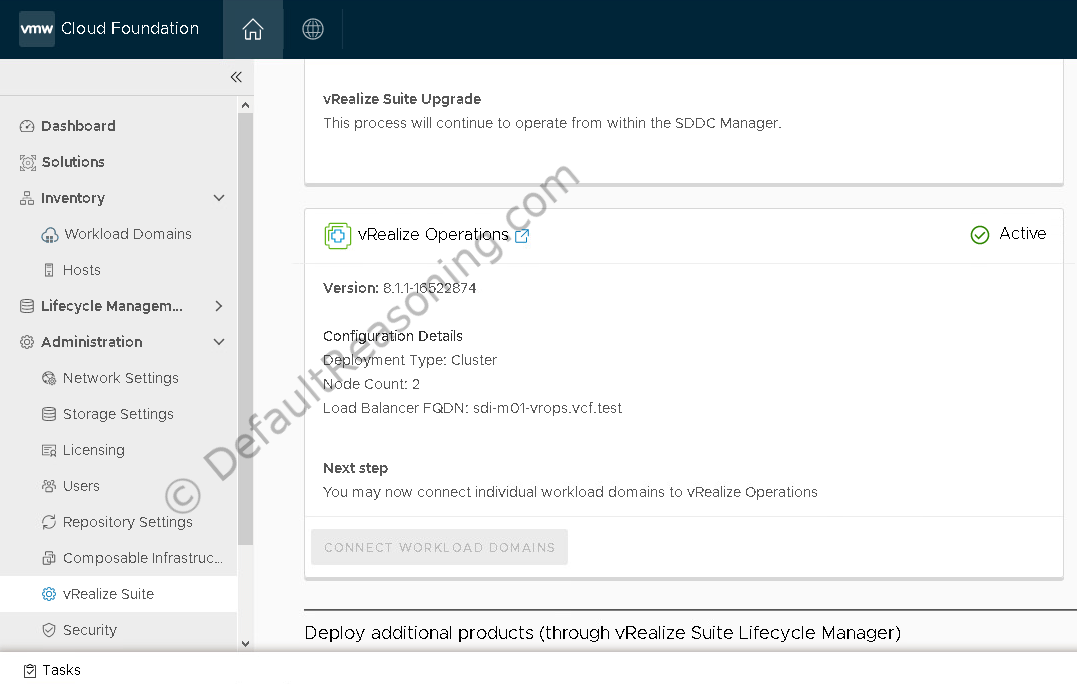
Configure vRealize Operations Manager appliances
According to the VVD documentation, in order to avoid availability disruptions in the vROps analytics cluster, you must reconfigure the domain name and seartch path on all vROps appliances.
- Log in via SSH to the first vROps node and log in as root.
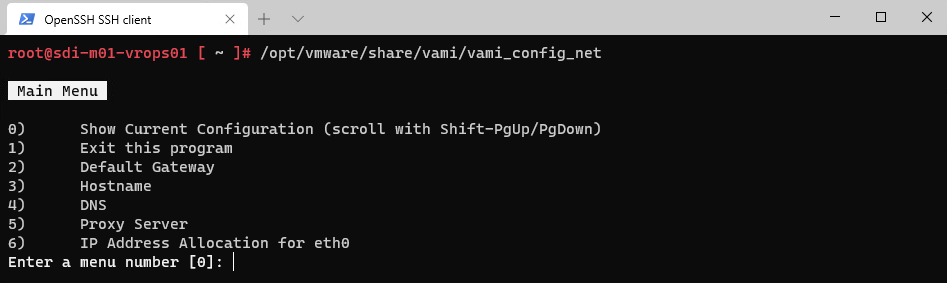
- Run this command to open the VAMI network configuration:
# /opt/vmware/share/vami/vami_config_net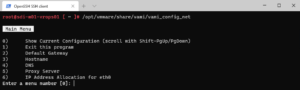
- Press 4 to configure the DNS.
- Press Enter on the DNS Server 1 and do the same for DNS Server 2.
- Enter the Domain Name and press Enter.
- At the Search Path, enter the domain name and press Enter.
- Verify the configuration with option 0.
- Exit the VAMI interface with option 1.
- You can also verify the values with
# cat /etc/resolv.conf
Repeat these steps for all remaining vROps nodes.
Connect Workload Domain(s) to vRealize Operations Manager
At this step you can start connecting your workloads domains to the vROps cluster if you have any deployed already. I don’t, so we will have to skip this step unfortunately. Instructions on how to connect workload domains to vROps cluster can be found in the online documentation.
Configure vRealize Operations Manager authentication source
This feature is set automatically by the vRSLCM. To verify the configuration, navigate to your vROps cluster VIP, log in as admin, and on the Administration page, go to Access -> Authentication Sources. You should see your Workspace ONE Access (of VMware Identity Manager) displayed here.
Define startup order of the vRealize Operations Manager cluster
We need to define the startup order for the vROps analytics cluster which will ensure that vSphere HA will power on the VM’s in correct order. Also, the Workspace ONE Access needs to power-on before the vROps cluster.
- Open the Management vCenter Server and log in as administrator@vsphere.local.
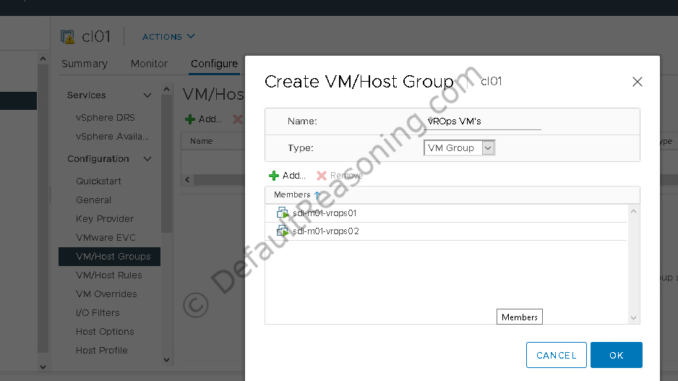
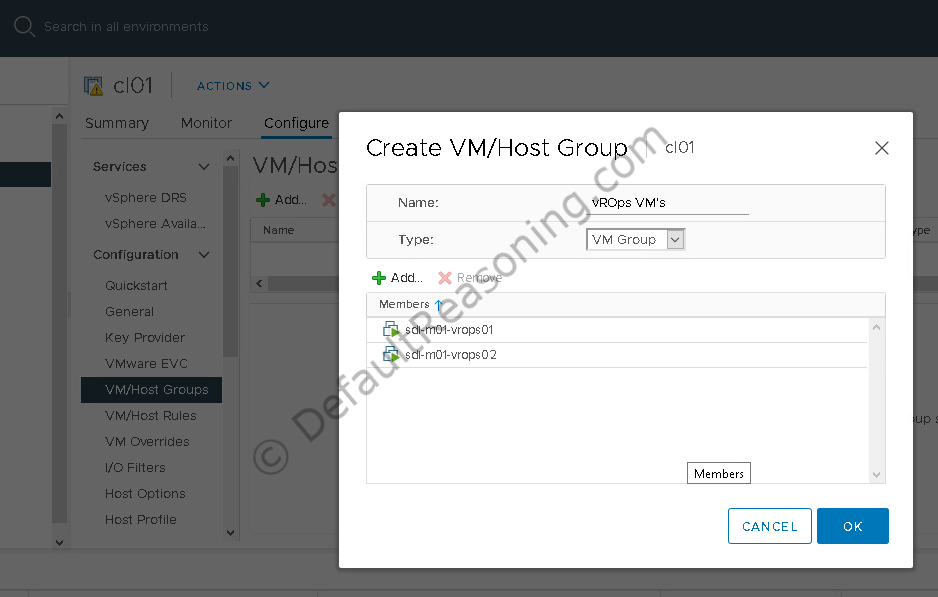
- Select the cluster resource and on the Configure tab, go to Configuration -> VM/Host Groups.
- Click the green Add button, enter a name for the group (i.e. vROps VM’s), and add all vROps nodes as members of this group. Click OK to create the group.
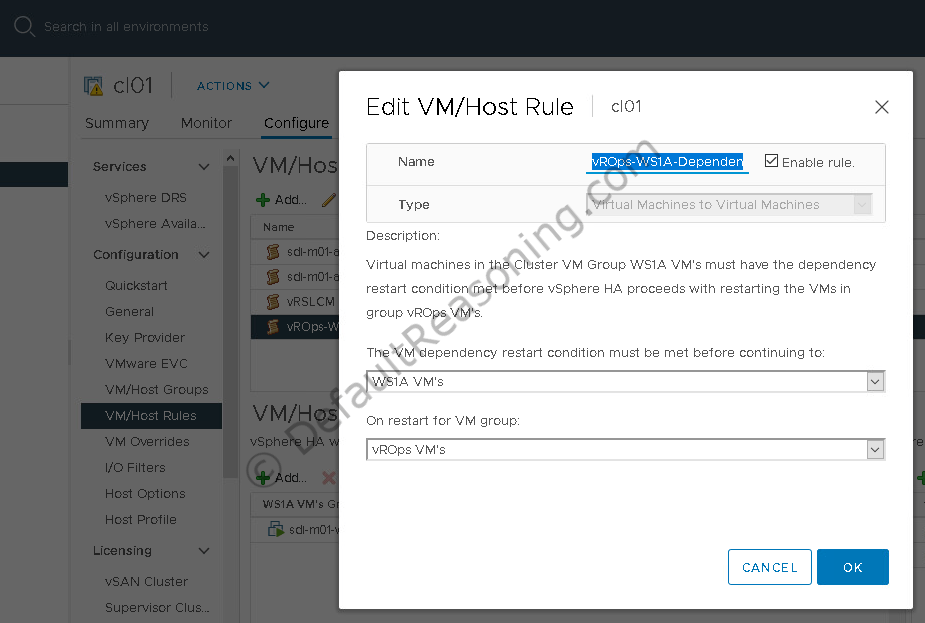
- Next, create a rule to power-on the WS1A before the vROps cluster.
- Under Configuration, select VM/Host Rules.
- Click Add.
- Enter the rules name (i.e. vROps-WS1A-Dependency), Virtual Machines to Virtual Machines as Type, and set the dependency of vROps VM’s to the WS1A VM’s.
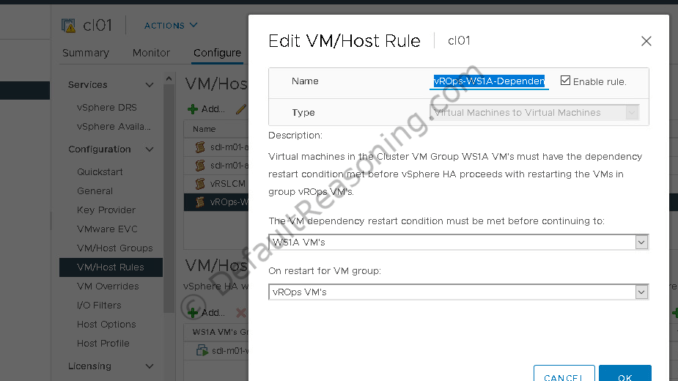
- Click OK.
This concludes part 2 of the automated deployment of vRealize Suite in VCF 4.1. In the next part, we will deploy vRealize Log Insight!
Cheers!
– Marek.Z
- Automated Deployment of vRealize Suite 2019 in VCF 4.1 – Part 1 (vRSLCM & WS1A)
Sorry, but where is that automation from the title? First manual wizard work, then SSH, then manual config in vCenter. That’s not automation at all.
Hi,
Initially, this may look that it requires a lot of manual steps but it really isn’t. You still need to input all the data in the LCM workflow but from there, it runs automatically. Once that is done, the remaining tasks are day-2 operations which you would have to do anyway.
Don’t get me wrong, I also think there is room for improvement but that will come with future releases.
Cheers!
Hello,
I would like to deploy only one node of vRealize Operation (no HA) but I found that GUI start from two nodes. How can I deploy it ?
Thanks,
Sukanya S.
Hi Sukanya,
Correct, this is by default for a deployment under VCF as it is based on design decision from the VVD.
Cheers!
So, it means that I cannot deploy one node vROPs under VCF 4.1. Am I right? My colleague use to deploy one node vROPs in the previous version of VCF, so I’m just curious about this VCF 4.1.
Correct, in 4.1 you cannot deploy a single node vROps instance. Minimum is 2, however, if this is a production environment, please follow the VCF 4.1 documentation and deploy a 3-node HA cluster as recommended by VMware.
From the documentation: “To monitor the resources in your SDDC, deploy the vRealize Operations Manager analytics cluster with three nodes.”
Source: https://docs.vmware.com/en/VMware-Validated-Design/6.1/sddc-deployment-of-cloud-operations-and-automation-in-the-first-region/GUID-C4A8EA0B-C1D4-4782-985C-3B8B7591AF9C.html
Hope this helps.
Thank you for your suggestion 🙂