


In one of my previous blog posts (Back to Basics – SRM – Part 4: Inventory Mappings) I briefly touched the subject on adding an IP address customization rule when creating the inventory mappings and in this article we will have a closer look on how to configure the IP addresses customization in SRM.
According to the vCenter Site Recovery Manager Administration Guide, the vCenter Site Recovery Manager supports different types of IP customization:
- Use of IPv4 and IPv6 addresses.
- Configure different IP customizations for each site.
- Use DHCP, Static IPv4, or Static IPv6 addresses.
- Customize addresses of Windows and Linux virtual machines.
- Customize multiple NICs for each virtual machine.
In vCenter Site Recovery Manager there are 2 ways to apply the IP addresses customization to the virtual machines. Actually, there are 3 ways as the second method can be configured in two different ways.
- Manually customize IP addresses for an Individual virtual machine or
- Customizing IP addresses for multiple virtual machines:
- By defining IP Customization Rules or
- By using the DR IP Customizer tool
In this post we will have a closer look at the first option, customize an IP address for an individual virtual machine. This option is valid if you don’t have a lot of virtual machines running in your environment.
Manually Customize IP addresses
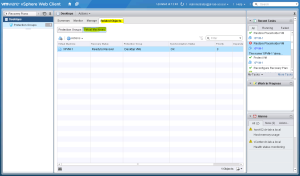
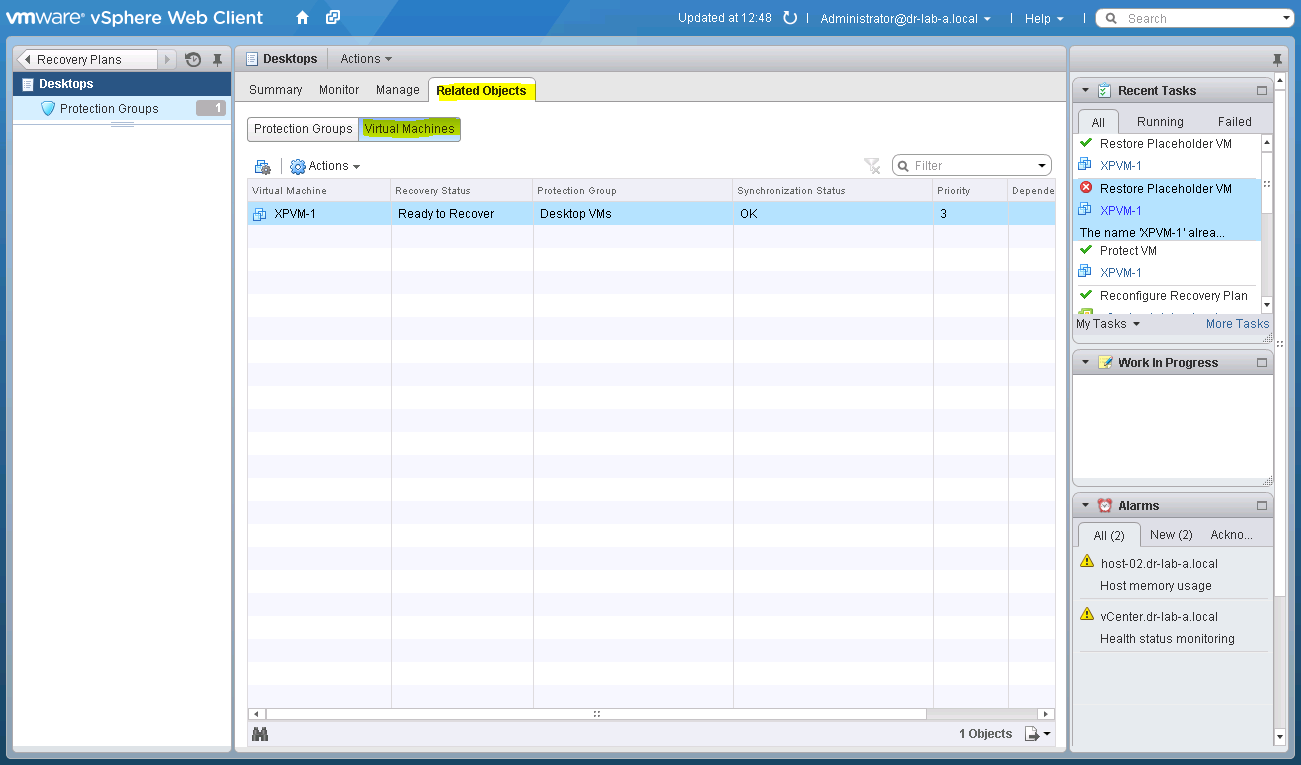
- Open the vSphere Web Client and log in to the vCenter Server at the Protected Site.
- On the left pane, go to Site Recovery.
- Under Inventories, select Recovery Plans.
- Open the already configured recovery plan, select the Related Objects tab and select the Virtual Machines.
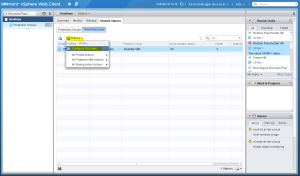
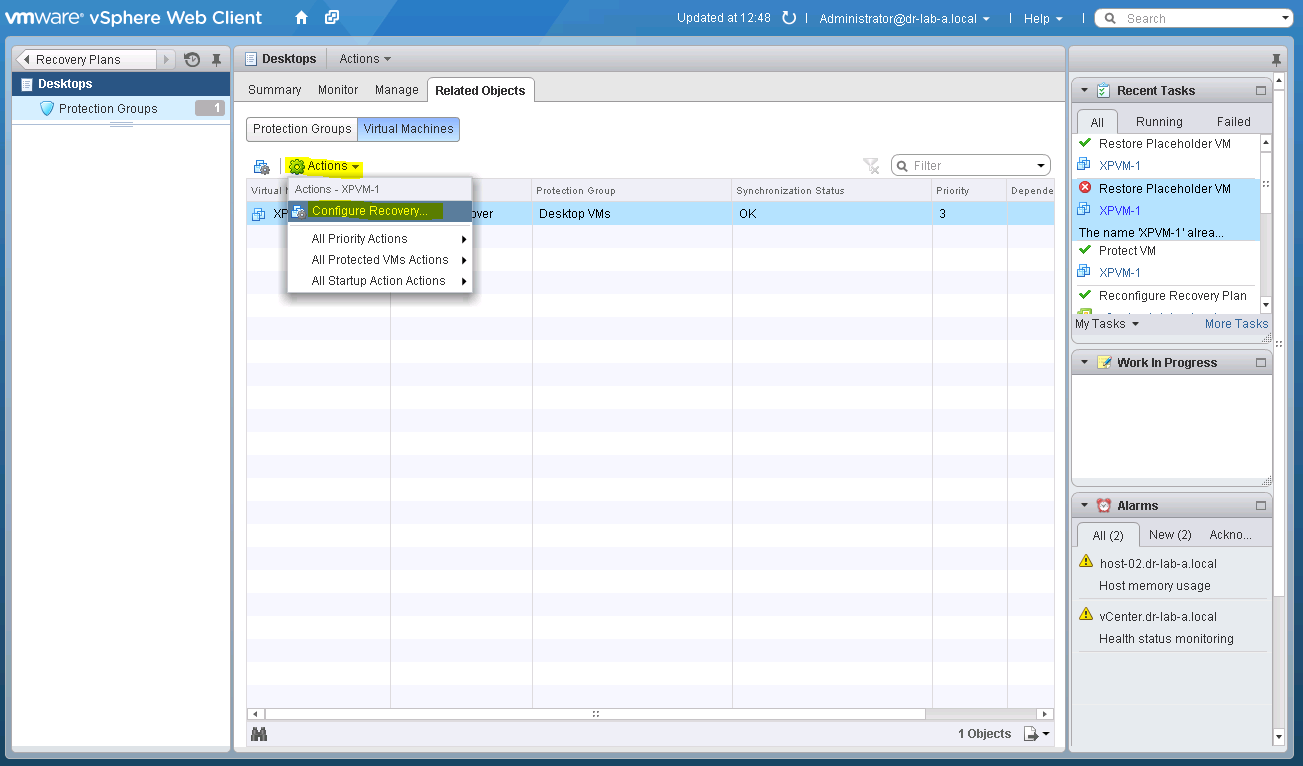
- Select the VM you want to edit and select Configure Recovery from the Actions You can also use the gear shaped button 🙂
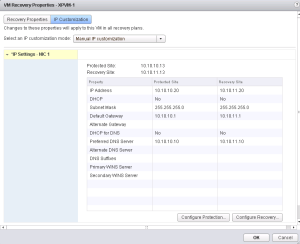
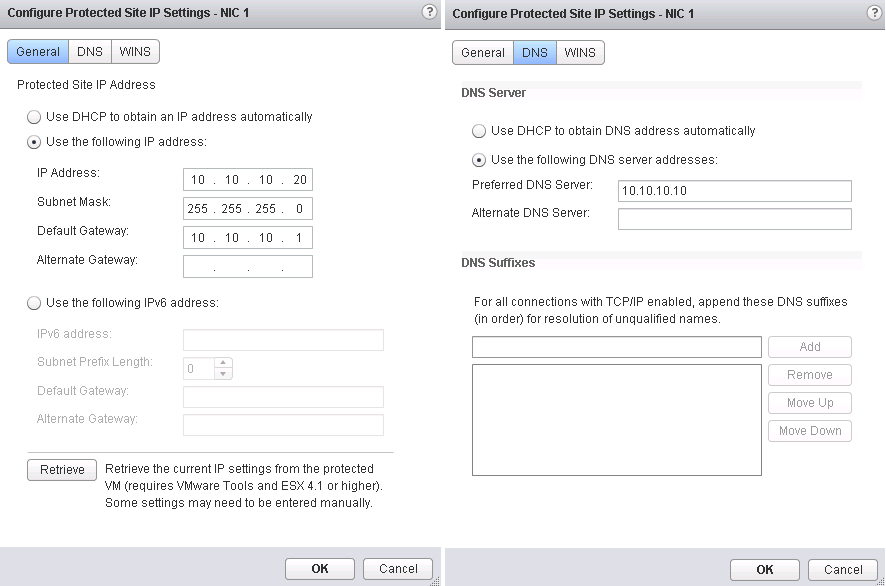
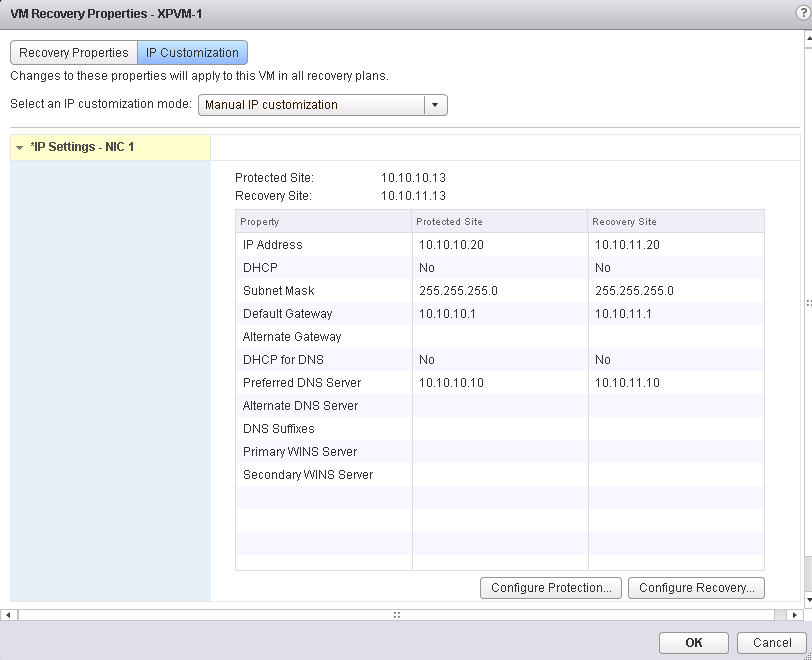
- In the VM Recovery Properties window, select the IP Customization tab, set the IP Customization mode to Manual IP Customization and select the NIC of the VM. The IP settings of this VM should now be visible.
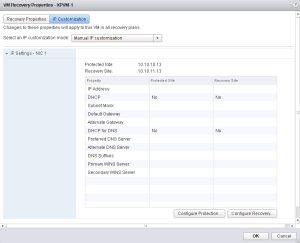
- At the bottom of the table, there are 2 options: Configure Protection and Configure Recovery which correspond with the Protected Site IP settings and the Recovery Site IP settings. Depending on your requirements, you can change the IP addresses for both sites. In my case I will enter a manual IP address for each site.
- Click the Configure Protection button and enter the IP address, subnet mask, default gateway and the DNS server for this VM on the Protected Site.
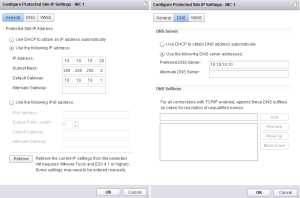
- Repeat the process for the IP address on the Recovery Site. When finished, the table in the VM recovery Properties window should look similar to the one depicted below.
- Click OK to close the window. When the configuration process is finished you should get a notification message in the vSphere Web Client stating that the protected VM has been successfully reconfigured.
At this point the VM IP address is customized. You can now test the recovery plan to see if the custom IP settings are being applied.
This concludes the manual IP address customization method in vCenter Site Recover Manager. Proceed to part 2 where we will have a closer look at the IP address customization process for multiple virtual machines by defining the IP customization rules.
Cheers!
– Marek.Z