


Continuing with the upgrade-migration scenarios to vCSA #migrate2vcsa FTW! 😎 , this blog post will concentrate on migrating from Windows vCenter Server 6 with embedded PSC to vCSA 6.5 with external PSC. The procedure steps are as follow.
Migrate to vCSA 6.5 with external PSC
- Deploy a secondary PSC version 6 and join the existing SSO domain.
- Repoint the vCenter Server to the new PSC.
- Migrate PSC to version 6.5.
- Migrate Windows vCenter Server to vCenter Server Appliance 6.5.
The following diagram shows the before and after topology.

Deploy secondary PSC
This step is relatively simple. Just start the vcsa-setup.html from the ISO image and follow the installation steps of the Platform Services Controller Appliance.
- Click Install on the start page.
- Accept the EULA and click Next.
- Enter the FQDN or IP address of the ESXi host or your vCenter Server. Click Next and accept the certificate.
- Specify the name for the new PSC Appliance and enter the root password.
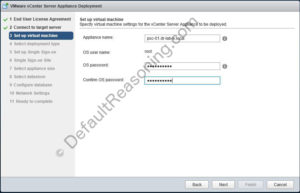
- Select Install Platform Services Controller and click Next.
- Next, select Join an existing SSO domain and enter the FQDN or IP address of the embedded PSC running on the vCenter Server 6. Enter the SSO domain and the administrator password. Click Next.
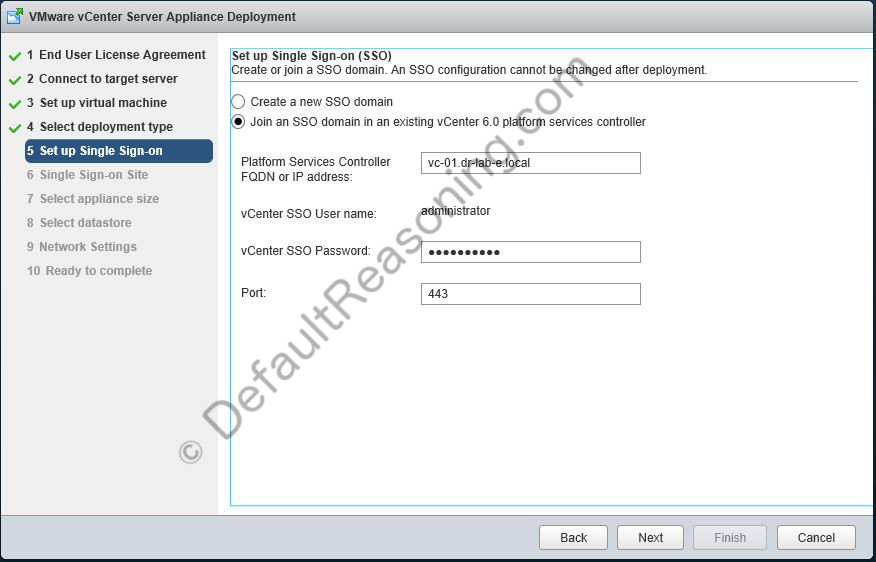
- Select Join an SSO domain in an existing vCenter 6.0 platform services controller and enter the FQDN or IP address of the SSO host which in this case is the Windows vCenter Server, and provide the administrator password.
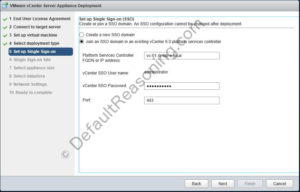
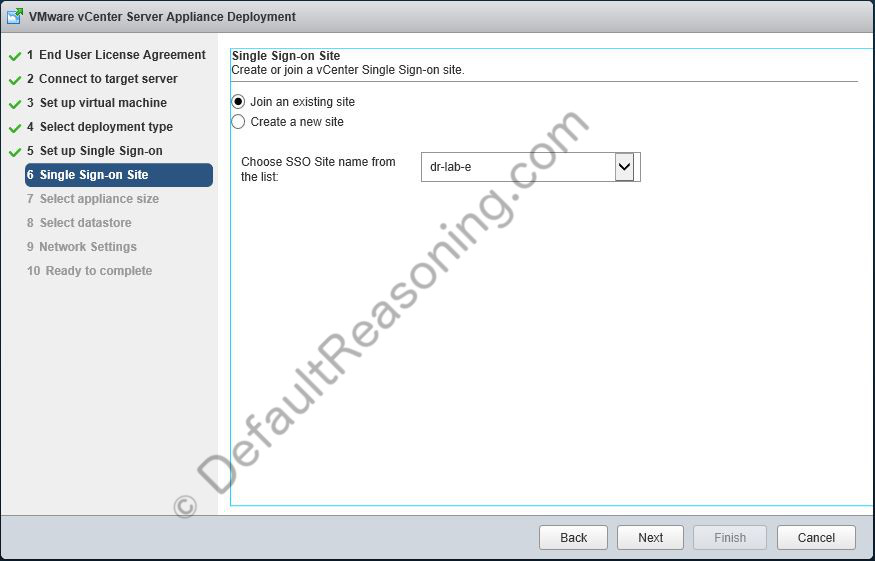
- Next, from the drop-down menu, select the SSO Site name and click Next.

- Click Next again on the appliance size.
- Select a datastore to store the new PSC and enable Thin Disk Mode if applicable.
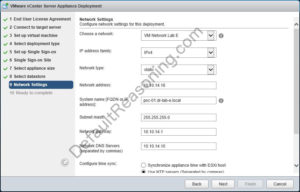
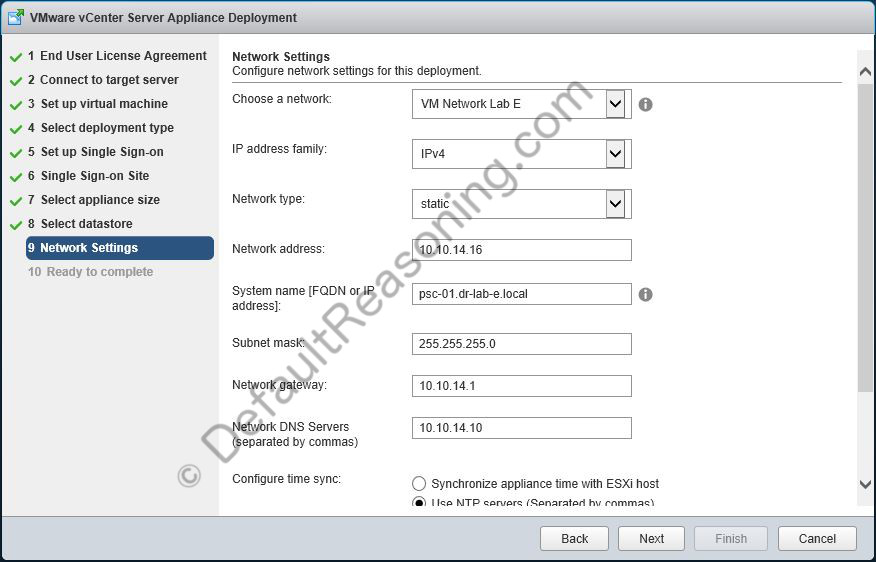
- Configure the network settings for the PSC appliance. Make sure you scroll down and configure the NTP settings and enable SSH if applicable.
- Review the settings and click Finish to start the PSC deployment.

When the second PSC is successfully deployed, you should be able to manage it in the vCenter Server inventory in the Administration -> Deployment/System Configuration -> Nodes menu.
Repoint vCenter Server to the new PSC
The next step in the procedure is to repoint the vCenter Server to the new PSC.
- On the Widows vCenter Server, log in as the Administrator.
- Open the command prompt and change the directory to \..\VMware\vCenter Server\bin
- Execute the following command:
cmsso-util reconfigure --repoint-psc <psc_FQDN_or__IP_Address> --username <username> --domain-name <domain.name> --passwd <password>
- So, for example:
cmsso-util reconfigure --repoint-psc psc-01.dr-lab-e.local --username administrator --domain-name dr-lab-e.local --passwd VMware123!
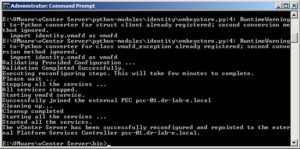
- Note that this process can take several minutes. When successful, you should see the following message.
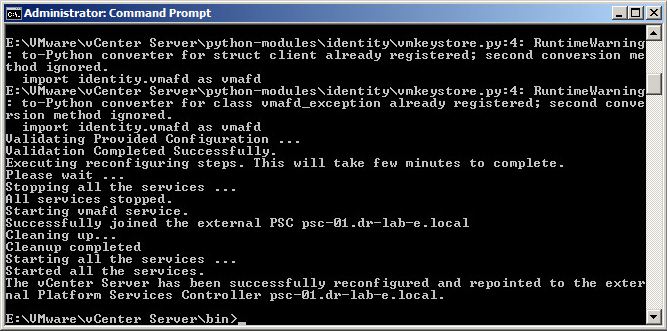
Open the vSphere Web Client and verify that you can log in using the administrator credentials.
Migrate PSC to version 6.5
This procedure will create e new PSC and migrate all setting. The old PSC can be removed from the vCenter Server inventory once the migration is successful.
- Open the installer.exe program located on the ISO image in the \..\vcsa-ui-installer\win32 and select the Upgrade option because the PSC is already running on an appliance.
- Click Next on the introduction page.
- Accept the EULA.
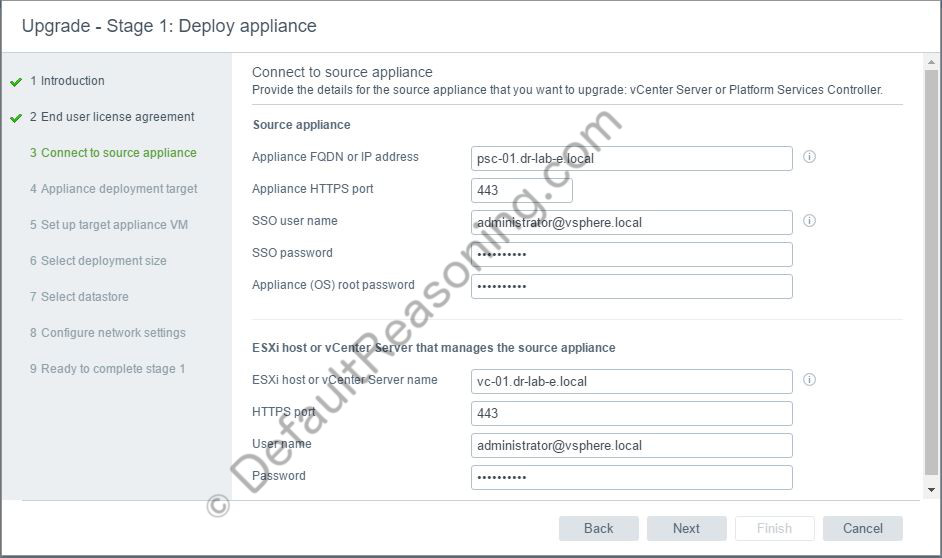
- Connect to the source appliance (PSC) and enter the credentials for the SSO user and the appliance root user. Also, connect to the vCenter Server or ESXi host.
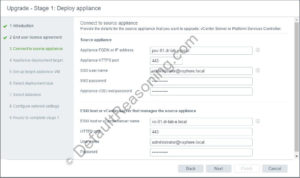
- Next, accept the certificate and enter the appliance deployment target which could be the vCenter Server or an ESXi host.
- Accept the certificate.
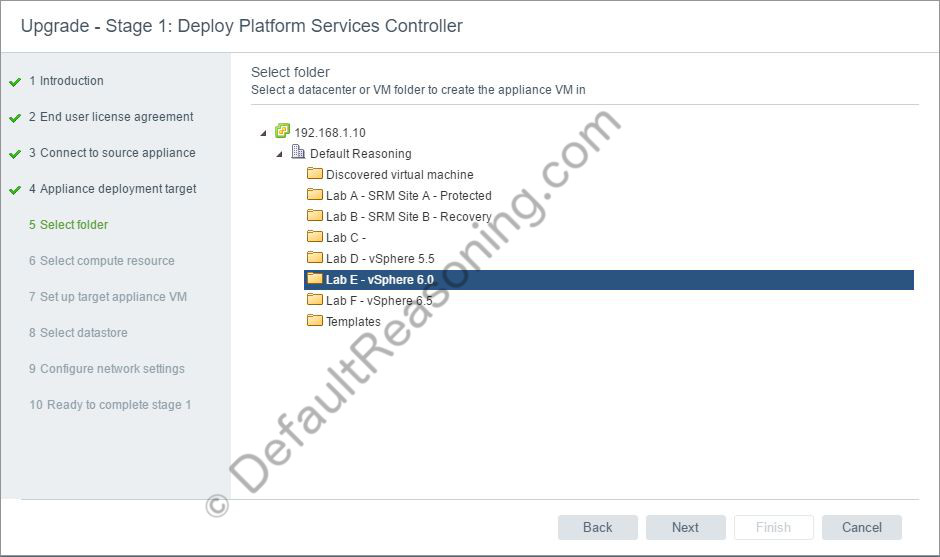
- If you are connecting to the vCenter Server (as I am), select the datacenter and a VM folder to store the new PSC appliance. Click Next.
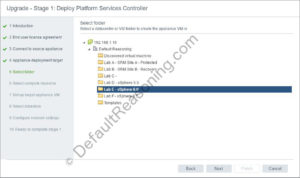
- Select a compute resource and click Next.
- Provide a temporary name for the new PSC appliance.
- Select a datastore and click Next. Enable Thin Disk Mode if applicable.
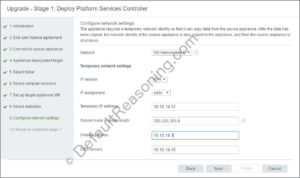
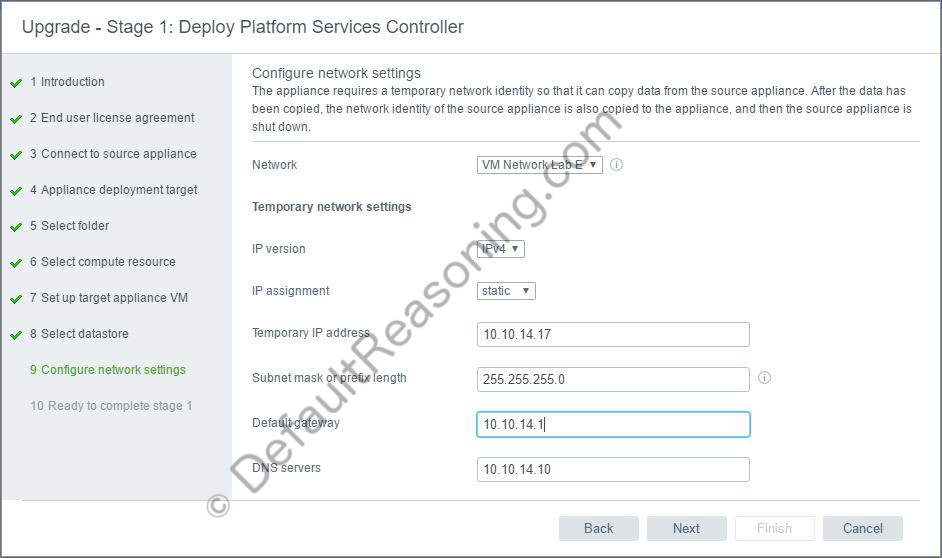
- Configure the network settings and click Next.
- Review the deployment details and click Finish to start the upgrade process.
- Once the deployment and configuration process is completed, click Continue.
- Click Next to start stage 2 of the upgrade process.
- Click Next on the introduction page.
- Connect to the source PSC and vCenter Server or ESXi host.
Note: if you get a pre-upgrade error stating that the source address cannot be reached on port 22. Open the SSH support on the PSC appliance from the VAMI interface.
- Decide if you want to join the VMware Customer Experience Improvement Program or not and click Next.
- Review the settings and select the I have backed up the source Platform Services Controller and all the required data from the database. Click Finish.
- Click OK to confirm that the source PSC will be shut down.
- When the setup process completes successfully, remove the old PSC from the vCenter Server inventory and rename the new PSC to the old name.
Next, proceed with the migration of the Windows vCenter Server.
Migrate Windows vCenter Server to vCSA 6.5
Similar to the PSC upgrade process, the upgrade-migration to vCenter Appliance 6.5 will copy all settings of the Windows vCenter Server and will deploy an appliance with original Windows values. The old Windows vCenter Server can be decommissioned after a successful migration.
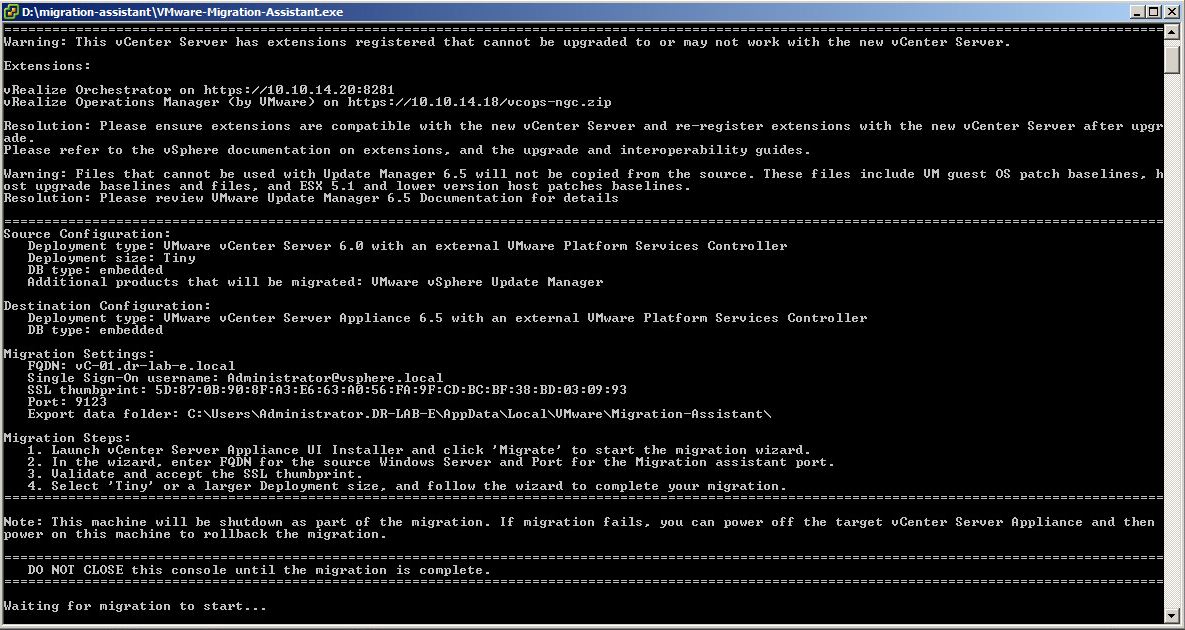
- Mount the vCSA ISO image on the virtual machine running the Windows vCenter Server and from the \migration-assistant directory execute the VMware-Migration-Assistant.exe.
- Enter the administrator password and wait for the pre-check scripts to continue.
- Before you continue, resolve any errors or warnings displayed by the migration assistant. Also, note that if you have any other extensions registered with your vCenter Server, you will have to re-register them again after the migration. In my case, I have to re-register my vROps and vRO appliances.
- Next, on a different machine, open the installer.exe from the vCSA 6.5 ISO image and select Migrate.
- Click Next on the introduction page.
- Accept the EULA and click Next.
- Enter the source FQDN or IP address of the Windows vCenter Server and provide the administrator credentials. Accept the certificate and click Next.
- Connect to an ESXi host and accept the certificate.
- Enter a temporary name for the new vCenter Server Appliance and enter the root password. Click Next.
- Select the vCSA deployment size, since this is a lab setup, I’ll go with Tiny. Click Next.
- Select a datastore to store the new vCSA, enable Thin Disk Mode if applicable and click Next.
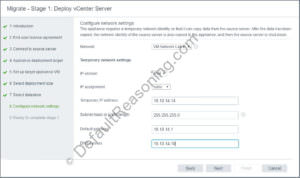
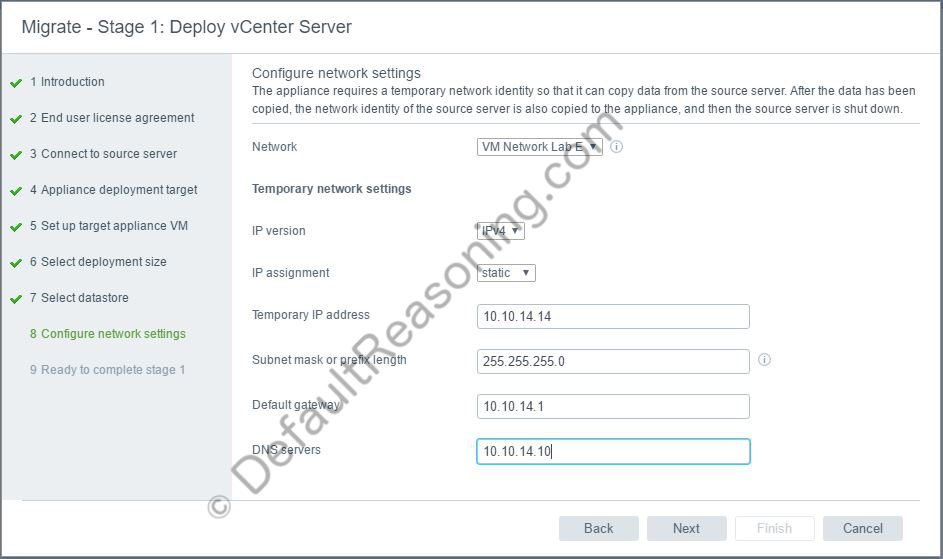
- Configure temporary network settings for the new appliance and click Next.
- Review the settings and click Finish to start the appliance deployment.
- Click Continue to proceed to stage 2 of the migration.
- Click Next on the introduction page.
- If you have extensions like vROps or vRO, click Close on the pre-migration check results window to continue.
- Enter the Active Directory domain credentials so the appliance is able to join the Windows Domain and click Next.
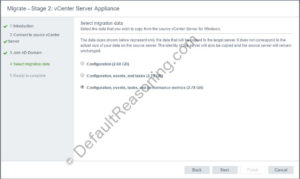
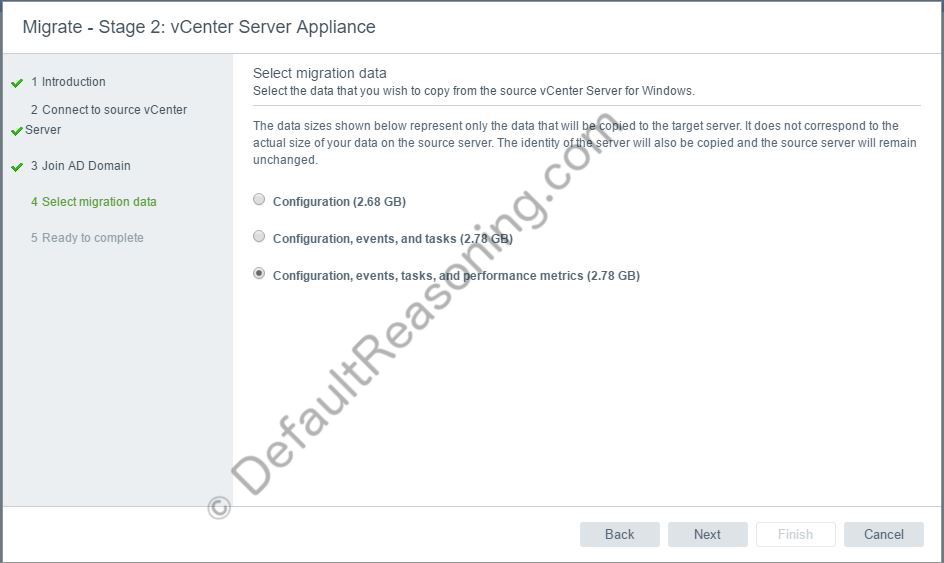
- Select the data that you wish to migrate and click Next.
- Review the settings, select I have backed up the source vCenter Sever and all the required data from the database and click Finish to start the migration process.
- Click OK to confirm the Windows vCenter Server shut down.
- Click Close to finish the migration process.
Congrats! 🙂
You successfully migrated from Windows vCenter Server 6.0 with embedded PSC to a vCenter Server Appliance with external PSC.
As a final step, remove the old Windows vCenter Server from the inventory and check if all other VMware products like SRM, vROps, vRO etc. are still communicating with the vCenter Server. If not, re-register the product again with the vCenter Server.
Cheers!
– Marek.Z