Dump Collector
ESXCLI Basics: Configure Dump Collector Host
Another basic command, but may be useful in stateless environments with no local disk usable for a diagnostic partition. Here is a quick how-to. Connect to your host through SSH […]
Another basic command, but may be useful in stateless environments with no local disk usable for a diagnostic partition. Here is a quick how-to. Connect to your host through SSH […]

I’ve been working lately on a project for one of our customers and one of the requirements was to reuse as much hardware as possible. This led of course to […]

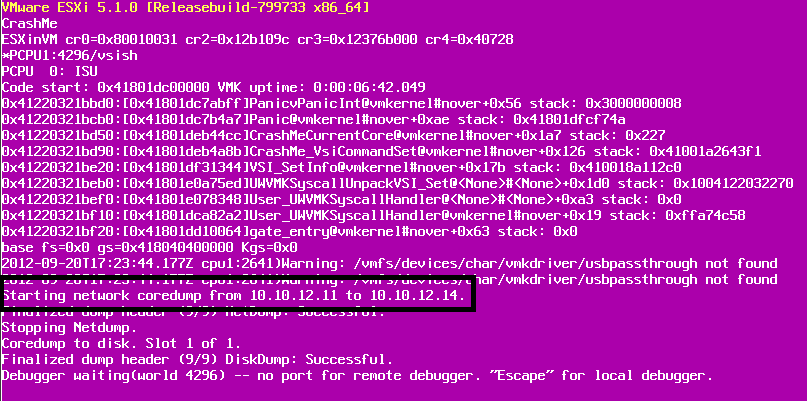
Recently I upgraded my physical server to ESXi 5.1 and I have been running different VMs on it without any issues. Unfortunately, when I powered on my whole vCenter Site […]
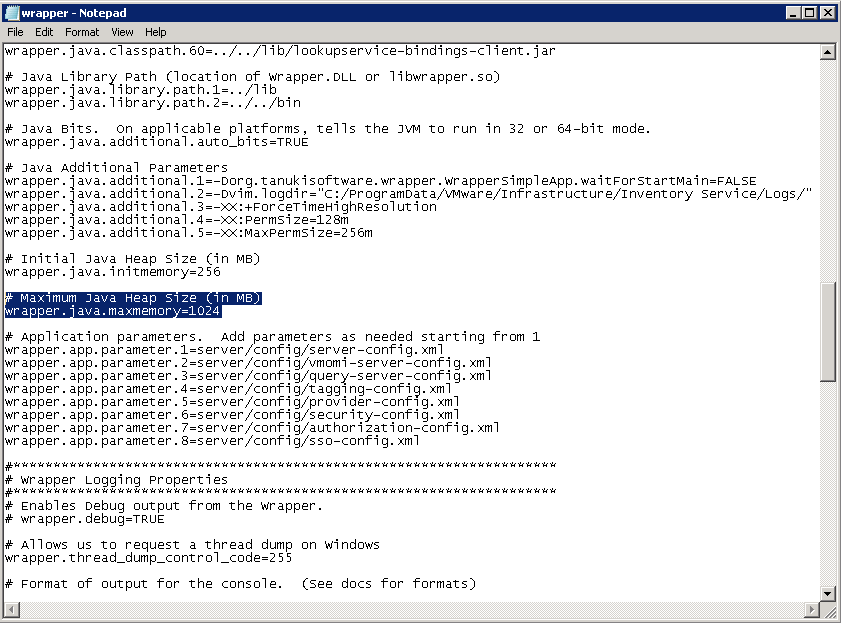
During the upgrade of my home lab from vSphere 5.0 to vSphere 5.1 I have noticed that there is more memory consumption on my vCenter Server than before the upgrade. […]
Here is a quick post about configuring the vSphere Dump Collector for your ESXi hosts. I’m not going to cover the installation process because it is really simple and straightforward. […]
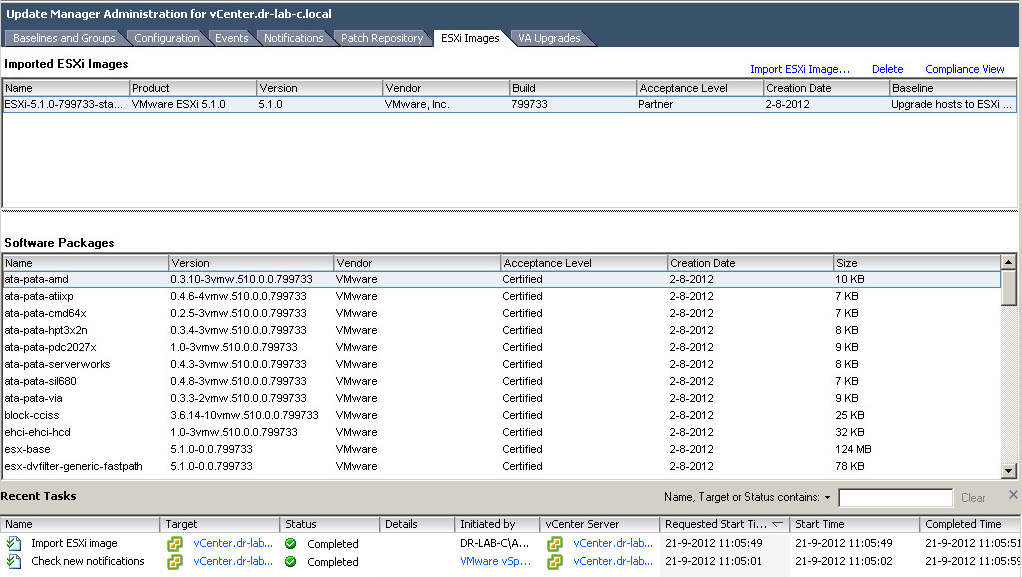
In-place upgrade of ESXi hosts is quick and simple and well suitable for small environments. However, if you want to upgrade a large number of ESXi hosts without any downtime, […]
The vSphere Web Client lets you connect to a vCenter Server system to manage your vSphere infrastructure and ESXi hosts through a browser. The vSphere Web Client requires a connection […]

Before we can protect a single virtual machine or a group of virtual machines, the virtual machine files need to be replicated from the Protected Site to the Recovery Site. […]
Copyright © 2024 | DefaultReasoning.com