

Some time ago VMware announced vCenter Site Recovery Manager 5.8 at VMworld U.S. which I covered in my previous blog post. Now that the binaries are available, let’s have a look on how to upgrade vCenter Site Recovery Manager to version 5.8.
Before you begin make sure you read and check the following:
- VMware vCenter Site Recovery Manager 5.8 Release Notes
- Site Recovery Manager Installation and Configuration Guide (especially chapter 6 – Upgrading Site Recovery Manager).
- Site Recovery Manager Compatibility Matrix
- VMware Product Interoperability Matrixes and make sure you check the upgrade path for SRM.
I will not cover the “What’s new” in version 5.8 here because it is well covered in the release notes but the first thing that stands out is the integration of SRM User Interface with vSphere Web Client. Which is something we have been waiting for! 🙂
Upgrade Steps
The vCenter Site Recovery Manager needs to be upgraded in specific order.
- Upgrade vCenter Server and vSphere Web Client on the Protected Site.
- Optionally, if you use vSphere Replication, upgrade the vSphere Replication on the Protected Site.
- Upgrade Site Recovery Manager Server on the Protected Site.
- Optionally, if you use array-based replication, upgrade the SRA on the Protected Site.
- Upgrade vCenter Server and vSphere Web Client on the Recovery Site.
- Optionally, if you use vSphere Replication, upgrade the vSphere Replication on the Recovery Site.
- Upgrade Site Recovery Manager Server on the Recovery Site.
- Optionally, if you use array-based replication, upgrade the SRA on the Recovery Site.
- Verify the connection between the Protected and Recovery site.
- Verify that the protection groups and recovery plans are still valid. Test if necessary.
Prerequisites
- According to the SRM Installation and Configuration guide, upgrading from SRM 5.0.x to SRM 5.8 is not supported. You must upgrade SRM 5.0.x to a SRM 5.5.x before you upgrade to SRM 5.8. See my previous post on how to upgrade to a new SRM version.
- Site Recovery Manager 5.8 requires vCenter Server version 5.5 Update 2. You need to upgrade the vCenter Server and optionally the ESXi hosts before you upgrade the Site Recovery Manager.
- In addition to the vCenter Server upgrade, you must also upgrade the vSphere Web Client.
- If you are using vSphere Replication, deploy the appropriate version of vSphere Replication on both sites before you upgrade Site Recovery Manager Server. See the solution interoperability between vSphere Replication and Site Recovery Manager in the VMware Product Interoperability Matrix.
- Backup the SRM database and/or take a snapshot of the VM running the Site Recovery Manager Server before you begin.
Upgrade Site Recovery Manager
When all of the prerequisites are met, you can proceed with the Site Recovery Manager upgrade. In my case I will perform an in-place upgrade of SRM.
- On the Protected Site, login on the vCenter Server and execute the SRM installation setup.
- Select your language and press OK.
- When the pre-installation wizard is ready click Next. Note the message stating that a previous version of SRM was detected and that the installation will upgrade the product to the latest version.
- Click Next on the VMware Patents window.
- Accept the EULA.
- Click Next on the installation pre-requisites window.
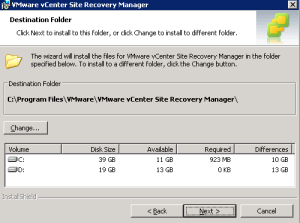
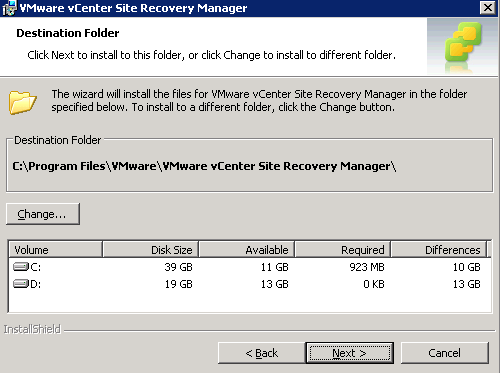
- Click Next to install SRM to its default folder or click the Change button and select another installation folder.
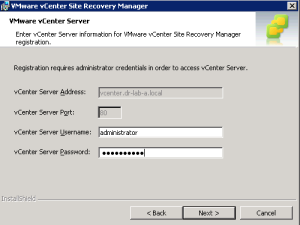
- Enter the vCenter Server administrator credentials and click Next.
- Accept the certificate security warning by clicking Yes.
- Next, accept the SRM Extension settings and click Next.
- On the Certificate Type part, select Automatically generate a certificate and click Next to continue.
- Click Next on the Generate Certificate
- Next, enter the credentials for the database admin and click Next.
- Select Use existing data or Recreate the database and click Next. In my case I went for the database upgrade.
- Use the Local System account for the SRM Service Account or choose an another one. Click Next.
- Click Install to start the installation process.
- When the installation process completes, click Finish to close the installer.

At this point the vCenter Site Recovery Manager is upgraded to version 5.8. Repeat the process for the Recovery Site.
Note that the Site Recovery Manager icon is no longer available in the vSphere Client. Open the vSphere Web Client and you will find the vSphere Replication and the Site Recovery icons on the Home page under the Inventories section.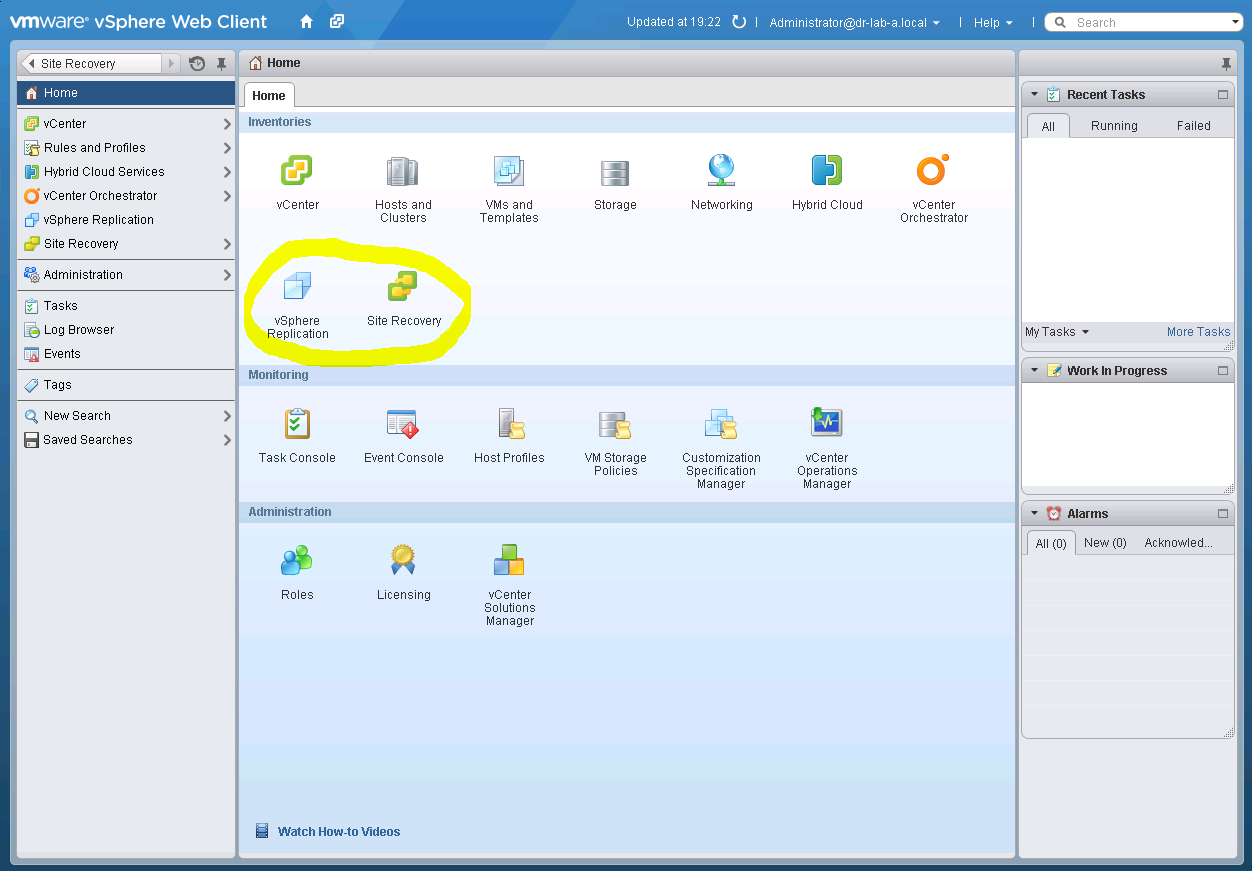
Next, you should verify if the vSphere Replication servers are connected and check the network, folder and resource mappings as well as the placeholder datastores. Don’t forget to verify your recovery plans too! 🙂
Cheers!
– Marek.Z