As you all know, the VMware vCenter Site Recovery Manager is a business continuity and disaster recovery solution that helps you to plan, test, and run the recovery of virtual machines between a protected vCenter Server site and a recovery vCenter Server site. The latest release of VMware vCenter Site Recovery Manager 5.5 has been generally available for a while so it is time to have a closer look on how to upgrade your SRM 5.1 environment to SRM 5.5. This article will focus on an in-place upgrade of SRM.
Before you begin make sure you have read the following:
- vCenter Site Recovery Manager 5.5 Release Notes.
- vCenter Site Recovery Manager 5.5 Installation and Configuration doc.
- Check the Compatibility Matrixes for vCenter Site Recovery Manager 5.5.
Also, before you begin with the upgrade process make sure the following prerequisites are met:
- vCenter Server and its components on the protected site and the recovery site must be running version 5.5. Upgrade these first. See my earlier post on how-to (part1 & part2).
- Optionally, upgrade your ESXi hosts to version 5.5.
- SRM 5.5 uses a 64-bit DSN to connect to the SRM database. If you are upgrading from SRM 5.0, you must create a new 64-bit DSN before the upgrade. This does not apply to SRM 5.1.
- Create a back-up of the SRM database on the protected site as well as on the recovery site.
- Download the vSphere Replication appliance ISO image from VMware.
According to the Site Recovery Manager Installation and Configuration guide, the SRM environment must be upgraded in a correct order. The upgrade steps are as follow.
- Upgrade SRM Server on the protected site.
- Upgrade the storage replication adapters on the protected site if you use any.
- Upgrade the vSphere Replication appliance on the protected site.
- Upgrade any additional vSphere Replication server instances on the protected site.
- Upgrade SRM Server on the recovery site.
- Upgrade the storage replication adapters on the recovery site if you use any.
- Upgrade the vSphere Replication appliance on the recovery site.
- Upgrade any additional vSphere Replication server instances on the recovery site.
- Configure the connection between the SRM sites and vSphere Replication appliances.
- Upgrade the SRM Client plug-in.
- Verify that your protection groups and recovery plans are still valid.
Upgrade Site Recovery Manager
As mentioned earlier, the steps below will perform an in-place upgrade of SRM. The SRM installer will reuse the information about vCenter Server connections, certificates, and database configuration from the existing installation.
- Login to the vCenter Server at the protected site and start the installer.
- Click Next on the Welcome Wizard. Note that the installer detected a previous version of SRM and will upgrade the product.
- Click Next on the VMware Patents window.
- Accept the EULA and click Next.
- Choose the destination folder or leave it to its defaults. Click Next.
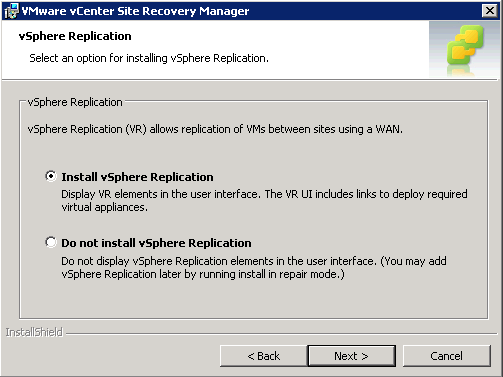
- If you are using vSphere Replication appliance, make sure the Install vSphere Replication option is selected and click Next to continue.

- Provide the vCenter Server credentials and click Next.
- Accept the certificate warning by clicking Yes.
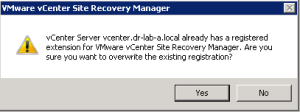
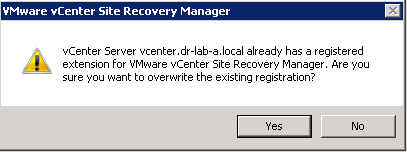
- Click Yes to confirm that you want to overwrite the existing SRM extension.
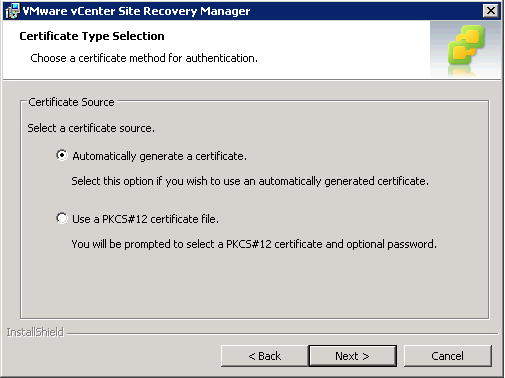
- When asked for the certificate source, you can choose to automatically generate a certificate or use a PKCS#12 certificate. In my case, I went for the automatic option since I don’t have a PKCS#12 certificate. Choose one that suits your environment and click Next.

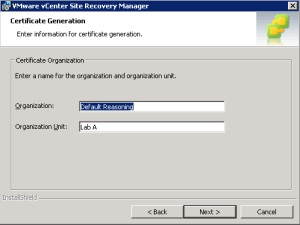
- If you chose the automatic option like me you will be presented with the certificate generation window. The Organization and the Organization Unit should already be populated since this is an upgrade. Click Next.
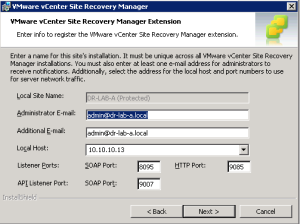
- Check the vCenter Site Recovery Manager Extension properties, make changes if necessary and click Next to continue.
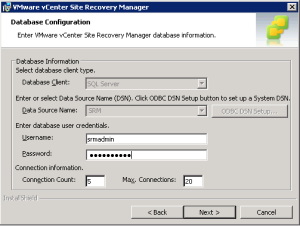
- On the Database Configuration window, enter the SRM database user credentials and click Next.
- Select if you want to use the existing database or to recreate the SRM database. Since this is an upgrade I choose to use the existing database.
- Click the Install button to start the installation.
- Click Finish to close the installation wizard when it completes successfully.


Upgrade vSphere Replication
The vSphere Replication is not upgraded automatically when you upgrade SRM. You must upgrade vSphere Replication as a separate process. According to the Site Recovery Manager Installation and Configuration guide, you cannot upgrade vSphere Replication to version 5.5 by using vSphere Update Manager or the virtual appliance management interface (VAMI). You can use a vSphere Replication ISO image to upgrade the vSphere Replication appliance.
- First, power off the vSphere Replication appliance if it is running.
- Edit the settings of the virtual machine and add a CD/DVD Drive.
- Attach the downloaded ISO image.
- Power on the vSphere Replication appliance.
- When the virtual machines boots up, navigate to https://IP_or_FQDN_Address:5480 using your browser and log in to the virtual appliance management interface (default username and password are root/vmware).
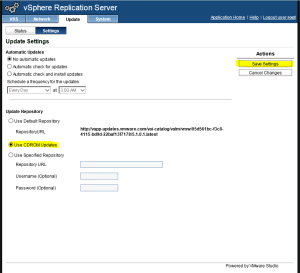
- Navigate to the Update tab and click Settings button.
- Under the Update Repository select CDROM Updates and click Save Settings under Actions.
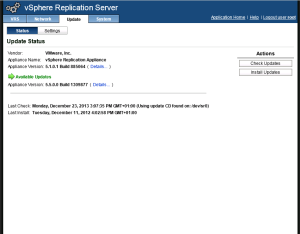
- Next, click the Status button and click Check Updates under Actions. A message stating that an update is available should be displayed.
- Click Install Updates and confirm it with OK.
- The updates are being installed.
- When the updates are installed, you should see a message stating that a reboot is required to complete the update. Navigate to the System tab and click Reboot under Actions. Confirm the reboot by clicking the Reboot button once again.


Upgrade any additional vSphere Replication server instances on the protected site.
Upgrade SRM client plug-in
After a successful SRM upgrade, the client plug-in must be upgraded.
- When still logged in on the protected site vCenter Server, you need to remove the old plug-in first from Programs and Features.
- When the old version is removed, open the vSphere Client and from the Plug-ins menu select Manage Plug-ins.
- Under Available Plug-ins, click Download and Install the VMware vCenter Site Recovery Manager Extension.
- Accept the certificate warning.
- Run the file and click Next on the welcome window.
- Click Next on the VMware patents page.
- Accept EULA and click Next.
- Click Install to begin the installation.
- Click Finish to end the installation.
The Site Recovery Manager plug-in should now reappear under the Solutions and Applications section on the Home page of the vCenter Server.
What to do next?
At this point the protected site is upgraded to version 5.5. Use the steps described above to upgrade the recovery site. Next, configure the connection between the SRM sites and vSphere Replication appliances and verify that your protection groups and recovery plans are still valid.
Cheers!
– Marek.Z
yours documents are perfect and helpful.. thanks..
Glad you like it! 🙂
Cheers!
What about the VRMS Appliance ?
I believe VRMS has been discontinued in this or previous version.
Cheers!