The VMware vRealize Orchestrator 7 was announced this year at VMworld EU in Barcelona and it comes with a new, redesigned GUI which is now called Control Center. It is worth to mention that this new GUI is HTML 5 driven! The installation and configuration of the product didn’t change much but the new GUI is worth heaving a quick look at.
Please refer to the vRealize Orchestrator 7 documentation for key features, architecture and system requirements.
vRealize Orchestrator 7 installation
The vRealize Orchestrator 7 installation procedure (deploy OVF Template) did not change in this version, hence I will skip this part. Have a look at one of my previous posts on how to install and configure vRealize Orchestrator 6 for a step-by-step guide.
vRealize Orchestrator 7 configuration
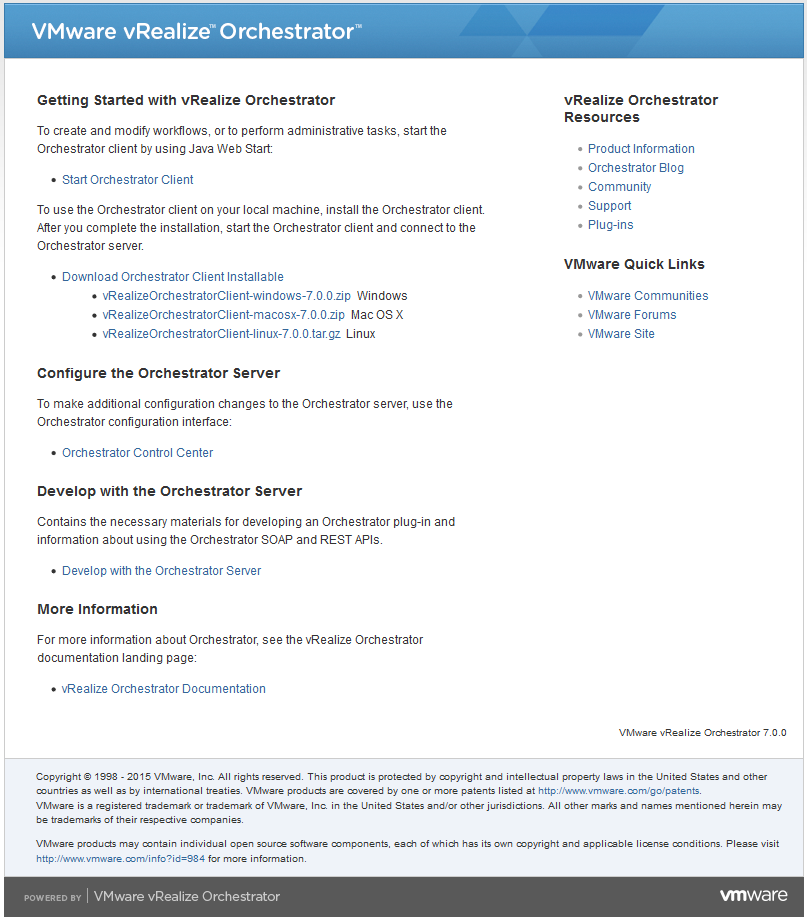
Once the appliance is deployed, you will be presented with the following welcome page.

Note the URL for the Orchestrator Control Center.
- At this point you should check if the settings were applied correctly during the setup by logging on to the appliance configuration page (https://<IP_FQDN>:5480)
- Next, open a web browser and navigate to the Orchestrator Appliance Home Page.
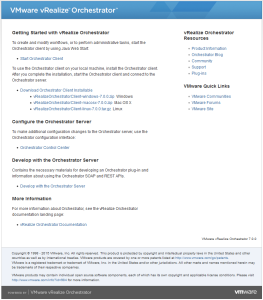
- Optionally, you can also download and install the Orchestrator Client from here.
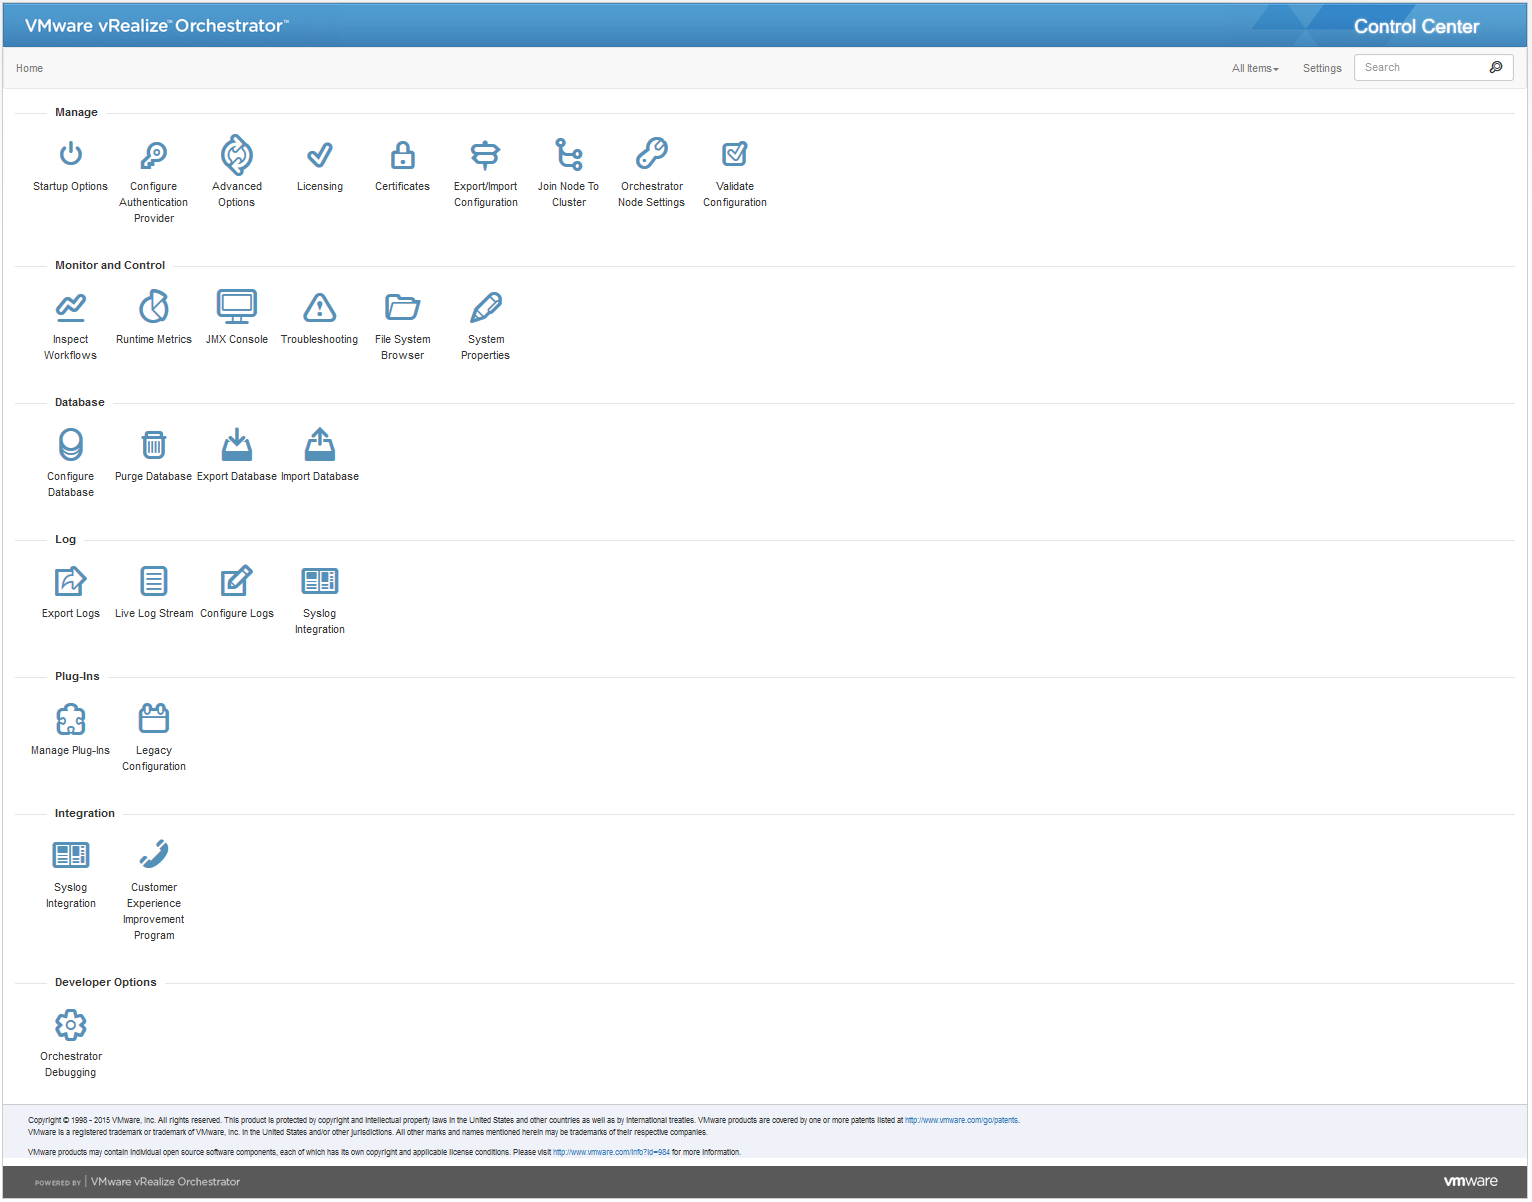
- Next, open the Orchestrator Control Center and you should now see the new Orchestrator Control Center GUI.

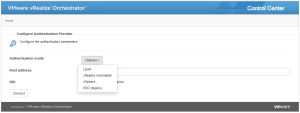
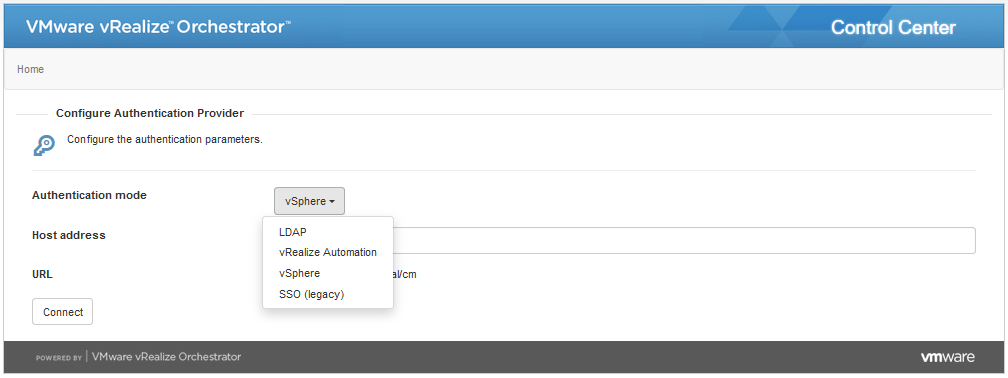
- Go to Configure Authentication Provider under the Manage menu and configure an applicable authentication provider.
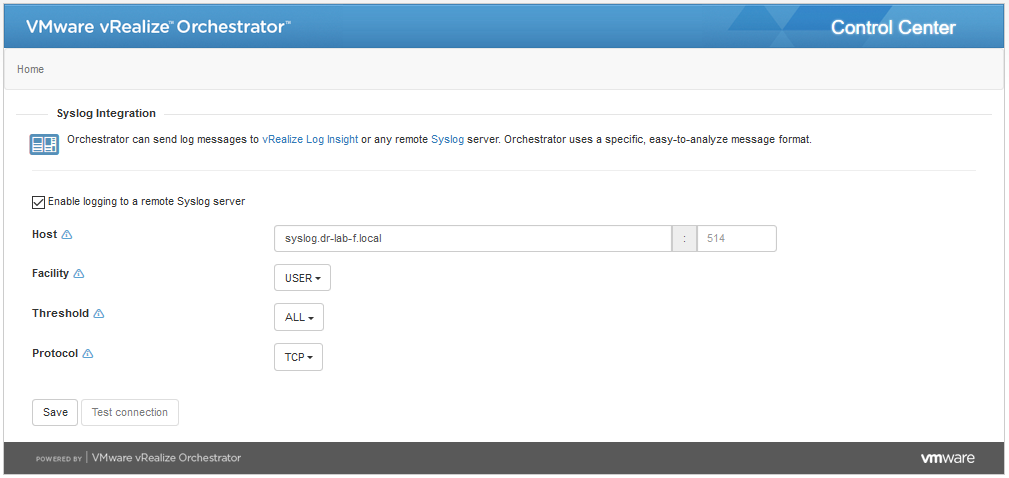
- Next, go to Syslog Integration under the Syslog menu and enter enable logging to a remote syslog server if you use one.

- Optionally, configure an external database if you use one or you are planning a cluster deployment of vRealize Orchestrator 7.
- You can now start installing custom plug-ins etc.
This concludes the install and configure vRealize Orchestrator 7 procedure. As you can see, the installation process is still the same as in version 6.x but the new control center is a bit clearer and easier to navigate in my opinion.
Cheers!
– Marek.Z
Be the first to comment