In the previous part of the automated deployment of vRealize Suite in VCF 4.1, we deployed the vRealize Log Insight and we also configured additional settings. This part will cover deployment and configuration of vRealize Automation 8.1.
Before you begin, make sure that you have the vRealize product bundles downloaded on the SDDC Manager and the vRSLCM has synchronized its inventory.
Prerequisites
Before you begin with the deployment, verify that your environment meets the following requirements.
Deploy vRealize Automation
Note: You configure deployment details and deploy vRealize Automation 8.1 by using vRealize Suite Lifecycle Manager. You then use SDDC Manager to apply Patch 1 to vRealize Automation.
Create Multi-SAN Certificate
Just like all the other vRealize products, the vRA cluster will consist of 3 nodes with an internal load balancer. Before the deployment, you must import or configure an SSL certificate for the cluster. In this case, I will create a self-signed SSL certificate, but it is recommended to use a CA signed one in production environments.
- Log in to vRSLCM as vcfadmin@local user under My Services, go to Locker.
- On the Certificate page, click Generate.
- Enter certificate name and fill in all required information. Make sure that Server Domain/Hostname contain all FQDN’s for the vRA appliances and the IP addresses field contains correct values as well.
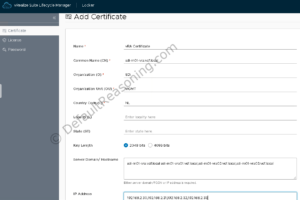
- Scroll down and hit the Generate button.
Add vRealize Automation password
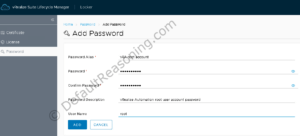
Next, we need to add the password for the vRA root account.
- With the vRSLCM still open on the Certificate page, go to Password on the left pane.
- Click Add.
- Enter the password alias, password itself, description, and the use name as well. For vRA this is the “root” user.
- Click the Add button.
Add vRealize Automation to x-Regional Environment
The vRealize Automation cluster resides on the cross-regional network within AVN. Since this environment was already created when we deployed vRealize Operations Manager, we simply have to add vRealize Automation as a new product to that environment.
- On the vRSLCM home page, go to Lifecycle Operations -> Manage Environments.
- On the Cross Regional Environment, click the “3 dots” button and select Add Product.
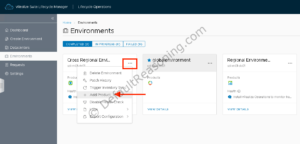
- Select vRealize Automation, make sure that New Install is selected and click Next.
- Accept the EULA.
- Select or add correct license.
- On the Certificate page, select the vRA multi-SAN certificate created earlier.
- The Infrastructure page will be pre-populated so just click Next to continue.
- The Network page will be pre-populated for you as well. Click Next.
- On the Products page, make sure that the correct certificate and product password are selected from the drop-down list.
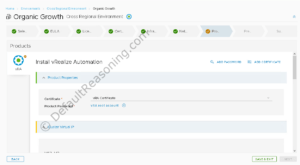
- Scroll down to Cluster Virtual IP and enter the FQDN for vRA VIP address.
- Next, scroll down to the Components part and for every vRA node enter the VM name, FQDN, and IP address. Once done, click Next.
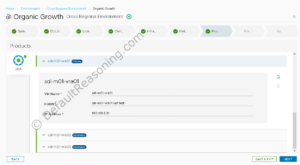
- Run the precheck. Fix issues if any. Click Next when validation is successful.
- Review the settings on the Summary page and click Submit to start the vRA deployment.
Apply Patch to vRealize Automation
As mentioned above, the vRA is deployed by the vRSLCM but the patch installation will be executed via the SDDC Manager.
- Log in to your SDDC Manager with your administrator account.
- First, verify that the vRA Patch 1 has been downloaded. If it is not downloaded yet, schedule the download or click Download Now.
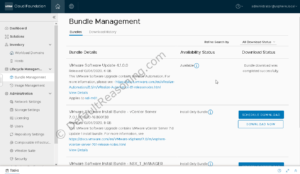
- Next, on the left pane select Workload Domains under Inventory, and click on your Management Workload Domain.
- Notice that the update has been detected by the SDDC Manager. You should see a “1” next to the Update/Patches.
- Scroll down to Available Updates and schedule the update of vRA.
Note: This process can take several hours to complete so plan this upgrade accordingly with your maintenance window.
Once completed, the patch will be applied to all vRA instances in the cluster.
Configure NTP
Check if the vRA cluster has the NTP settings synchronized.
- Log in to the first vRA appliance using SSH as the root user.
- Configure your NTP server with:
# vracli ntp systemd --set <FQDN or IP of your NTP server> - Apply the settings with:
# vracli ntp apply - Verify the settings with:
# vracli ntp status - In the output window, make sure that the Network time on and NTP synchronization are both set to Yes. The ESXi time sync configuration should be set to Disabled.
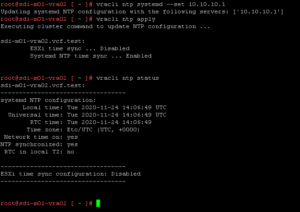 6. Close the SSH session.
Repeat these steps for all nodes in the vRA cluster.
Configure Anti-Affinity rules
As mentioned in the documentation, to protect the vRA VM’s from a host-level failure, you must configure DRS to run the virtual machines on different hosts in the cluster.
Define start-up order for vRealize Automation appliances
Just as with vRealize Operations Manage and vRealize Log Insight, we need to make sure that the vRA cluster powers on after the WS1A appliances.
- Open the Management vCenter Server and log in as administrator@vsphere.local.
- Select the cluster resource and on the Configure tab, go to Configuration -> VM/Host Groups.
- Click the green Add button, enter a name for the group (i.e. vRA Appliances), and add all vRA VM’s as members of this group. Click OK to create the group.
- Next, create a rule to power-on the WS1A before the vRLI cluster.
- Under Configuration, select VM/Host Rules.
- Click Add.
- Enter the rules name (i.e. vRA-WS1A-Dependency), Virtual Machines to Virtual Machines as Type, and set the dependency of vROps VM’s to the WS1A VM’s.
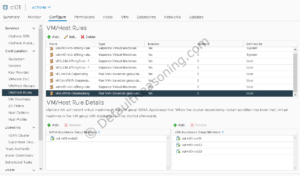
- Click OK.
Integrate vRealize Automation with vRealize Operations Manager
- Open your browser and navigate to your vRA cluster VIP FQDN.
- Log in with the configadmin account on the System Domain.
- Go to Services and click on Cloud Assembly under My Services.
- Click on the Infrastructure tab and select Integrations under Connections on the left pane.
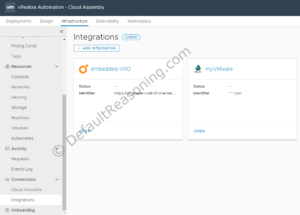
- Click Add Integration and select vRealize Operations Manager as the integration type.
- Provide a name and description. Enter the vROps URL with the /suite-api in the URL. Provide the username and password. Click Validate.
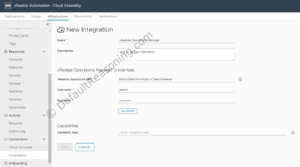
- Once validated, click Add.
- Next, we need to update the vRA integration in vROps.
- With your browser still open, navigate to the vROps VIP and log in as admin user.
- On the Administration tab, go to Integrations under Management on the left pane.
- Click the ellipsis button next to vRealize Automation and click Edit.
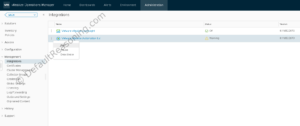
- Verify the FQDN for vRA and click Validate Connection.
- Accept the certificate.
- Click Save.
The status of the VMware vRealize Automation 8.x adapter should now read OK.
This concludes part 4 in the automated deployment of vRealize Suite 4.1 series. As this is the last part of the series, I hope it gives you a good picture how the process works, and you will be able to deploy the vRealize Suite products by yourself using the vRealize Suite Lifecycle Manager.
Cheers!
– Marek.Z
- Automated Deployment of vRealize Suite 2019 in VCF 4.1 – Part 1 (vRSLCM & WS1A)
- Automated Deployment of vRealize Suite 2019 in VCF 4.1 – Part 2 (vROps)
- Automated Deployment of vRealize Suite 2019 in VCF 4.1 – Part 3 (vRLI)
Be the first to comment