As we now know what vCloud Suite is from part one of this series, we can now start preparing the environment for deployment of the vCloud Director. Before we can start with the installation, there are certain components that must be configured first.
Prepare the Database
Before you begin with vCloud Director Installation, you have to create a database with specific configuration. You can use Oracle or Microsoft SQL to do it. In this case, I’ll use the Microsoft SQL database engine. The queries used to create the database can be found in the vCloud Director Installation and Upgrade Guide.
- Login to your SQL server and open the Microsoft SQL Server Management Studio.
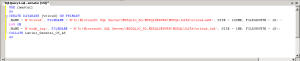
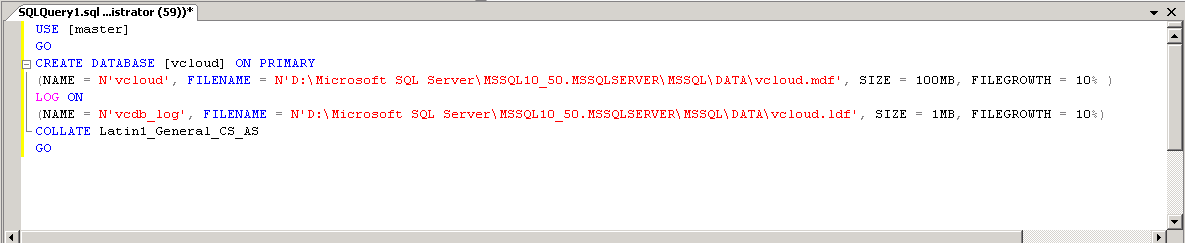
- Open a new query and create the database instance. You can change the path to your database files and the database size. Run the query.
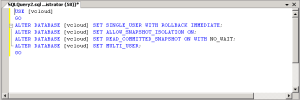
- Close the query, save it if you want to and open a new query window. Create the transaction isolation. Run the query.
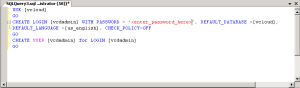
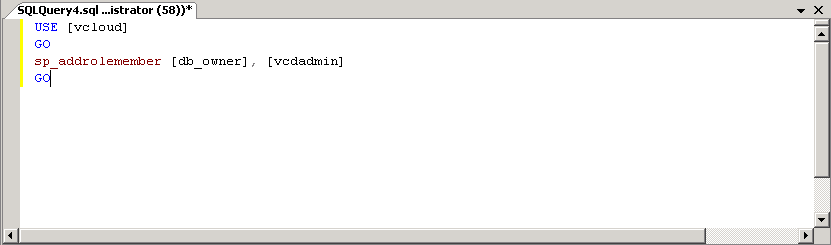
- Close the query, save it if you want to and open a new query window. Create a vCloud Director Database user. Change the name and password. Execute the query.
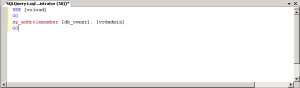
- Close the query, save it if you want to and open a new query window. Next, add permissions to the vCloud Director Database user account.


The database is now created.
Prepare the OS
Next step in the process is the configuration of the operating system for installation of the vCloud Director, in this case CentOS 6.3 (which is not supported by VMware by the way).
- When the OS is installed, verify that DNS can be resolved using FQDN and IP address.
- Verify the NTP server settings.
- Check the Java Runtime Environment version. vCloud Director 5.1 requires at least version 1.6.0 Update 10. Install the latest version if necessary.
- Open port 443 on the firewall by editing the /etc/sysconfig/iptables and entering the following line: -A INPUT -m state –state NEW -m tcp -p tcp –dport 443 -j ACCEPT
- Restart the firewall by typing: # service iptabels restart
The OS is now ready for deployment.
Create SSL Certificates
Next, the vCloud Director Server needs two SSL certificates, one for the HTTP service and one for the console proxy service. You can use signed or self-signed certificates. In this case I’ll use self-signed SSL certificates.
- Login as root on the vCloud Director machine.
- First, install the keytool: # alternatives –install /usr/bin/keytool keytool /usr/java/latest/keytool 1
- Next, configure the keytool: # alternatives –config keytool
- Select the path you installed in step 2.
- Create an untrusted certificate for HTTP service: # keytool -keystore certificates.ks -storetype JCEKS -storepass <password> -genkey -keyalg RSA -validity 731 -alias http
- Answer the questions accordingly.
- Create an untrusted certificate for the console proxy service: # keytool -keystore certificates.ks -storetype JCEKS -storepass <password> -genkey -keyalg RSA -validity 731 -alias consoleproxy
- Answer the questions accordingly.
The SSL certificates are now created.
Add transfer storage
vCloud Director needs a temporary NFS shared storage for uploads and downloads. Create a NFS share on a NFS server, I used my OpenFiler virtual machine, and make sure that the vCloud Director server has read/write permission for the root user on the share.
- Login to the vCloud Director with root user, directly or through SSH.
- Create the /opt/vmware/vcloud-director/data/transfer directory by typing: # mkdir –p /opt/vmware/vcloud-director/data/transfer
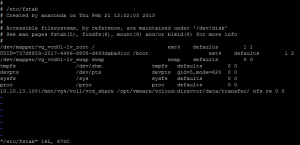
- Mount the NFS share by typing: # mount <IP_or_FQDN_NFS_Server>:<path>/<share> /opt/vmware/vcloud-director/data/transfer See the screenshot below for an example.

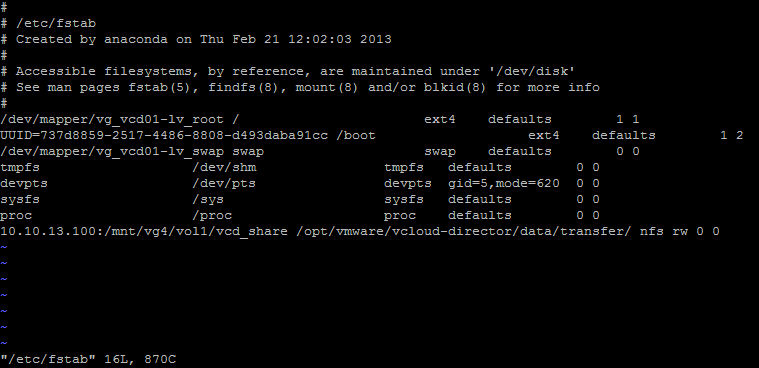
- To make this NFS mount auto connect when the vCloud Director is rebooted, edit the /etc/fstab file and enter following at the end of the file: 10.10.13.100:/mnt/vg4/vol1/vcd_share /opt/vmware/vcloud-director/data/transfer/ nfs rw 0 0
- You should end up with something like this.
- Save the file and exit.
- Reboot the machine and verify if the share is auto mounted.
Deploy vCloud Networking & Security
vCloud Director needs vCloud Networking and Security (vShield Manager) to provide network services to the cloud. So, vShield Manager must be deployed before the vCloud Director installation.
- Open vSphere Web Client and login to the vCenter Server.
- From the Home page, click Hosts and Clusters and select the cluster object.
- Click the Actions button and select Deploy OVF template.

- Select Local file as source option and click the Browse button.
- Change the file type to OVA and select the vShield Manager OVA package. Click Open and then Next in the Deploy OVF Template wizard.
- When the package is verified, review the details and click Next.
- Accept the EULA and click Next.
- Specify a name and location for the vShield Manager, click Next.
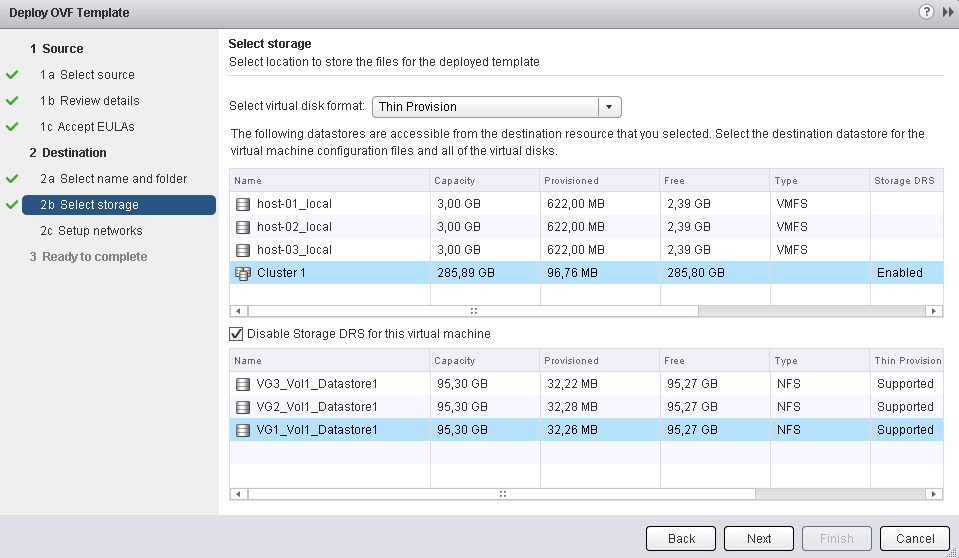
- In the Select storage part, select a datastore for the vShield Manager virtual machine. Click Next.

- Select which network the vShield Manager virtual machine should use and click Next.
- Review the settings and check the Power on after deployment option. Click Finish to start the vShield Manager deployment.
- Select the vShield Manager virtual machine and launch the console.
- Login with user admin and password default.
- Type enable to enter the configuration mode.
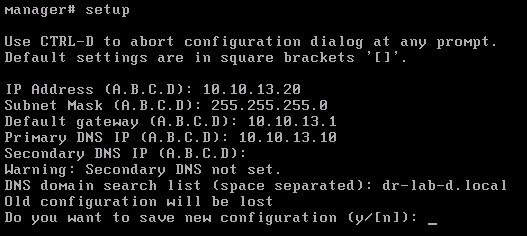
- Type setup to start the setup procedure.
- Provide an IP address, subnet mask, default gateway, primary and secondary DNS server and the DNS domain search list. Press Y to save the configuration.

- Type exit to log out of the vShield Manager.
- At this point, as security best practice, you should login to the vShield Manager Web interface and change the password of the admin user.
- Next, connect the vShield Manager to the Lookup Service. Provide the host, SSO administrator username and password. Accept the unsigned certificate warning.
- Connect to the vCenter Server. Accept the unsigned certificate warning.
- Verify the DNS, NTP and Syslog server settings. Update the settings if necessary.
- Reboot the vShield Manager.

Install vCloud Director
When the above steps are completed, it’s time to install the vCloud Director.
- First, upload the binaries to the vCloud Director Cell.
- Next, make the downloaded file executable: # chmod u+x vCloud_director_installation_file
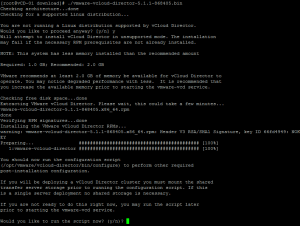
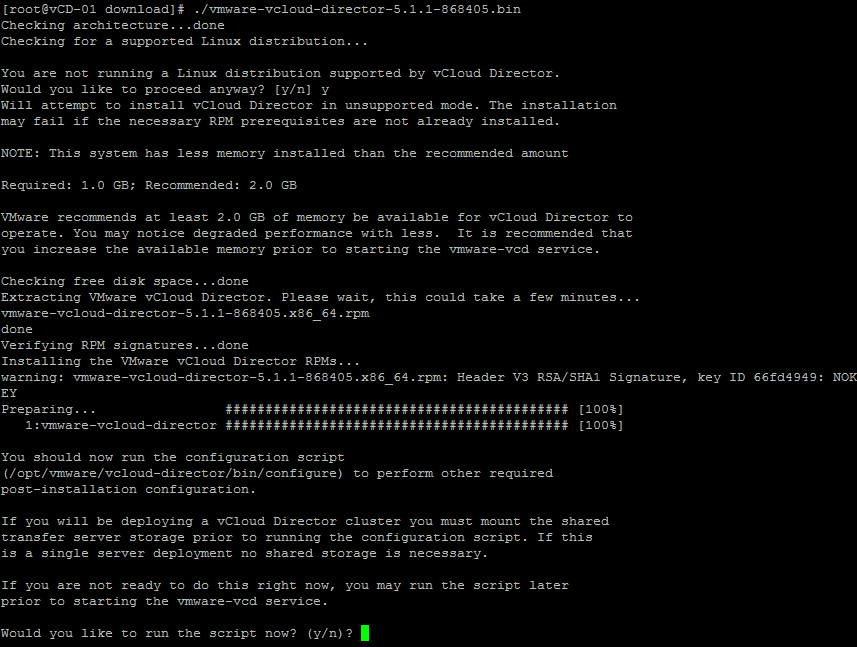
- Execute the installer: # ./vCloud_director_installation_file
- Since I’m using CentOS, the “You are not running a Linux distribution supported by vCloud Director” warning will be displayed. Type Y to proceed anyway.
- If you get the “error: unpacking of archive failed on file /opt/vmware/vcloud-director/data/transfer: cpio: chown failed – Operation not permitted” error during the installation, make sure the NFS export for transfer storage has the “no_root_squash” option enabled.
- When the preparation is ready, type Y to run the configuration script.
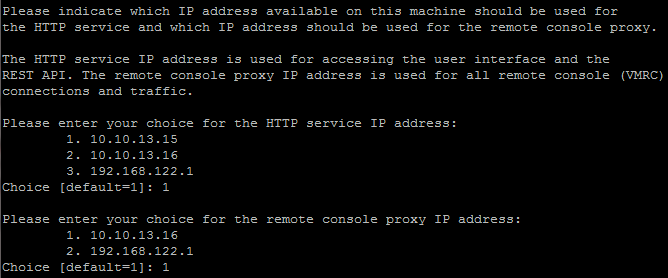
- Choose the IP address that will be used for the HTTP service.
- Next, choose the IP address that will be used for the remote console proxy.

- Enter the path to the directory containing the SSL certificates. In my case, /opt/certificates/certificates.ks and enter the password.
- Enter the IP address or hostname of the syslog host.
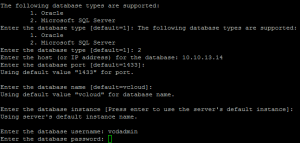
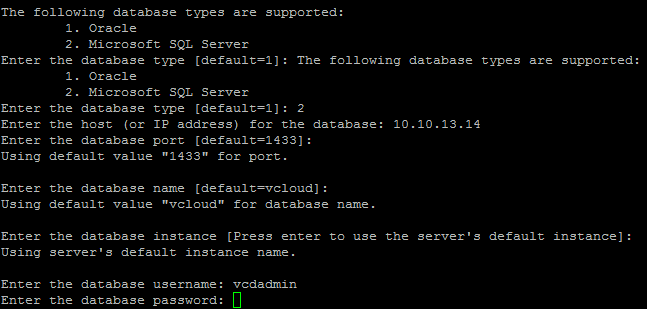
- Choose your database. In my case, I created a Microsoft SQL Database.
- Enter the hostname or IP address of the database server and provide the port number.
- Provide the database name and enter the database instance.
- Enter the database username and password.
- The installer will run the database configuration scripts and when the process completes successfully, answer with Y to start the vCloud Director services.
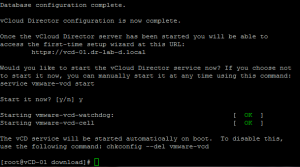
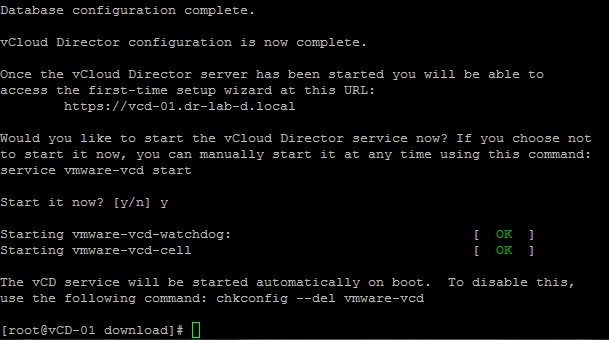
The vCloud Director is now up and running. Access the vCloud Director interface by opening the URL provided at the end of the configuration script.
Continue to part 3 where we will configure vCloud Director system settings.
Cheers!
– Marek.Z
Having an issue with keytool saying “command not found” yet it’s in the directory it’s supposed to be in and I even started the install for vCloud Director and use the keytool in the /opt/vmware/vcloud-director/jre/bin/ directory..same error?
Shouldn’t be a problem… I assume you installed it correctly?
# alternatives –install /usr/bin/keytool keytool /usr/java/latest/keytool 1