VCF multi-pNIC and multi-VDS support in UI feature has been on the VCF roadmap for a while. Until now, this feature was available using API but in VCF 5.1, it is now available in the SDDC Manager UI. Let’s have a look how the workflow looks like in the SDDC Manager and explore the customization features as well!
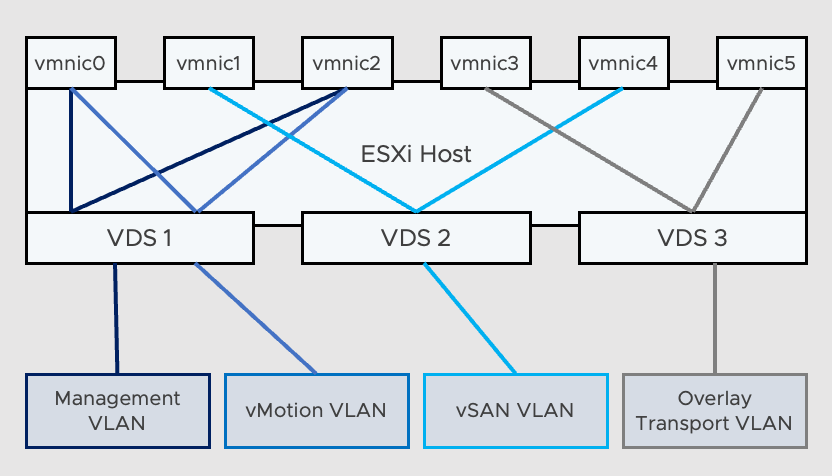
Consider the following example
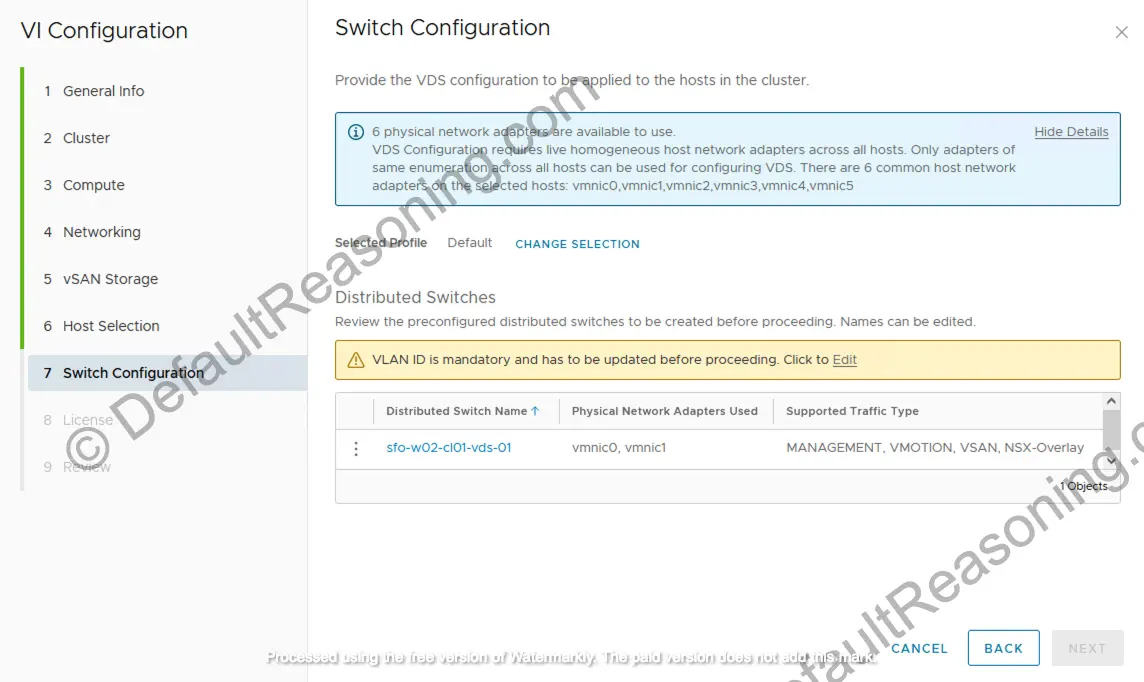
Switch Configuration
When you go through the VI Configuration workflow, after the Host Selection part, you’ll see a new input window for the VDS switch configuration in the new Workload Domain. Note the pre-configured profiles.
Default
This profile creates 1 VDS with 2 NIC’s and all traffic types.
Storage Traffic Separation
This profile creates 2 VDS’s with 4 NIC’s and separates the vSAN traffic.

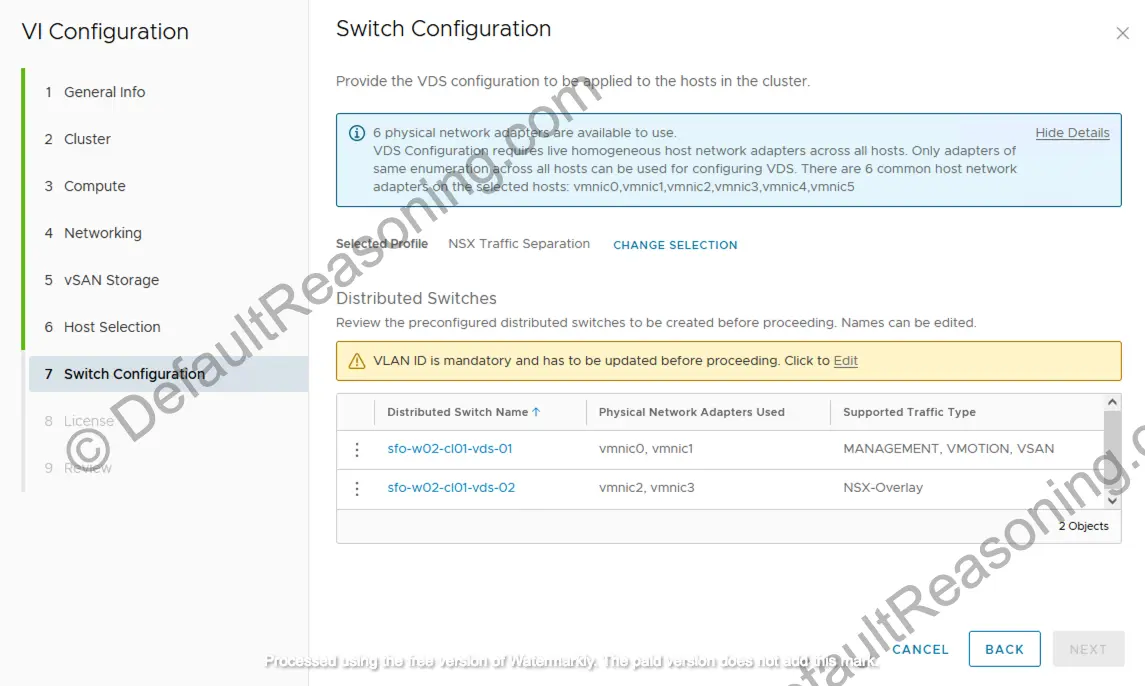
NSX Traffic Separation
This profile is basically the same as the previous one except that here the NSX-Overlay traffic is being separated instead of vSAN.
Storage Traffic and NSX Traffic Separation
This profile is combination of both Storage and NSX traffic separation. It creates 3 VDS’s with each 2 NIC’s.

Custom
If you scroll down, you will see an option to create custom switch configuration. This creates an empty profile, where you can create you own specific configuration. Note that you can also copy the configuration from per-configured profile and modify it.
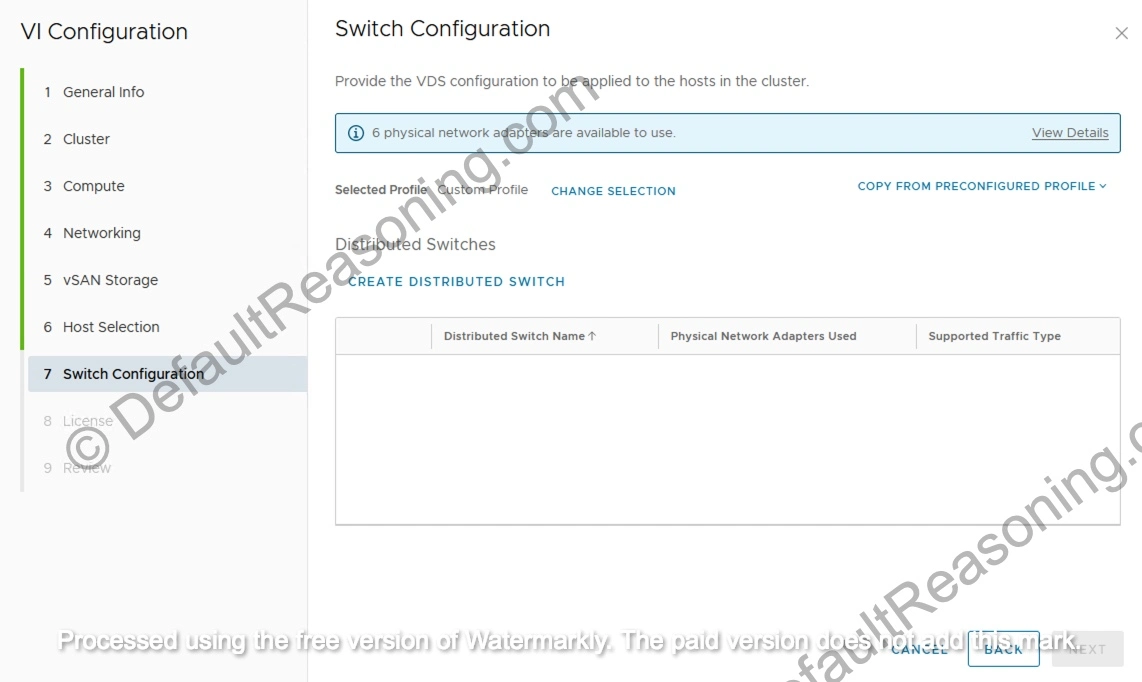
Create Custom Switch Profile
This example will follow the network design mentioned at the beginning of this blog.
- Once you have selected the Custom Profile option, click Create Distributed Switch.
- Provide a name, MTU, and number of uplinks you want to use for the first switch. Note that you can extend up to the maximum available physical network adapters on the host.
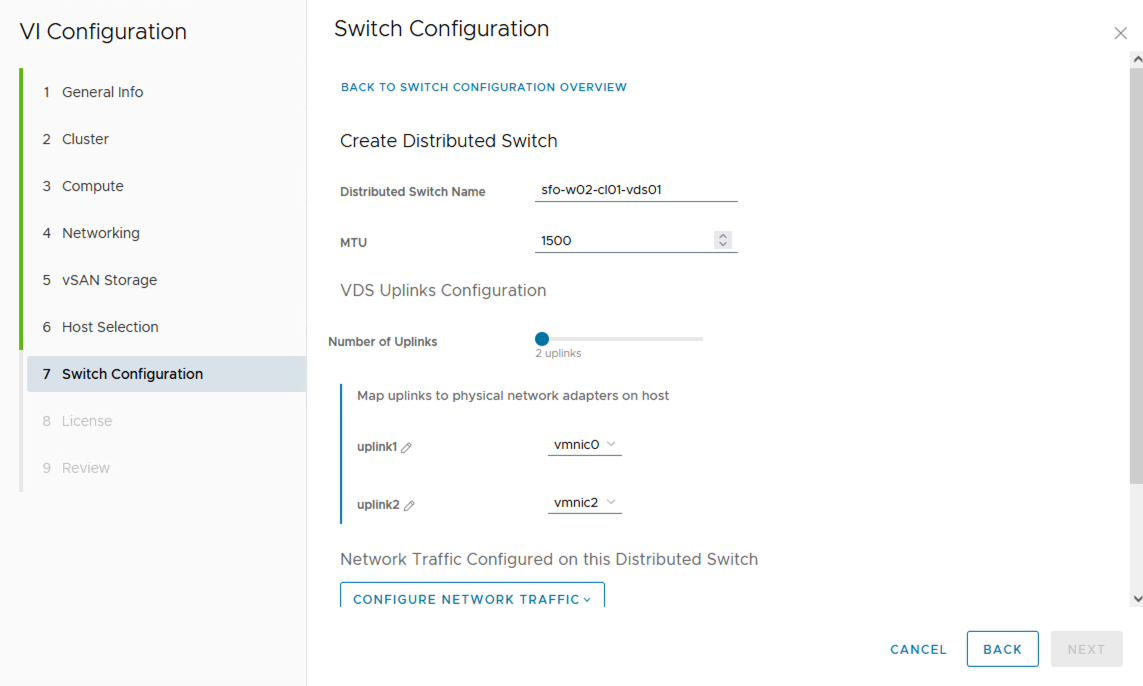
- Next, scroll down and configure the network traffic on the Configure Network Traffic button and selecting the network traffic type, in this case, Management.
- A new workflow window will open and ask for Distributed PortGroup Name, Load Balancing policy, and uplinks settings.
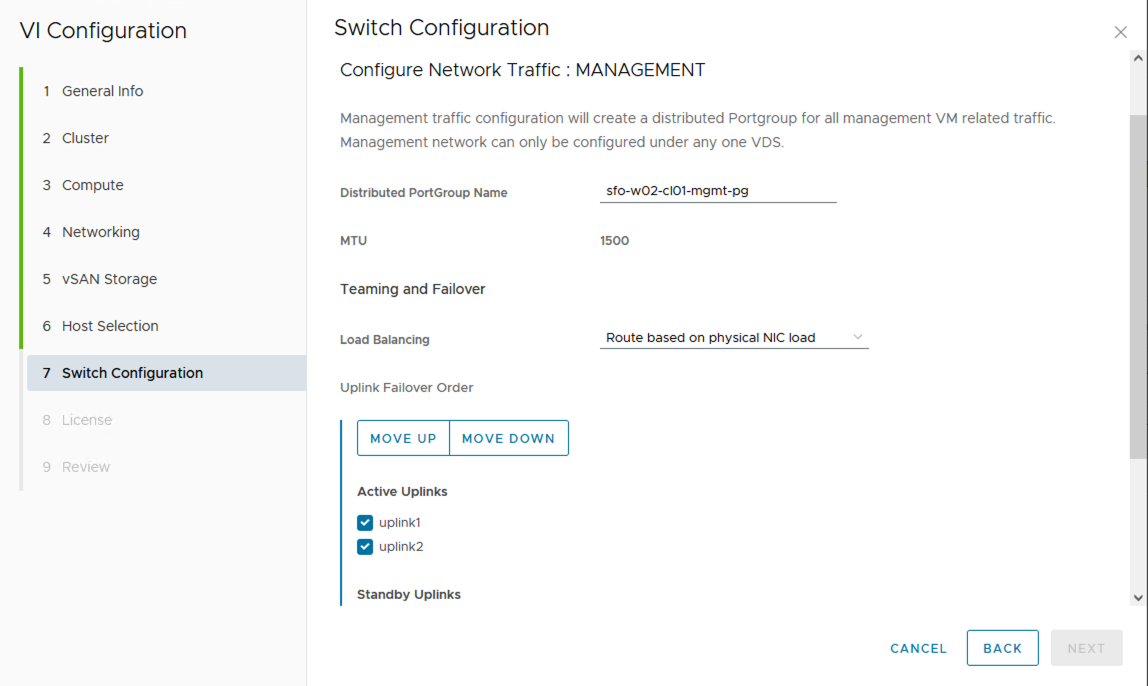
- Click Save Configuration at the bottom of the workflow. Management portgroup configuration summary is now visible in the main workflow pane.
- Scroll up and click Configure Network Traffic once again, select vMotion.
- Provide the portgroup name, select load balancing policy, and select active uplinks.
- Click Save Configuration.
- The vMotion network traffic settings are added to the switch configuration.
- Save the settings for VDS01 by clicking Create Distributed Switch button.
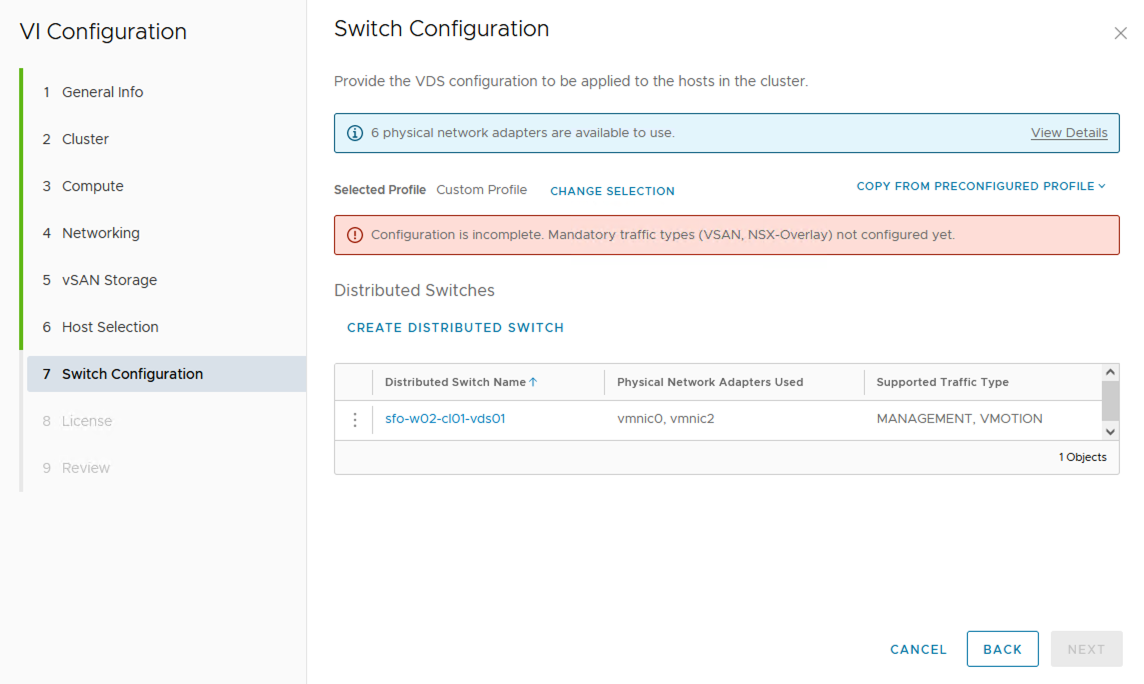
- Click Create Distributed Switch button again and create VDS02 with vmnic1 and vmnic4. Make sure you add vSAN network traffic here.
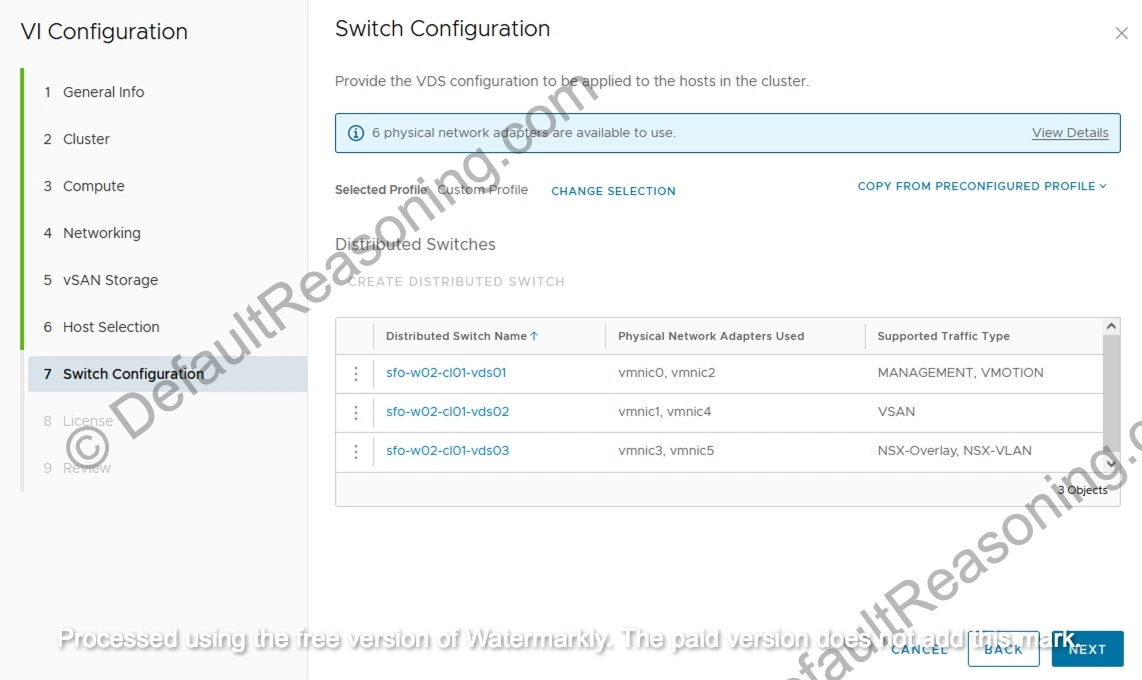
- Repeat the process for VDS03 with vmnic3 and vmnic5. Make sure you add NSX overlay network traffic here.
- Enter the NSX traffic configuration as per your design.
- Once the network configuration is created, the error should disappear, and you should see an overview of your configuration.
- Continue to follow the VI Configuration workflow, select licenses, and review the configuration of the Workload Domain.
- Click Finish to start the deployment process.
Deployment process may take some time to complete. After the deployment process is finished, take time to review the network configuration details of both the ESXi hosts and the NSX cluster.
And there you go! You can now create custom (or predefined) switch configuration from SDDC Manager UI. No need to do it from API. However, if you need to create switch profile with more than 3 VDS’s or more than 6 physical network adapters, you will still have to do it via API call.
Cheers!
Marek.Z
Be the first to comment