The last couple of days I’ve been playing around with vSphere App HA in my home lab, so here is a small series on how to install and configure vSphere App HA version 1.1. Before we begin let’s have a look at what vSphere App HA actually is.
vSphere App HA is a feature that complements the functionality of VMware vSphere High Availability with application-level monitoring and automated remediation. App HA improves application uptime through policy-based application monitoring and remediation, integration with vSphere HA to provide multiple recovery options, e.g. restart the application service or restart the virtual machine.
vSphere App HA also eliminates the need for application-specific clustering solutions, therefore reducing the complexity involved in managing infrastructure silos, as well as cost associated with the solutions. vSphere App HA provides uniform protection and support for many commonly used, off-the-shelf applications. Simple, centralized management through app-health visibility from VMware vCenter Server.
Source: VMware.com
Before you begin make sure you have read the following:
- vSphere App HA Release Notes
- vSphere App HA Installation and Configuration Guide
- vSphere App HA User’s Guide
- VMware Compatibility Guide
Also, make sure your environment meets the following prerequisites before the installation:
- A vCenter Hyperic vApp is deployed, configured and monitoring your environment.
- DRS is enabled on the cluster where you will deploy the vSphere App HA virtual machine.
- Make sure VM and Application Monitoring is enabled in the HA settings of the cluster.
- There is an IP pool configured for the vSphere App HA (since you are obligated to deploy vCenter Hyperic, you probably already have a IP pool set up in your environment).
- Make sure that port 22 (access to vSphere App HA appliance) and port 8443 (REST API) are open on your network.
Deploy vSphere App HA
The vSphere App HA ships as an OVA file.
- Open vSphere Web Client, connect to your vCenter Server and log in with your administrator account.
- Start the Deploy OVF Template wizard and enter the path where you downloaded the OVA file.
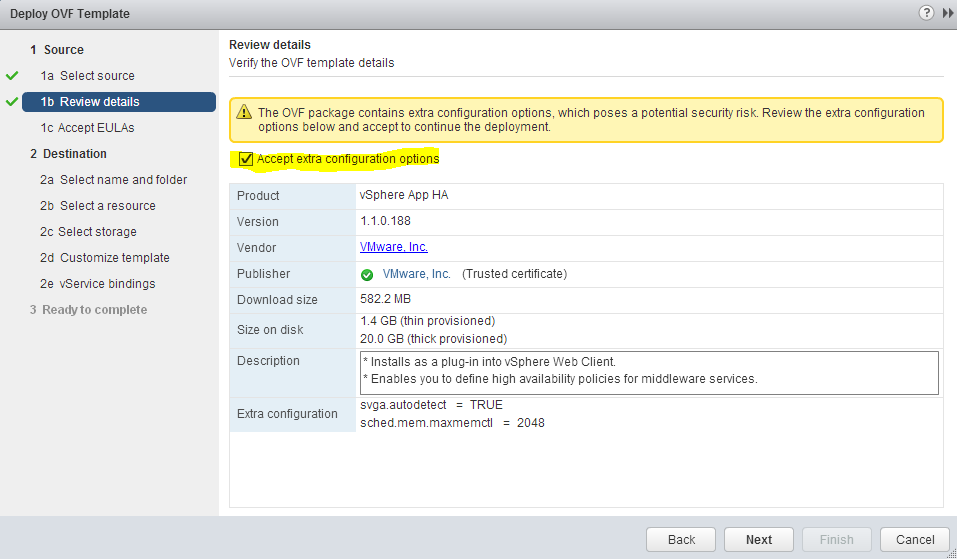
- In the Review page, select the Accept extra configuration options and click Next.

- Accept the EULA and click Next.
- Provide a name and select a folder where the VM will be located.
- Next, select a cluster and a host in which the VM will be deployed.
- Select the virtual disk format, VM storage policy if you use any and select a datastore where the vApp will be stored.
- Next, select the appropriate destination network from the drop-down menu. Click Next.
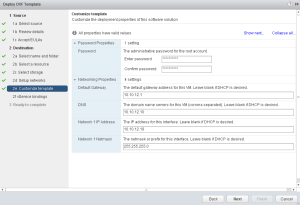
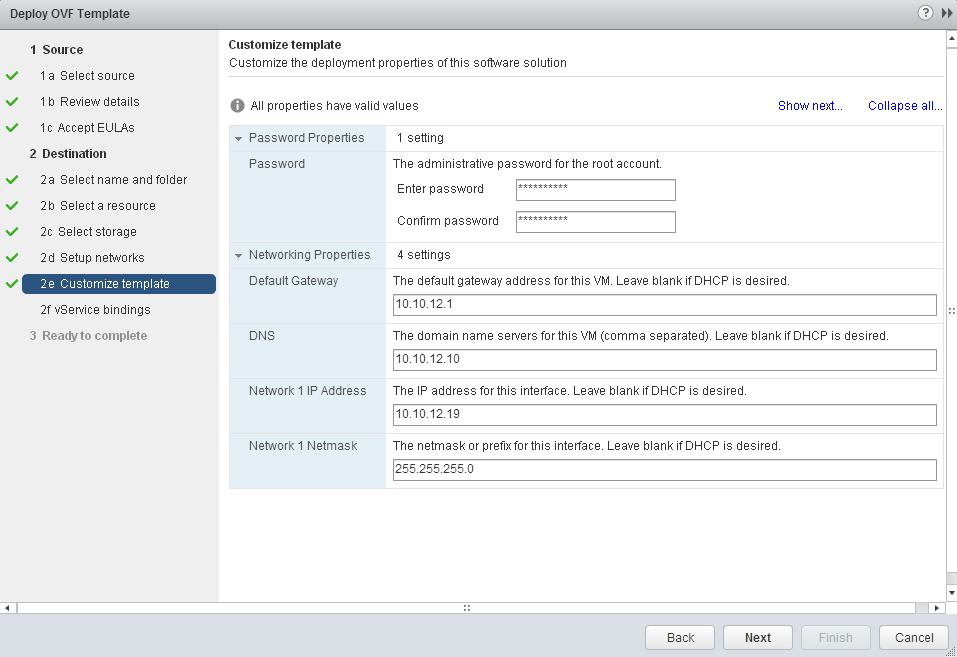
- Enter the administrative password for the root account and enter the default gateway, DNS servers, IP address and network mask for the VM.
- On the vService bindings page, click Next to proceed.
- Select the Power on after deployment checkbox and click Finish to start the VM deployment.
When the VM is up and running you need to log out and log back in to the vSphere Web Client so you can access the vSphere App HA plug-in in the list of vCenter Server extensions.
vSphere App HA Setup
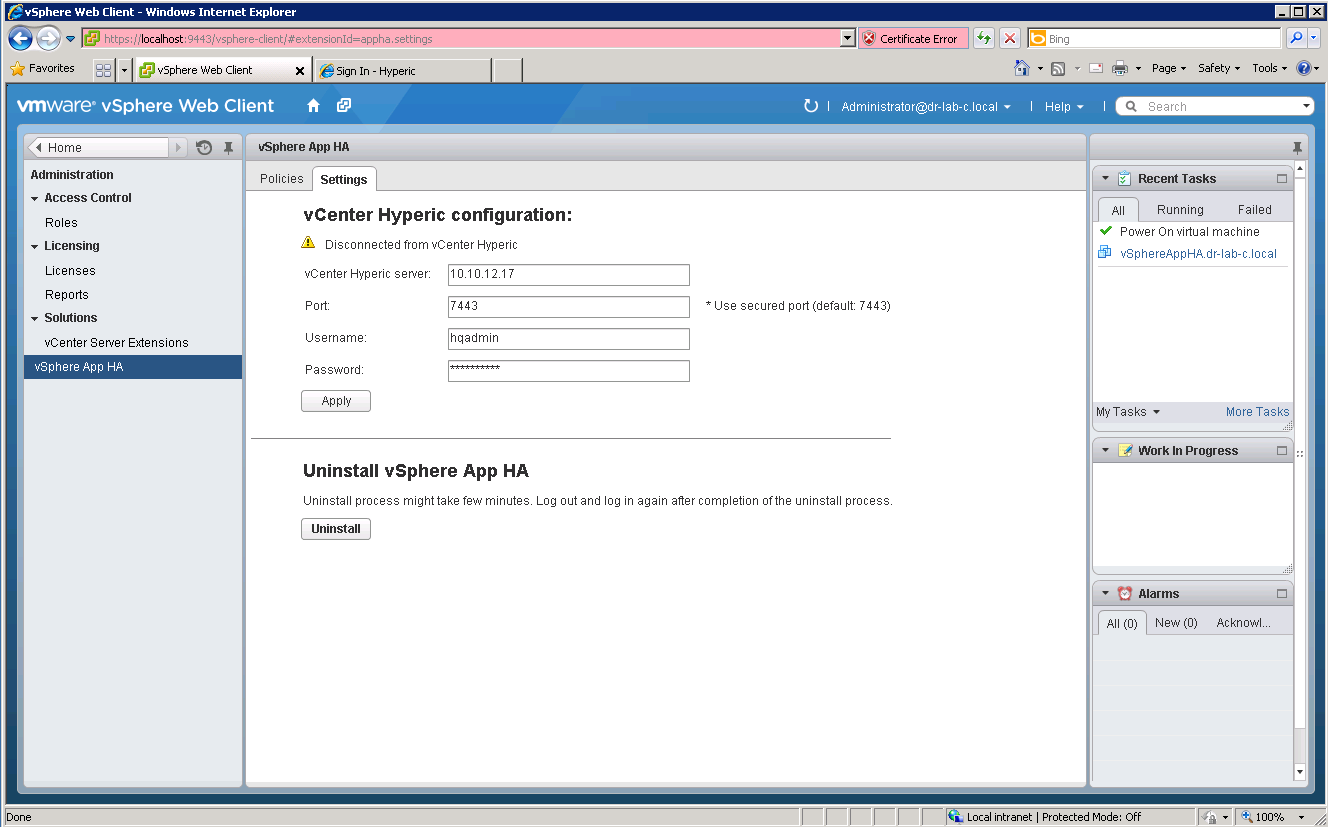
- When you reopen the vSphere Web Client, select Administration and then select vSphere App HA.
- Next, select the Settings tab.
- Enter the vCenter Hyperic server IP address or FQDN, port, username and password for the vCenter Hyperic server. Click Apply button.
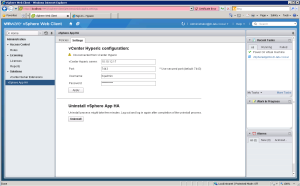
- An error message should appear stating that you need to approve the certificate. Click the link provided in the error message and approve the certificate.
- The vCenter Hyperic configuration should now read Connected to vCenter Hyperic.
This concludes the first part of the vSphere App HA install and configure series. Continue to part 2 where we will configure the remaining vSphere App HA settings.
Cheers!
– Marek.Z
Be the first to comment