In the previous part, we have deployed a vSphere App HA virtual machine and we also configured the connection for the vCenter Hyperic server that the vSphere App HA will use. In this part we will continue with the remaining vSphere App HA configuration settings.
vCenter Hyperic Agent Properties File Configuration
To enable vSphere App HA alarms on the vCenter Server, you must configure certain values in the vCenter Hyperic agent.properties file. Before you can edit the Hyperic agent file, you must install the agent first. In my case, I will install the Windows based version of the client. You can download this agent from VMware. Agents for other OS types can also be downloaded there.
- Run the installer on the vCenter Server.
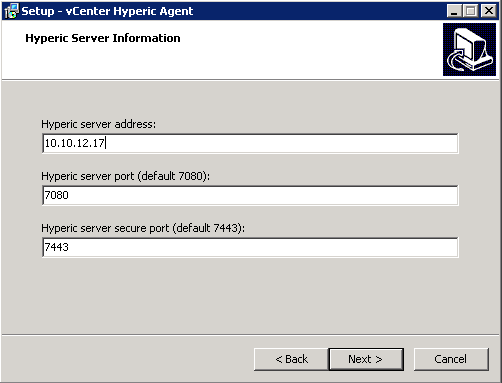
- Provide the vCenter Hyperic server IP address and lease the ports as default.

- Next, enter the username and password for the vCenter Hyperic server and click Next.
- Select No when asked if the communication with the server should be unidirectional and click Next.
- Select Yes when asked if the communication with the server should be secured and click Next.
- Select a folder where the vCenter Hyperic Agent should be installed or leave it to default.
- Click Next to start the installation process.
- Click Finish to end the installation process.
- Stop the Hyperic HQ Agent service.
- Open the folder where the agent has been installed, for example: C:\Hyperic-Agent\hyperic-hqee-agent-5.8.1\ and delete the data folder.
- Next, open the conf folder and edit the agent.properties file with notepad.
- Verify the following settings:
- agent.setup.camLogin = hqadmin
- agent.setup.camPword = <your_hqadmin_password>
- agent.setup.acceptUnverifiedCertificate = yes
- accept.unverified.certificates = true
- Save and close the file.
- Start the vCenter Hyperic agent on the vCenter Server.
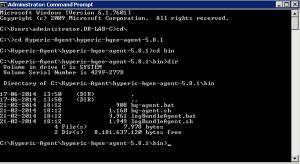
- Open the command prompt and navigate to the bin directory where the vCenter Hyperic agent is installed. See picture below for an example.
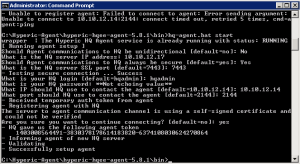
- Execute the hq-agent.bat start command. If the registration is unsuccessful due to connection time out, then you probably need to open TCP port 2144 on the Windows Firewall.
- When the hq-agent.bat start command completes successfully you should see something similar as depicted below.
- Close the command prompt.


Create vCenter App HA Plug-in
If you want to enable alarms to be sent from the vCenter Server in the event of a remediation action, you must create a new service in vCenter Hyperic.
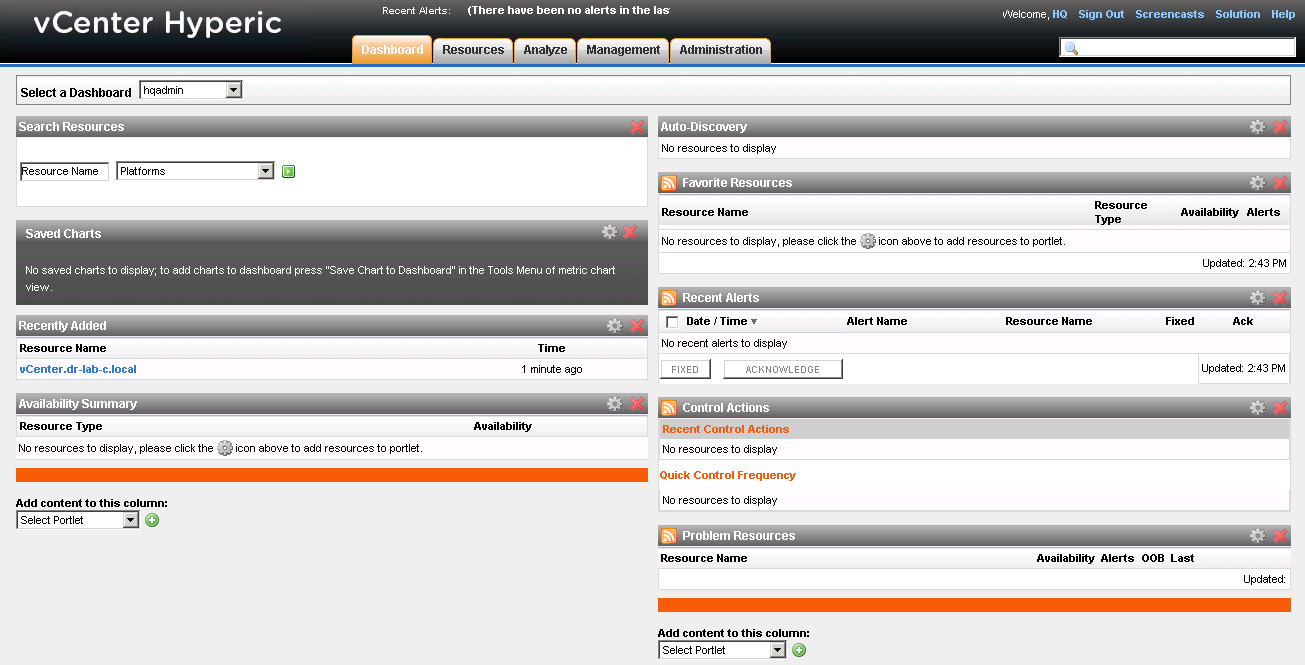
- Open your browser, navigate to the vCenter Hyperic server and log in.
- On the Dashboard tab add the vCenter Server to the inventory by clicking Add to Inventory button or if it is already added, click its link under the Recently Added pane.

- From the Tools Menu select New Server.
- Enter a name, description (optional), select the server type as VMware vCenter AppHA and enter a * (asterisk) as the install path. Click OK.
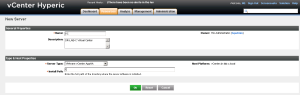
- The object will be created but you will see a warning stating that the resource has not been configured yet. Click the Configuration Properties link to continue.

- In the URL field, replace the localhost value with the IP address of your vCenter Server.
- Provide the username and password used to log in to the vSphere Web Client.
- Leave the process query settings to its default.
- Make sure that the Auto-Discover services option is not checked.
- Click OK.


This concludes part 2 of the vSphere App HA install and configure series. Continue to part 3 (coming soon) where we will put the vSphere App HA to a test!
Cheers!
– Marek.Z
- How To Install and Configure vSphere App HA – Part 1
Be the first to comment