

So far we covered almost any aspect of the VMware vCenter Site Recovery Manager. We have prepared and set up the infrastructure, paired the sites, configured the VR replication, set up inventory mappings, created a protection group, configured a recovery plan and performed a test failover. In this part we will perform a planned migration and an unplanned failover from the Protected Site to the Recovery Site to simulate a disaster recovery scenario. But first, let’s define both scenarios.
What is a planned migration?
“Planned migration enables you to migrate the workloads from the protected site to the recovery site with minimal risk of data loss. A planned migration will stop if there is an error in the workflow giving you an opportunity to fix it.”
What is an unplanned failover?
“Unplanned failover is a disaster recovery event where the connection between the sites has been lost. Unplanned failover will not stop if any errors are encountered in the workflow. This provides the quickest recovery time during a disaster event.”
Initiate Planned Migration
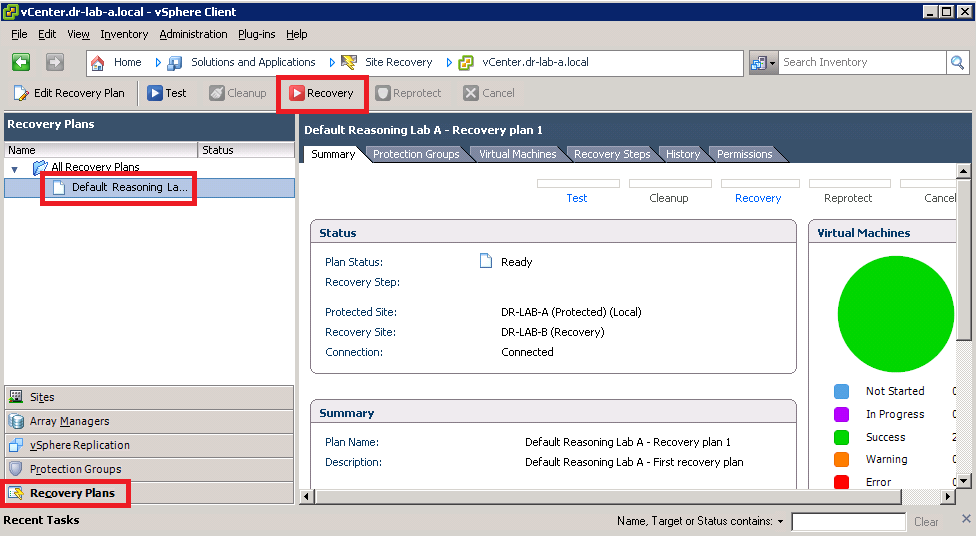
- Open the Site Recovery Manager on the Protected Site, click on the Recovery Plans in the left pane, select your recovery plan and click on the red Recovery button.

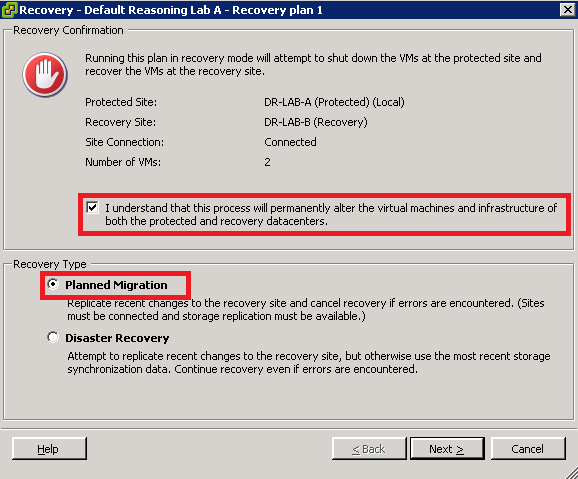
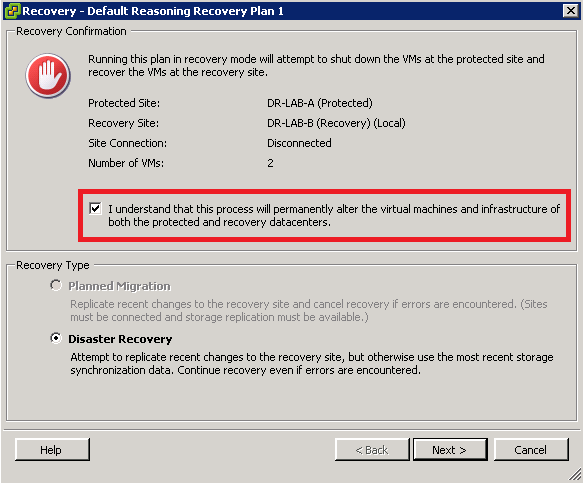
- Read the info in the Recovery Confirmation window, check the “I understand that this process will permanently alter the virtual machine and infrastructure of both the protected and recovery datacenters.” box and make sure that Planned Migration is selected under the Recovery Type. Click Next to continue.

- Review the info and click on Start to start the recovery process.
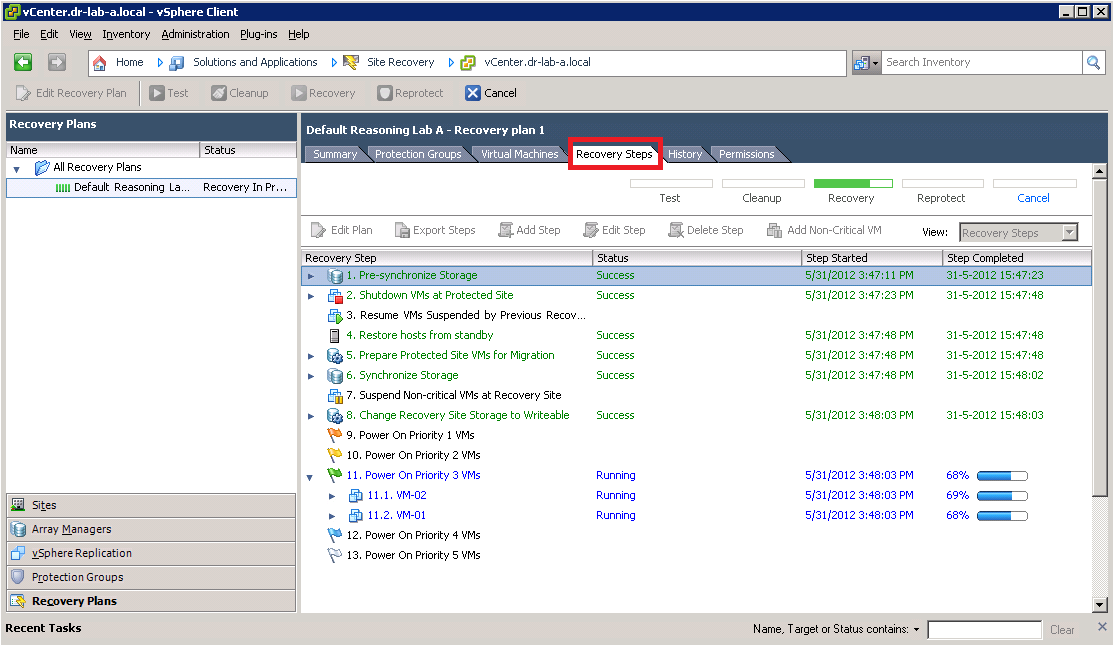
- Switch over to the Recovery Steps tab to see the progress.

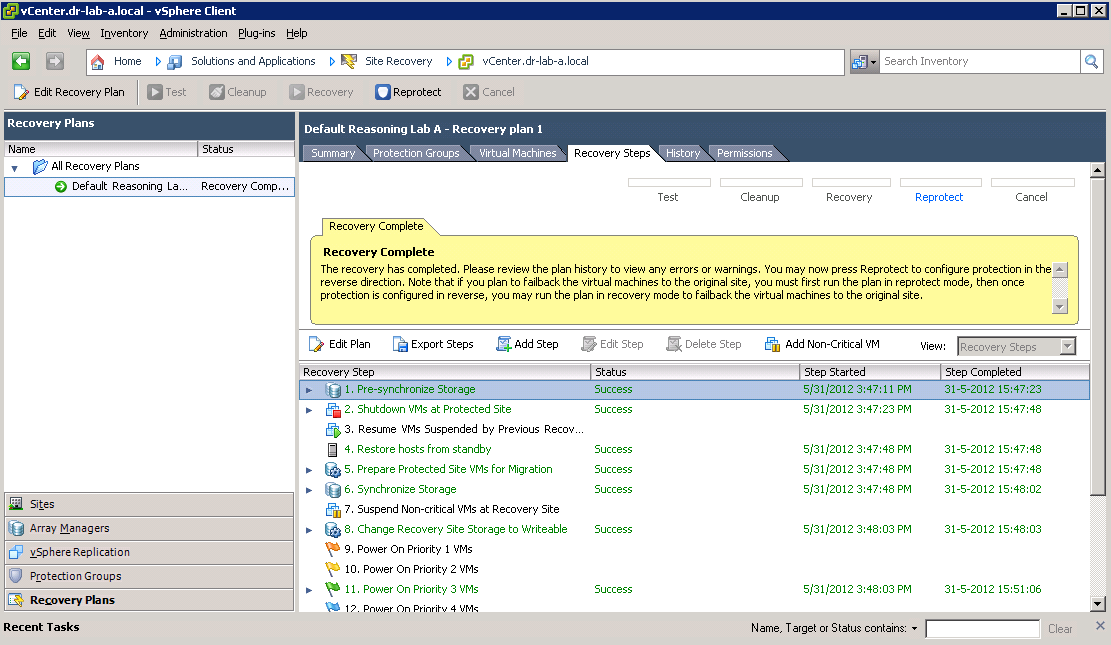
- When the recovery process completes, you should see a message as depicted in the screenshot below.

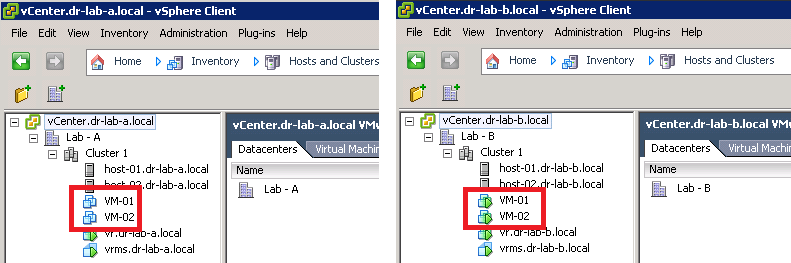
- Notice that the VMs on the Protected Site are powered off and on the Recovery Site, powered on.

Initiate Unplanned Failover
This process is very similar to the one performed with the Planned Migration but in this case the Protection Site is not available.
- On the Protected Site, simulate a disaster by powering off the vCenter Server and the ESXi hosts containing the protected VMs.
- On the Recovery Site, open the Site Recovery Manager, navigate to Recovery Plans and press the red Recovery button, just like in the previous step.
- By now you should get a warning stating that the connection to the vCenter Server at the Protected Site has been lost.
- In the Recovery Confirmation window, notice that the Planned Migration is now grayed out. Select the “I understand that this process will permanently alter the virtual machine and infrastructure of both the protected and recovery datacenters.” option and click Next to proceed.

- Review the settings and press Start to begin the recovery process.
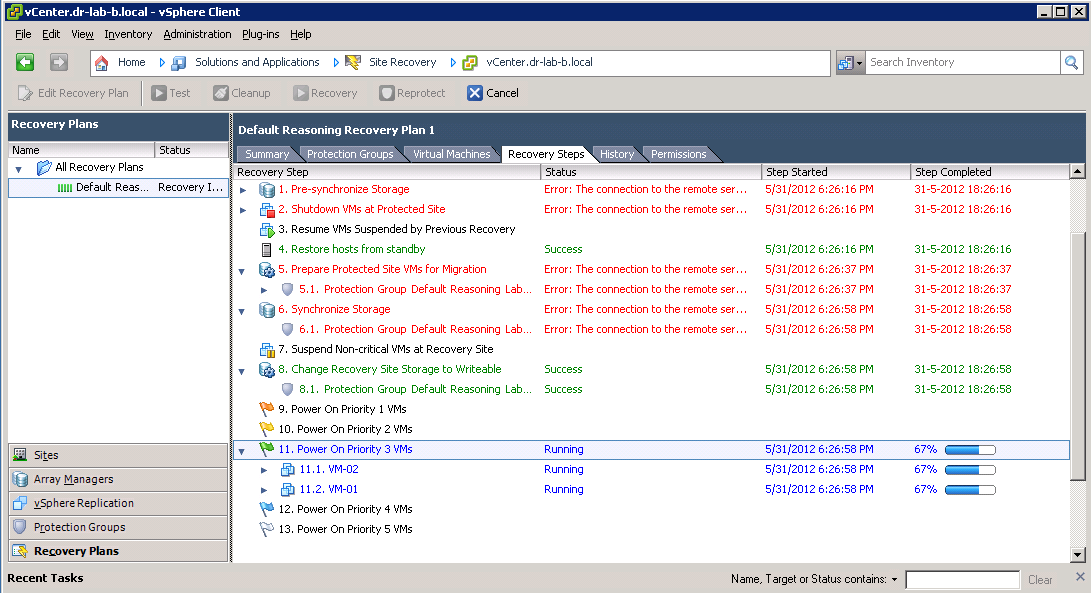
- Switch over to the Recovery Steps tab and monitor the progress. Notice the errors stating that the connection to the remote server is down. Despite the failure the recovery process continues. The VMs should be up and running in couple of minutes.

If the unplanned migration and failover process both complete successfully, your SRM implementation is properly configured. Congratulations! 🙂
This concludes the series about implementing and configuring the VMware vCenter Site Recovery Manager 5. I really like the product and I had a lot of fun building the lab, implementing and configuring SRM but also writing the blog posts. I hope you enjoyed the series as well.
- SRM 5 Part 1: Preparation
- SRM 5 Part 2: Installation
- SRM 5 Part 3: Site Pairing
- SRM 5 Part 4: vSphere Replication
- SRM 5 Part 5: VRM Pairing and VR Deployment
- SRM 5 Part 6: Inventory Mappings
- SRM 5 Part 7: VM Replication
- SRM 5 Part 8: Protection Groups
- SRM 5 Part 9: Recovery Plans
Cheers!
– Marek.Z