In the previous part we’ve deployed and configured all vCloud Connector components needed to move virtual machines to the cloud infrastructure. But there is one more thing that needs to be configured before a virtual machine can actually be moved from one environment to another and that is adding the vCloud Connector Nodes to the vCloud Connector UI. Please note that only the environments whose nodes are registered with the vCloud Connector Server will be available in the UI.
Add Nodes to vCloud Connector UI
- Open the vSphere Client and connect to the vCenter Server where the vCloud Connector plug-in is enabled.
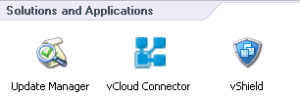
- From the Home page, scroll down to Solutions and Application and click the vCloud Connector plug-in.
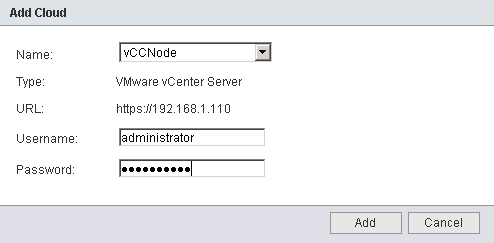
- Select the Clouds link under the Browser menu on the left and click the green plus sign to add a cloud.
- In the Add Cloud Wizard, select one of the nodes from the pull down menu, enter the appropriate username and password and click Add.

- Repeat step 4 for the other node. If the second node is the node pointing to the vCloud Director, use the credentials of the Organization Administrator to log in if you receive an authentication error.
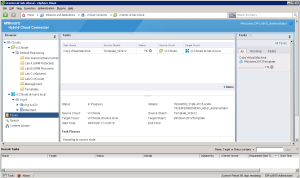
- When all vCloud Connector Nodes are added, you can browse the content of each node. You should end up with something similar like the picture below.


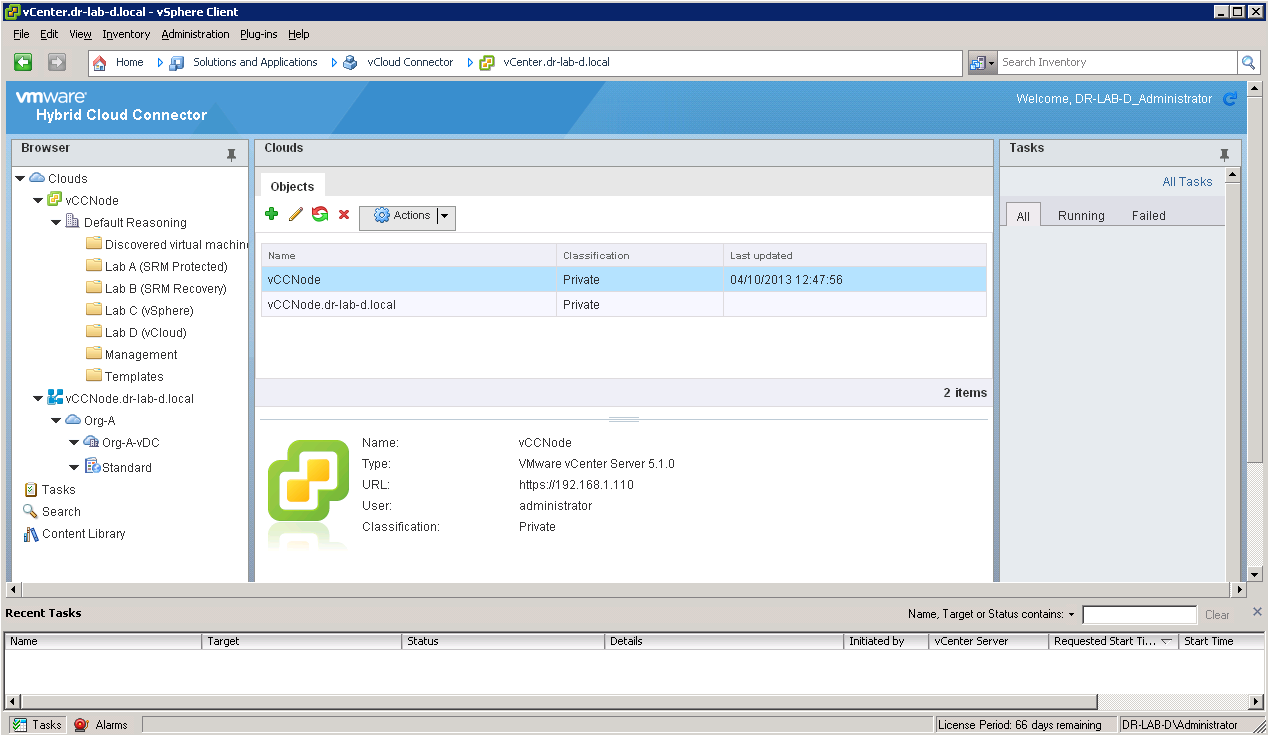
The nodes are added and set up at this point so we can now proceed to the next step.
Move VM to Cloud
Please note that when you copy a virtual machine to a vCloud Director cloud, the virtual machine is copied as a vApp template. When the virtual machine is copied, you can use the deployment options to automatically deploy a VM from the copied vApp template.
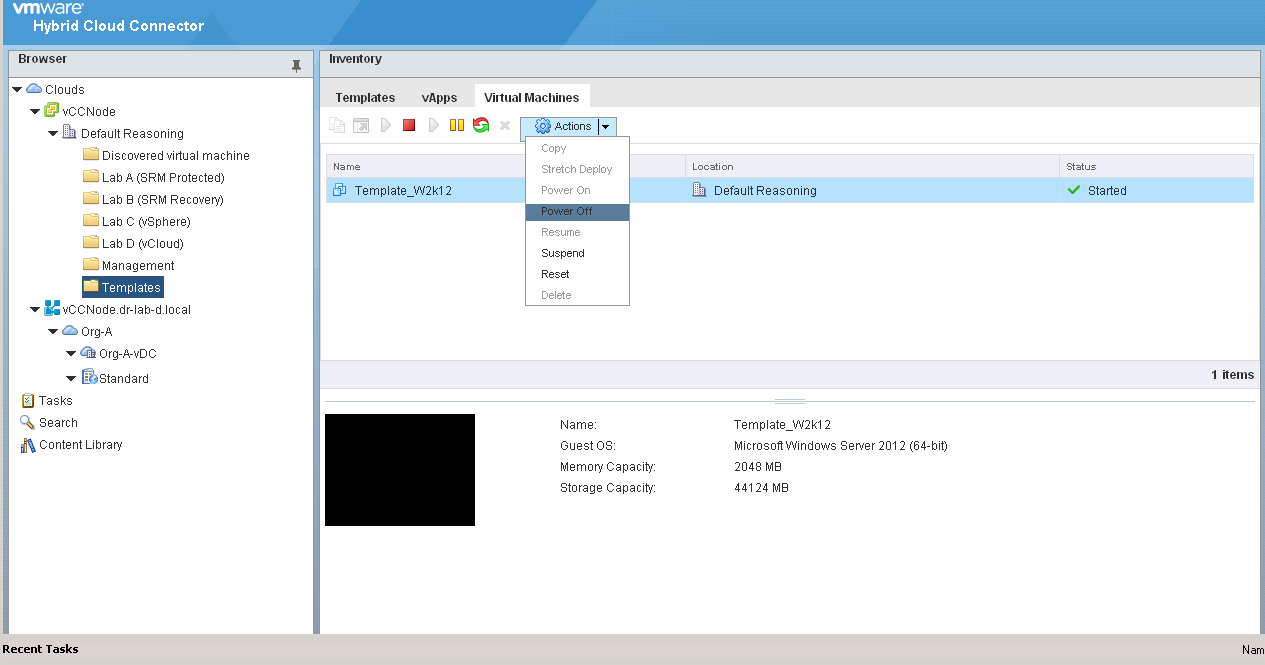
- With the vCloud Connector UI still open, browse to the virtual machine you want to move to the cloud environment.
- If the virtual machine is running, you have to stop it first. You can do this from the vCloud Connector UI by selecting the VM and clicking the Power Off option from the Actions pull down menu.

- When the status of the VM reads Stopped, select the VM and from the Actions pull down menu select Copy.
- In the Copy Wizard, select the target destination, in my case the organization in the vCloud Director. Provide a name, description and select the catalog you want to use for the vApp.
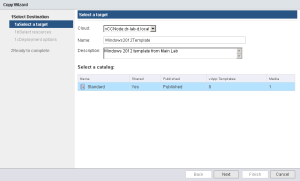
- Next, select the resource. In my case, this will be my Organization. Click Next.
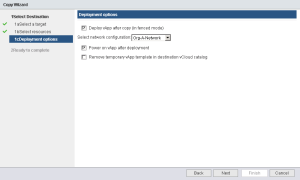
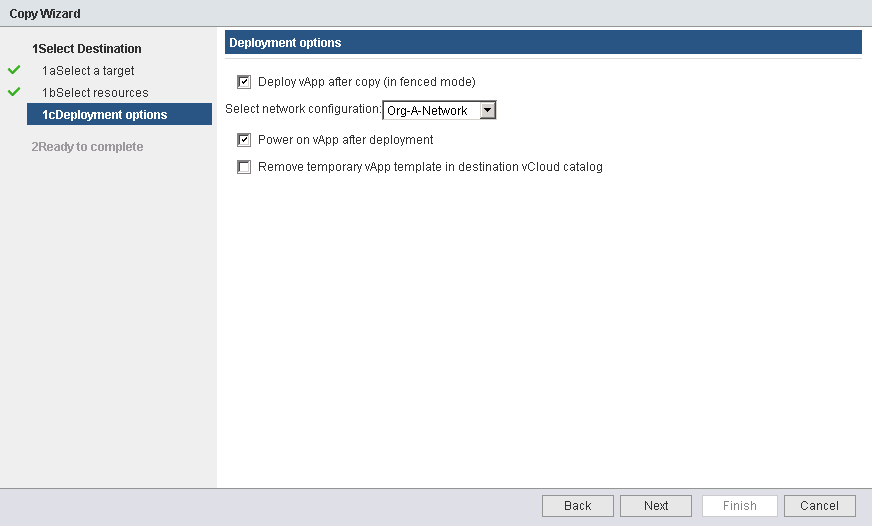
- In the Deployment Options, you can choose if you want to deploy the vApp after it is copied. If so, than you must select the network configuration from the pull down menu. You can also choose if you want to power on the vApp and if you want to remove the vApp template from the catalog.
- Review the settings in the summary windows and press Finish to start the copy process.
- You can monitor the progress from the Tasks menu. Depending on the size of the virtual machine being copied, this process can take a while.


Done! The new vApp should be up and running when the copy process completes. Check the network configuration and adjust if necessary. At this point you can start adding more virtual machines to your cloud or deploy them from the template.
This concludes the vCloud Connector part of the vCloud Suite. Continue to part 10 where we will deploy the vCenter Chargeback Manager which will allow us to create reports on resources used in the cloud.
Cheers!
– Marek.Z
- vCloud Suite POC Part 1: Introduction
- vCloud Suite POC Part 2: Installing vCloud Director Cell
- vCloud Suite POC Part 3: vCloud Director Configuration
- vCloud Suite POC Part 4: Creating a new Provider vDC
- vCloud Suite POC Part 5: Creating new Organization
- vCloud Suite POC Part 6: Add and Publish Catalogs
- vCloud Suite POC Part 7: Create New vApp
- vCloud Suite POC Part 8: Add vCloud Connector
Be the first to comment