Now the vCenter Operations Manager vApp is deployed, we can proceed with the initial configuration.
Initial Setup
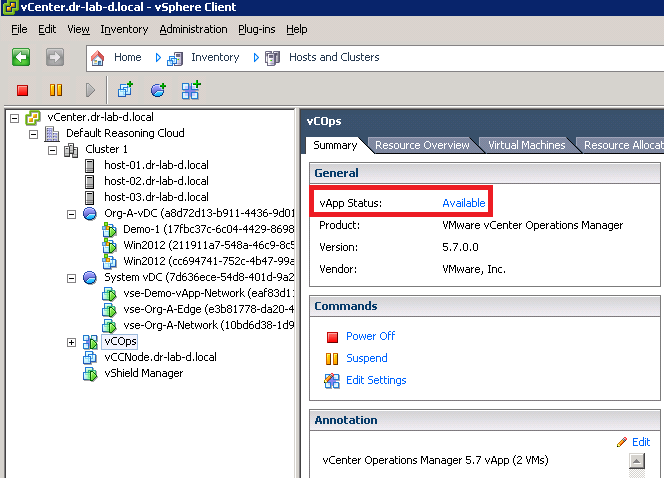
- Open the vSphere Client and log in to the vCenter Server where the vCenter Operations Manager vApp is located.
- Select the vApp and from the Summary tab click the Available link to open the vCenter Operations Manager Administration page.

- Accept the SSL security warning and log in with username admin and password admin.
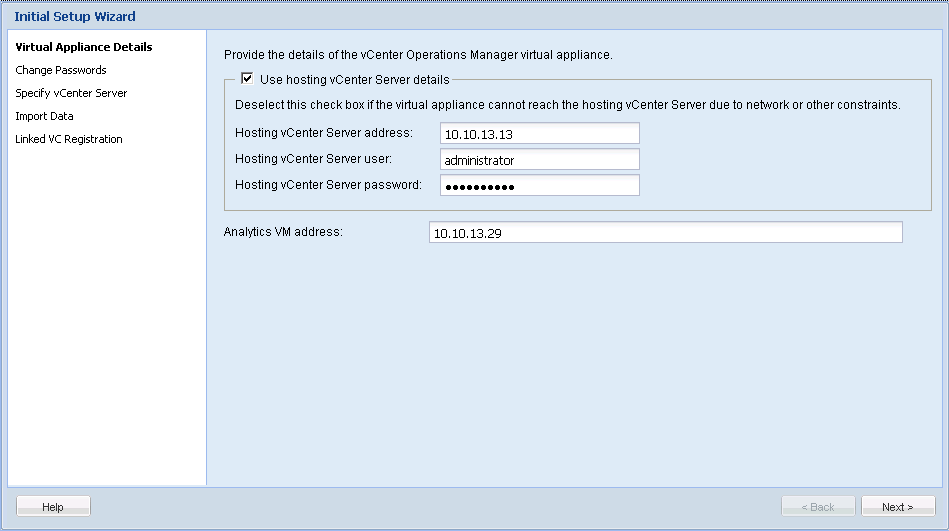
- In the Initial Setup Wizard, provide the vCenter Server address which will be monitored and a username and password. Click Next. Note that the IP address of the Analytics VM is already present.

- Click Yes on the SSL security alert to accept the authenticity of the vCenter Server.
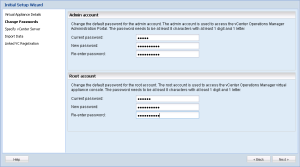
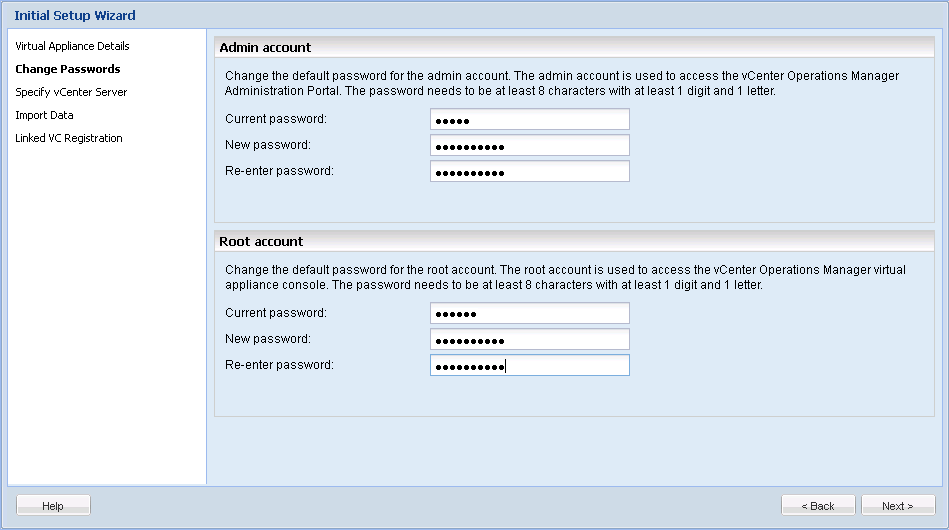
- Next, change the password for the admin account (for the vCenter Operations Manager Administration Portal) and the root password (for the vCenter Operations Manager virtual appliance console).
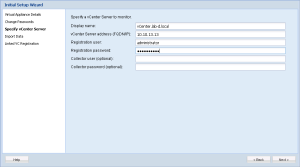
- Specify the details for vCenter Server that will be monitored. Provide a display name, FQDN or IP address, username, password for the registration user and optionally for the collector user. Click Next.
- Click Next on the Import Data section. This is only available if you already running a legacy version of vCenter Operations Manager or vCenter CapacityIQ.
- In the next step, you can register vCenter Servers that are in Linked Mode with your vCenter Server. In my case there are no vCenter Servers in Linked Mode. Click Finish to complete the initial setup.

When the registration of the vCenter Server instance is completed you will be redirected to the vCenter Operations Manager Administrations user interface. This process can take some time to complete.
Configure Email Notifications
The vCenter Operations Manager can send email notifications when a problem with its operation occurs. An Administrative alert is sent when the vCenter Operations Manager detects a problem with one or more of its components and cannot collect data from the monitored objects.
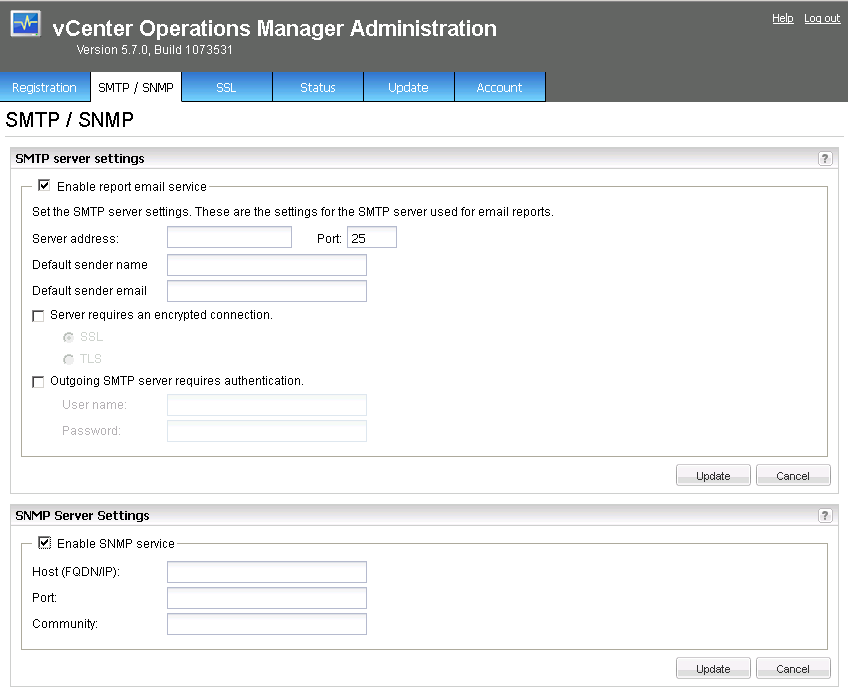
- On the vCenter Operations Manager Administration UI select the SMTP/SNMP tab and enable SMTP and/or SNMP.
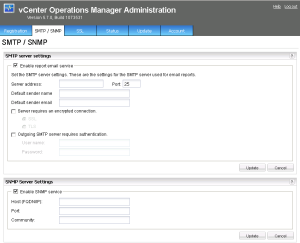
- Click Update.
- Close the vCenter Operations Manager Administration page.
Enable Plug-in
- Open the vSphere Client and log in.
- From the Plug-ins menu, select Manage Plug-ins.
- In the Plug-in Manager, scroll down to vCenter Operations Manager plug-in.
- If not enabled, right click the plug-in and select Enable.
- The plug-in should now be enabled.
- Click Close to close the Plug-in Manager.
- You should now see a vCenter Operations Manager icon under the Solutions and Applications section.
Assign License
The final step in the initial vCenter Operations Manager setup is assigning a valid license key. This must be done in the vCenter Server.
- Open vSphere Client or vSphere Web Client and log in to you vCenter Server. In this case I will use the Web Client.
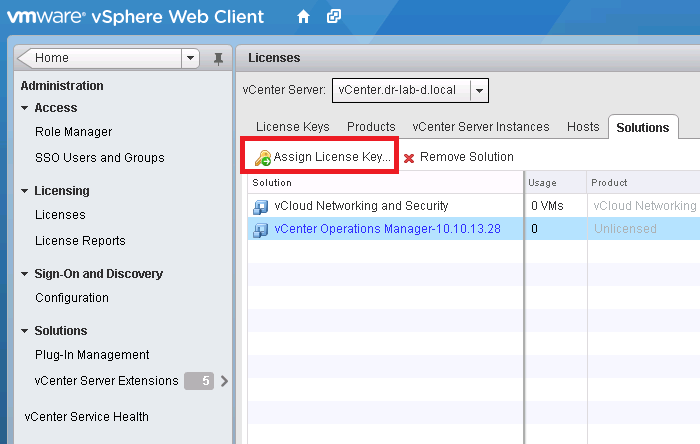
- From the Home page, select Licensing under Administration.
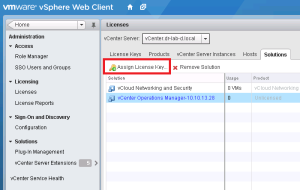
- Next, select the Solutions tab.
- Highlight the vCenter Operations Manager and click Assign License Key.
- From the drop-down menu, choose if you want to assign an existing key or if you want to assign a new one.
- Enter a new key or choose one, if you already entered one.
- Click OK to assign the license key.
This concludes the initial setup of the vCenter Operations Manager. Proceed to part 15 where we will create a custom user interface dashboard.
Cheers!
– Marek.Z
- vCloud Suite POC Part 1: Introduction
- vCloud Suite POC Part 2: Installing vCloud Director Cell
- vCloud Suite POC Part 3: vCloud Director Configuration
- vCloud Suite POC Part 4: Creating a new Provider vDC
- vCloud Suite POC Part 5: Creating new Organization
- vCloud Suite POC Part 6: Add and Publish Catalogs
- vCloud Suite POC Part 7: Create New vApp
- vCloud Suite POC Part 8: Add vCloud Connector
- vCloud Suite POC Part 9: Move VM to the Cloud
- vCloud Suite POC Part 10: Add vCenter Chargeback Manager
- vCloud Suite POC Part 11: Install and Configure vCenter Chargeback Manager
- vCloud Suite POC Part 12: vCenter Chargeback Manager Cost Analysis and Reporting
- vCloud Suite POC Part 13: Add vCenter Operations Manager
Just finished our initial VCOPS implementation today, looking forward to seeing your work on custom dashboards!
Hi Ryan,
Thanks! The custom dashboard post will be rather basic 🙂
Cheers!
I’m confused about the difference between what is going on for step #3 ‘Virtual Appliance Details’ vs step #7 ‘Specify vCenter Server’? More specifically for the ‘Virtual Appliance Details’ is the user account an administrator or low priviledge?
Hi,
I’m not entirely sure. Looks like the installer needs it twice during the deployment.
Cheers!