As the vCloud Suite proof of concept environment is running and utilizing its resources, you may want to provide a self-service portal for your cloud customers to request new resources for their cloud infrastructure. The VMware vCloud Suite includes the vCloud Automation Center (vCAC) which provides you with a secure portal where authorized administrators, developers or business users can request new services and manage existing resources from predefined, user-specific menus. Before we begin with deployment of vCloud Automation Center, let’s first define what vCloud Automation Center actually is.
vCloud Automation Center enables customized, self-service provisioning and lifecycle management of cloud services that comply with established business policies. It provides a secure portal where authorized administrators, developers or business users can request new IT services as well as manage existing computer resources from predefined user-specific menus.
Source: vmware.com
Before you can proceed with the deployment of vCloud Automation Center, there are certain criteria that must be met first. In this post I’m using version 5.2 of vCloud Automation Center.
Platform
According to the vCloud Automation Center support matrix, the only operating system supported for the deployment is Windows Server 2008 R2 SP1. I started with the following configuration:
- Clean, up to date, Windows Server 2008 R2 SP1 virtual machine
- 2 vCPU, 4 GB, 40 GB disk
- .NET Framework 4.0 installed
- IIS Web Server role enabled
- Static IP address
- Server joined to the domain
Database
The vCloud Automation Center supports a variety of Microsoft SQL Server edition. See the support matrix for all supported versions. In my case I used my stand alone Microsoft SQL Server 2008 R2. There are 3 options for creating the vCloud Automation Center database:
- Create an empty database and use the vCAC installation wizard to install the vCAC schema
- Use the vCAC installation wizard to create the vCAC database
- Create the database manually
I went for the easiest one, using the vCAC installation wizard during the installation. 🙂
Prerequisite Checker
The vCloud Automation Center deployment requires a lot of specific functions and features to be enabled before the installation. To help you verify and install all of the required components, vCloud Automation Center installation package comes with a prerequisite checker. Run the program (DCACPrepreqCheckerInstaller.msi) and make sure you met all deployment criteria displayed in the prerequisite checker. For each requirement that is not met, Prerequisite Checker provides further information including the recommended actions. Optionally, you can click the Fix Issue button and the Prerequisite Checker will try to resolve the issue for you. Keep in mind that when you fix an issue you have to click the Run Checker button to reflect the changes that you made.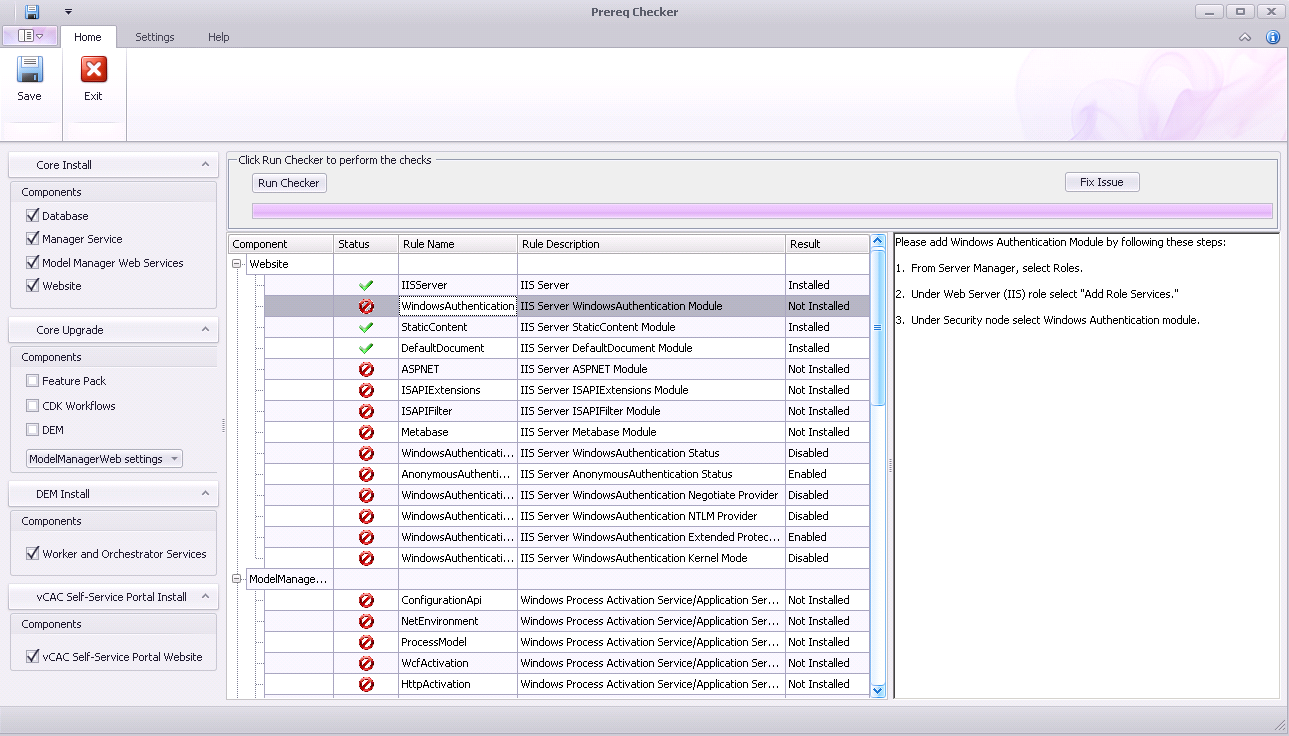
Authorization Store
The vCloud Automation Center uses Windows Authentication and the Windows Authorization Manager to authenticate and authorize users. During the installation, you can select file-based, SQL-based or Active Directory based authorization store type. I went for the AD based option. In this case, you must prepare an appropriate store in AD before beginning installation.
- Extract the installation zip file and browse to the tools folder. Extract the AzManUtil zip file.
- Execute the AzManUtil.exe file. If you receive an error stating that the .NET Framework 4.5 needs to be installed then click Yes and install the software.
- When the .NET 4.5 installation is ready, run the AzManUtil.exe utility again.
- Click Import in the menu.
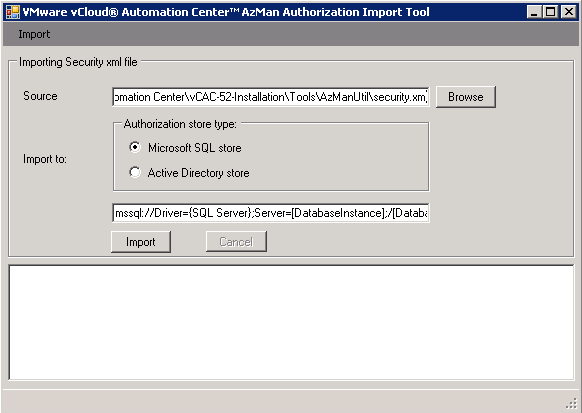
- Click Browse button next to the Source field and navigate to the vCAC installation folder, Tools, the extracted AzManUtil folder and select the security.xml file.
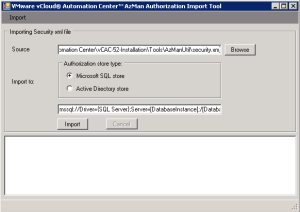
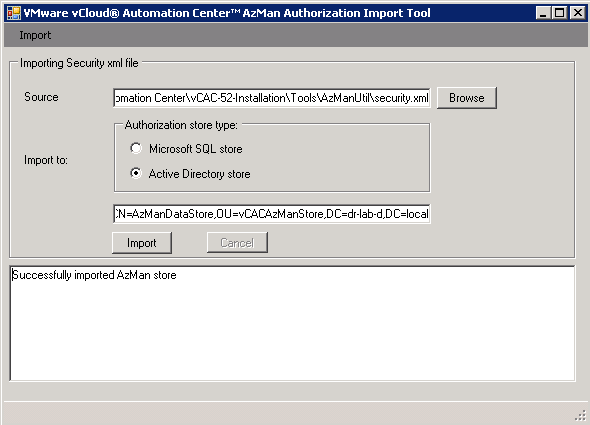
- Next, make sure the Active Directory store is selected in the Import to section.
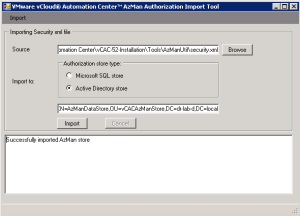
- Enter the LDAP connection string to your Active Directory Server. If you get an error, make sure that the path exists in your Active Directory.
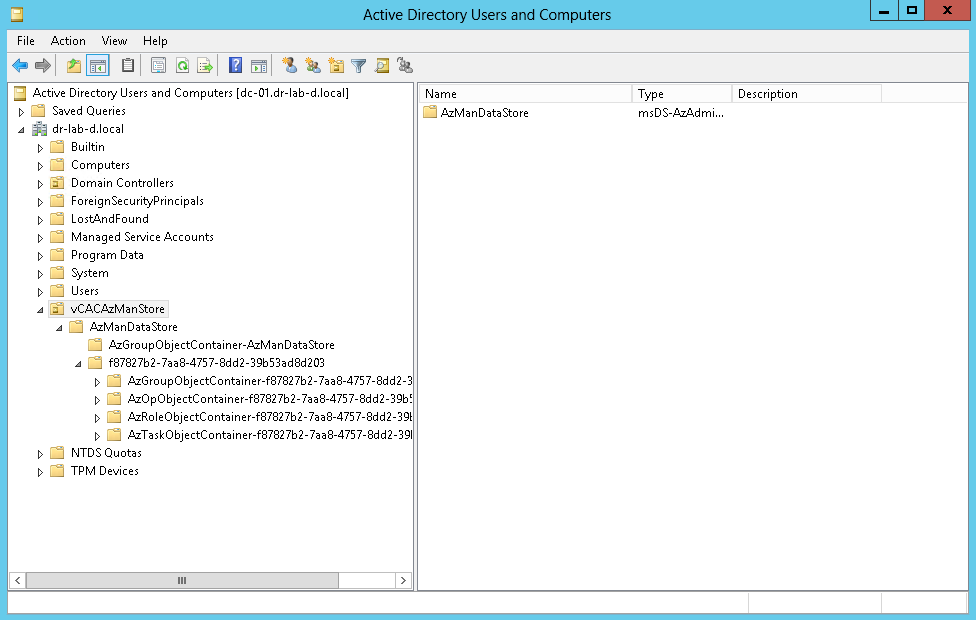
- When the import operation completes you should see the OU populated with AzMan entries.

- Close the AzMan utility.
- Start the Authorization Manager from the Run menu by typing: azman.msc
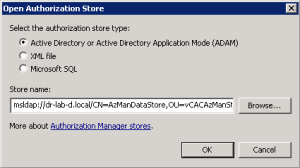
- From the Action menu, select Open Authorization Store.
- Select Active Directory or Active Directory Application Mode (ADAM) and enter the LDAP string used in step 7. Click OK to connect.
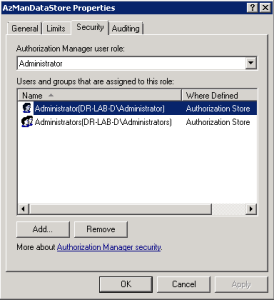
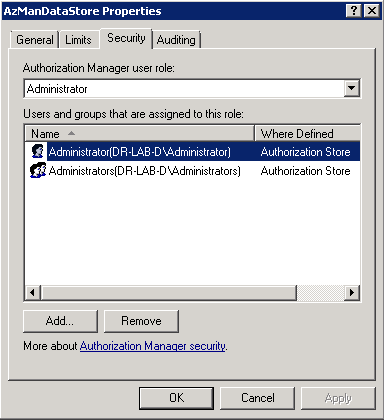
- Right-click the AzManDataStore and select Properties.
- Select the Security tab and make sure that Administrator is listed under Authorization Manager user role. Click OK to close.
- Exit Authorization Manager tool.

When all prerequisites mentioned above are met, you can proceed with the installation.
Continue to part 17 where we will install and configure the vCloud Automation Center.
Cheers!
– Marek.Z
- vCloud Suite POC Part 1: Introduction
- vCloud Suite POC Part 2: Installing vCloud Director Cell
- vCloud Suite POC Part 3: vCloud Director Configuration
- vCloud Suite POC Part 4: Creating a new Provider vDC
- vCloud Suite POC Part 5: Creating new Organization
- vCloud Suite POC Part 6: Add and Publish Catalogs
- vCloud Suite POC Part 7: Create New vApp
- vCloud Suite POC Part 8: Add vCloud Connector
- vCloud Suite POC Part 9: Move VM to the Cloud
- vCloud Suite POC Part 10: Add vCenter Chargeback Manager
- vCloud Suite POC Part 11: Install and Configure vCenter Chargeback Manager
- vCloud Suite POC Part 12: vCenter Chargeback Manager Cost Analysis and Reporting
- vCloud Suite POC Part 13: Add vCenter Operations Manager
- vCloud Suite POC Part 14: Configure vCenter Operations Manager
- vCloud Suite POC Part 15: Create Custom UI in vCenter Operations Manager
Be the first to comment