The next step in the vCloud Automation Center deployment process is installation and configuration of the Self-Service Portal. The vCAC Self-Service portal website is a standalone interface that streamlines a user’s ability to request access to virtual, cloud or physical machines. Please note that this portal is not the same as the Self-Service option that is available from the vCAC console.
Before you begin, download the vCAC-52-Extensibility.zip file from VMware.
Prerequisite Checker
- Start the already installed Prerequisite Checker from your start menu.
- Deselect all options except the vCAC Self-Service Portal Webstie and run the checker.

- Make sure that all components are set up correctly.
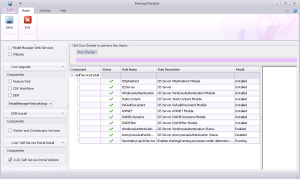
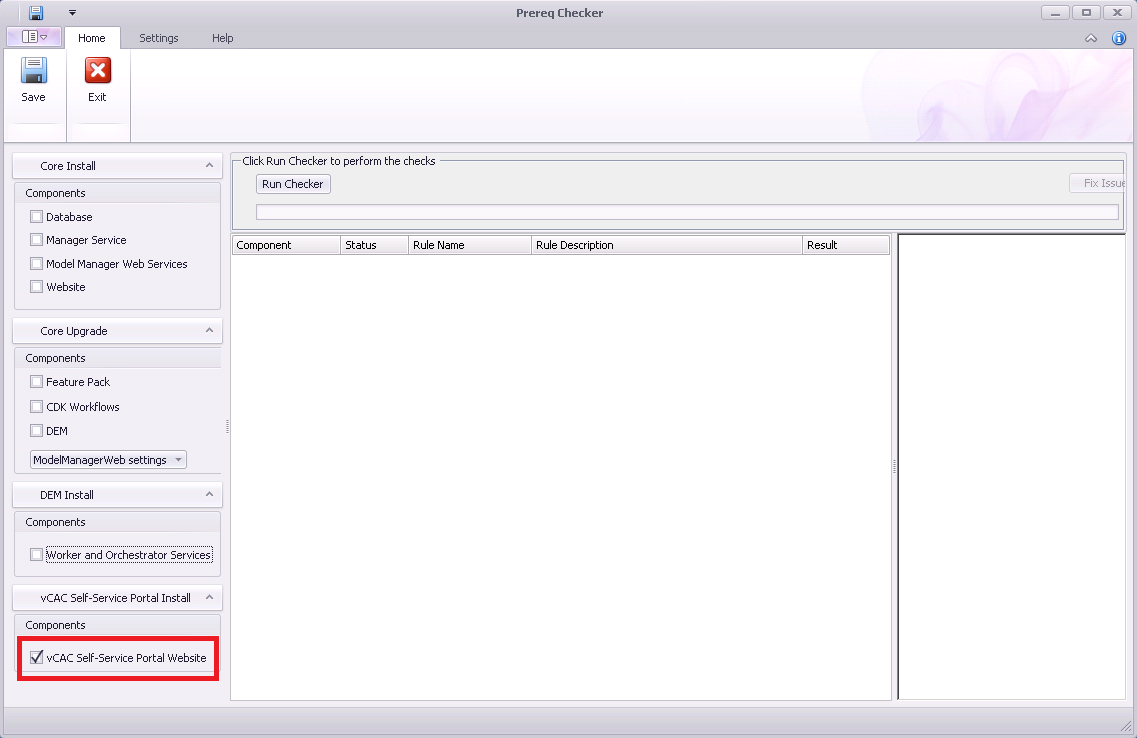

Close the Checker when ready
Install vCAC Self-Service Portal Website
- Extract the Extensibility zip file and browse to Setups folder.
- Execute the vCAC-SelfService-Setup.
- Click Next on the welcome wizard.
- Accept the EULA and click Next.
- Change the installation destination folder or leave it to default.
- Next, click Install to start the installation.
- When installation is finished, hit the Finish button.
Configure vCAC Self-Service Portal Website
When the installer is finished, the configuration wizard will start automatically.
- Click Next on the welcome wizard.
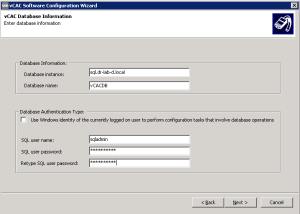
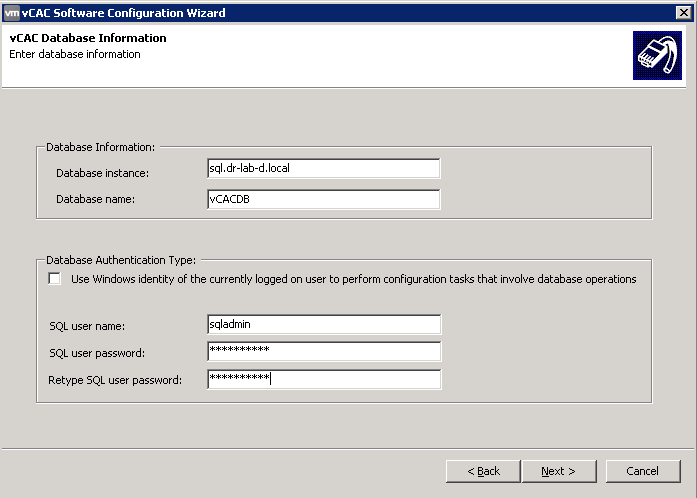
- Provide the vCAC database instance and name. Select the database authentication type. In my case, I didn’t use the Windows identity since I already have a dedicated SQL user account.
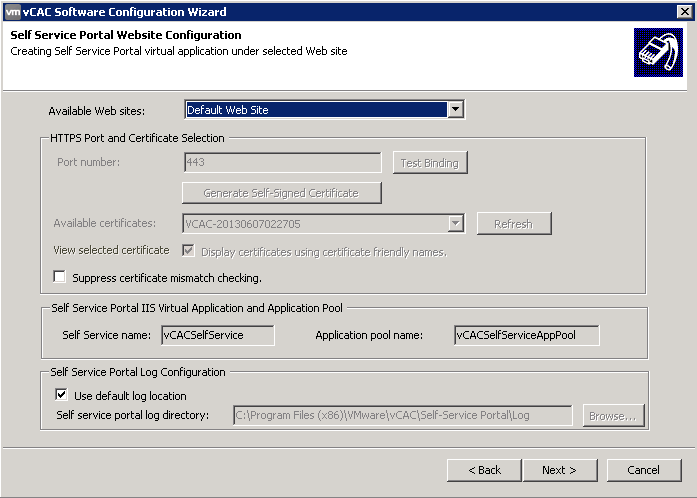
- Next, in the Self Service Portal Website Configuration, leave the values at its default and click Next.

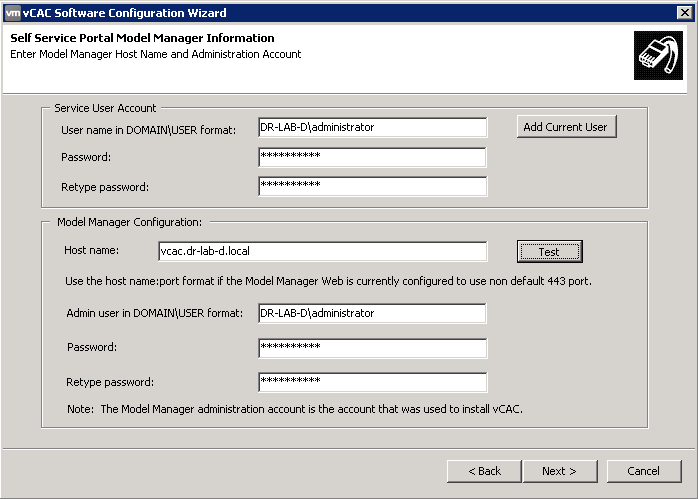
- In the Self Service Portal Model Manager Information, enter a user account that will be used to start the service. Also, provide the host name, username and password used to install the vCAC server. Click the Test button to verify the credentials.
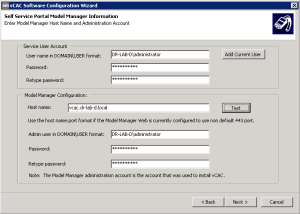
- If successfully validated, click Next to continue.
- Click Configure to start the configuration process.
- When the configurations wizard is finished, click Next.
- Click Finish to close the installation wizard.
Verify Access
Now the vCAC Self-Service Portal Website is installed, open your browser and navigate to https://<vCAC_Server>/vCACSelfService and you should see a webpage similar to the one depicted below.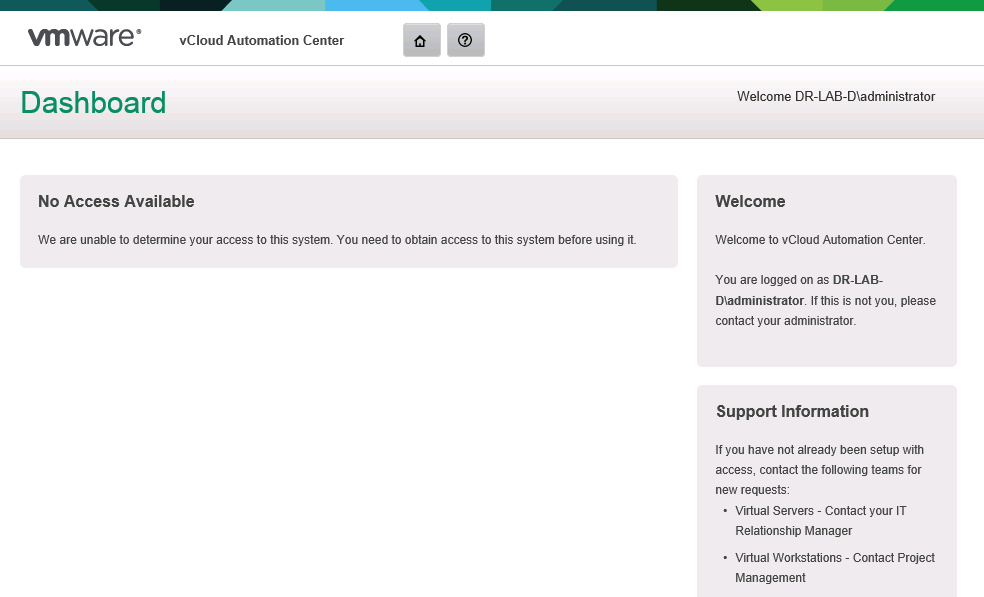
This concludes the installation and configuration part of vCloud Automation Center Self-Service Portal.
Continue to part 19 where we will integrate vCloud Director with vCloud Automation Center.
Cheers!
– Marek.Z
- vCloud Suite POC Part 1: Introduction
- vCloud Suite POC Part 2: Installing vCloud Director Cell
- vCloud Suite POC Part 3: vCloud Director Configuration
- vCloud Suite POC Part 4: Creating a new Provider vDC
- vCloud Suite POC Part 5: Creating new Organization
- vCloud Suite POC Part 6: Add and Publish Catalogs
- vCloud Suite POC Part 7: Create New vApp
- vCloud Suite POC Part 8: Add vCloud Connector
- vCloud Suite POC Part 9: Move VM to the Cloud
- vCloud Suite POC Part 10: Add vCenter Chargeback Manager
- vCloud Suite POC Part 11: Install and Configure vCenter Chargeback Manager
- vCloud Suite POC Part 12: vCenter Chargeback Manager Cost Analysis and Reporting
- vCloud Suite POC Part 13: Add vCenter Operations Manager
- vCloud Suite POC Part 14: Configure vCenter Operations Manager
- vCloud Suite POC Part 15: Create Custom UI in vCenter Operations Manager
- vCloud Suite POC Part 16: Add vCloud Automation Center
- vCloud Suite POC Part 17: Install and Configure vCloud Automation Center
Be the first to comment