In the previous two parts of this vCloud Suite POC we have installed and configured the vCloud Automation Center and the Self-Service Portal. In this part we will integrate the vCloud Director in the vCloud Automation Center. This will enable users to provision vApps in a virtual datacenter based on an existing vApp template, bringing the software-defined services of vCloud Director together with the user-centric governance of vCloud Automation Center.
Before you begin, make sure the vCloud Director, vCenter Server and corresponding ESXi hosts are up and running.
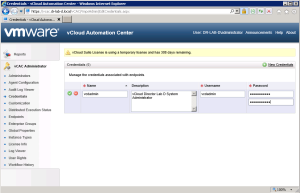
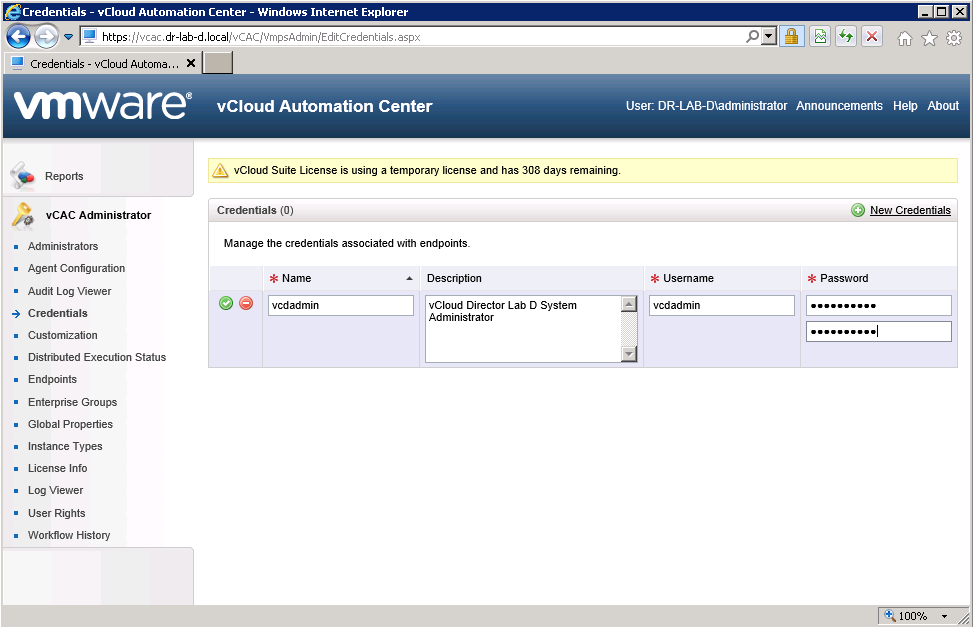
vCloud Director Credentials
The credentials will be used for authenticating with the vCloud Director server. You can provide the credentials of the Organization Administrator or the System Administrator.
- Open the vCloud Automation Center Administration page by browsing to https://<vCAC_Server>/vCAC and log in with the administrator account.
- Click the vCAC Administrator link on the left pane.
- Select Credentials from the menu.
- Next, click New Credentials in the top right of the right pane.
- Enter a name, description (optional), username and password of your vCloud Director instance and click the green check button to save the credentials.
Create vCloud Director Endpoint
The vCloud Director endpoint will be used to connect to the vCloud Director Server.
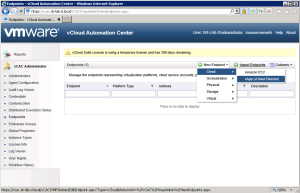
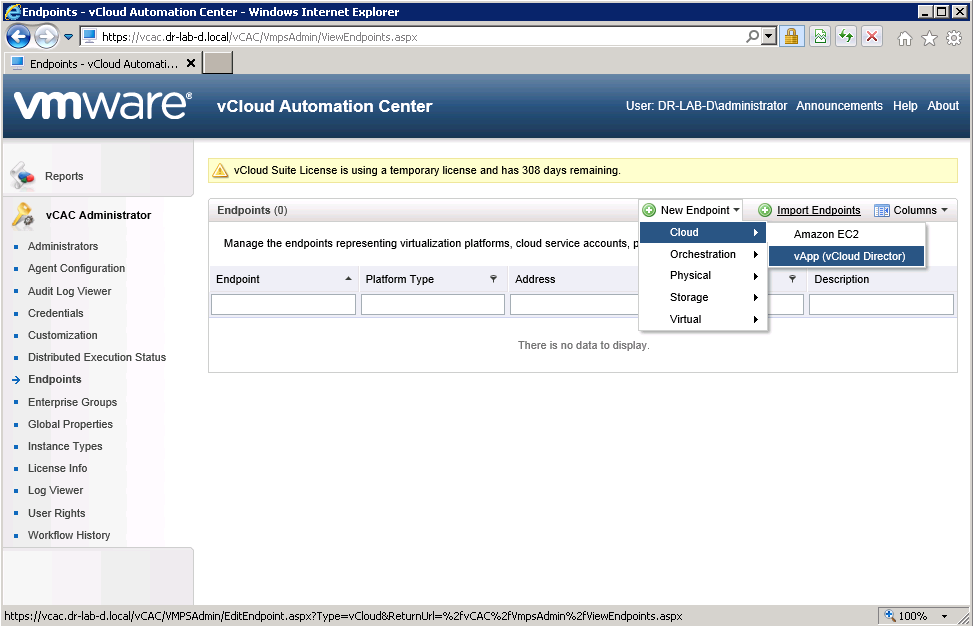
- With the vCloud Automation Center Administration page still open, navigate to Endpoints on the left pane.
- Add a new endpoint from the New Endpoint menu, select Cloud and the vApp (vCloud Director).
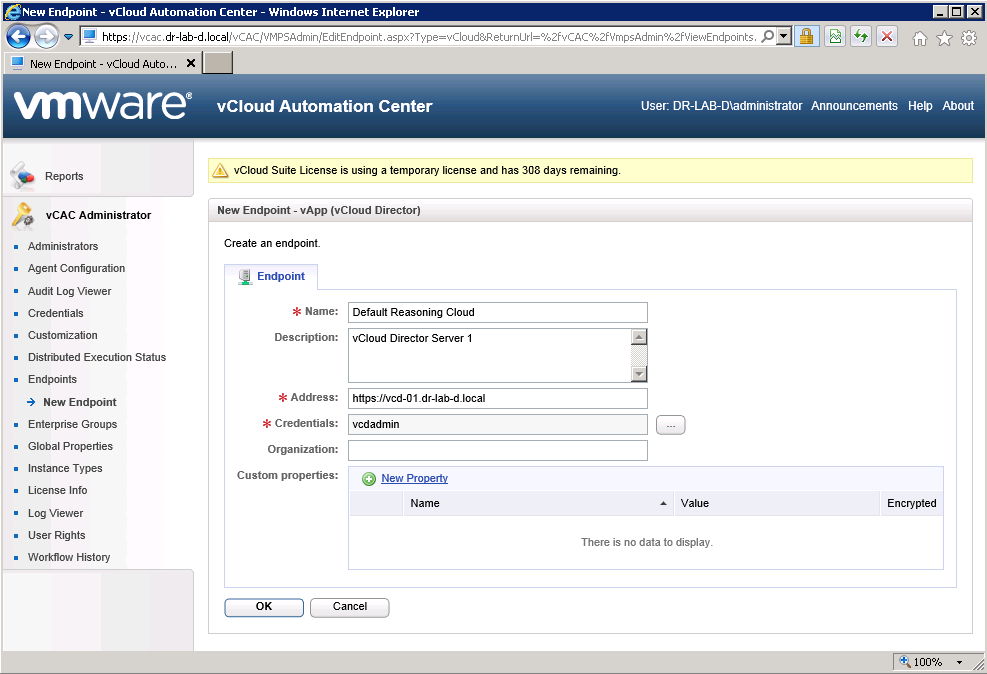
- In the New Endpoint window, provide a name, description (optional), credentials (created in paragraph above) and address of your vCloud Director Server (make sure you use the https as transport protocol). Leave the organization blank as we will enable access to all organization in the vCloud Director instance. Click OK to add the new endpoint.

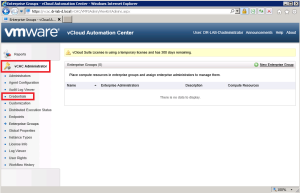
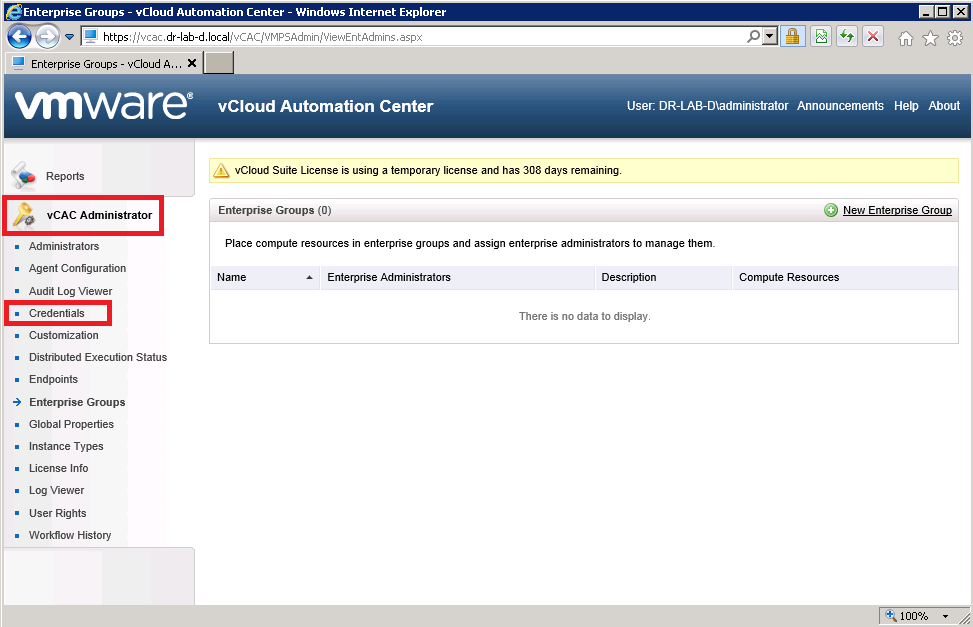
Add VDC to Enterprise Group
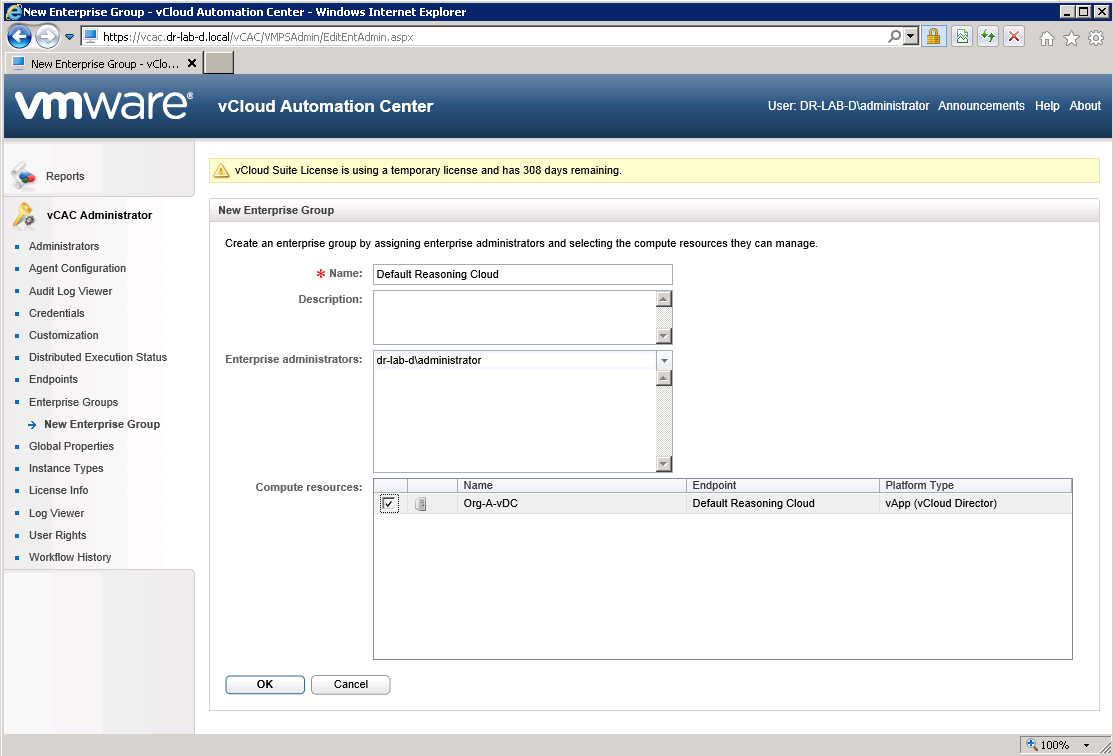
Each organization VDC in your vCloud Director must be added manually to an enterprise group to make it available for provisioning.
- With the vCloud Automation Center Administration page still open, navigate to Enterprise Groups on the left pane.
- Select New Enterprise Groups on the top right.
- Enter a name, description (optional), enterprise administrators and select the VDC from the Compute Resources list. Click OK to add the new enterprise group.

- Note that the left pane will now have additional options.
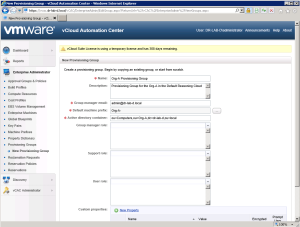
Map Provisioning Group to vCloud Director Organization
The vCloud Automation Center provisioning group corresponds to the organization in vCloud Director.
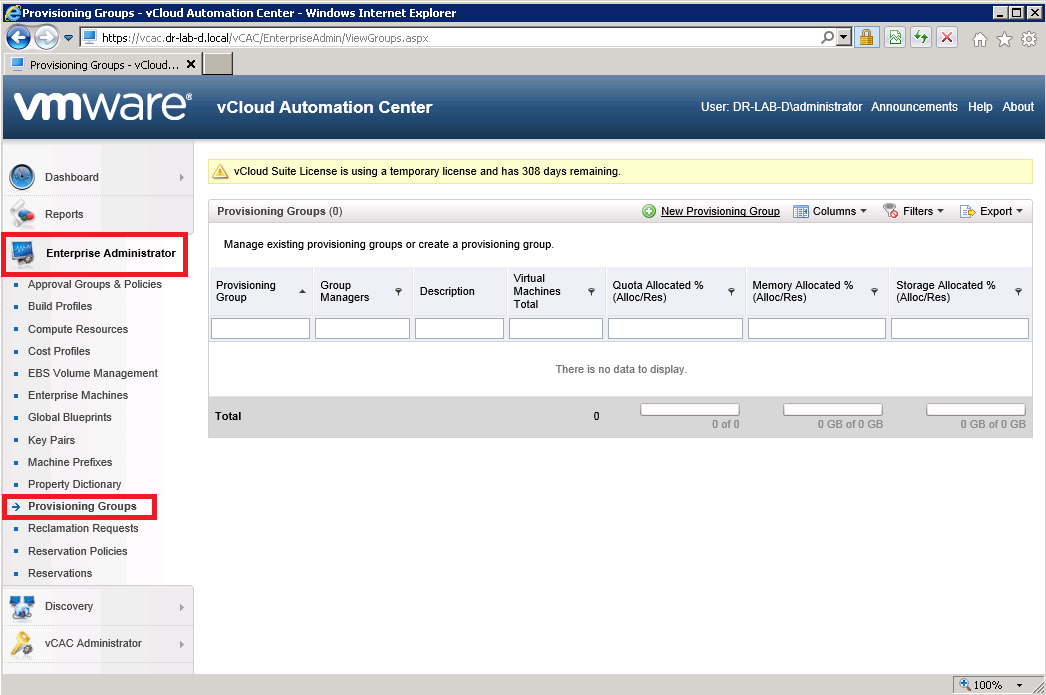
- With the vCloud Automation Center Administration page still open, navigate to Enterprise Administrator on the left pane and select Provisioning Groups.
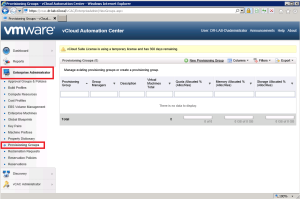
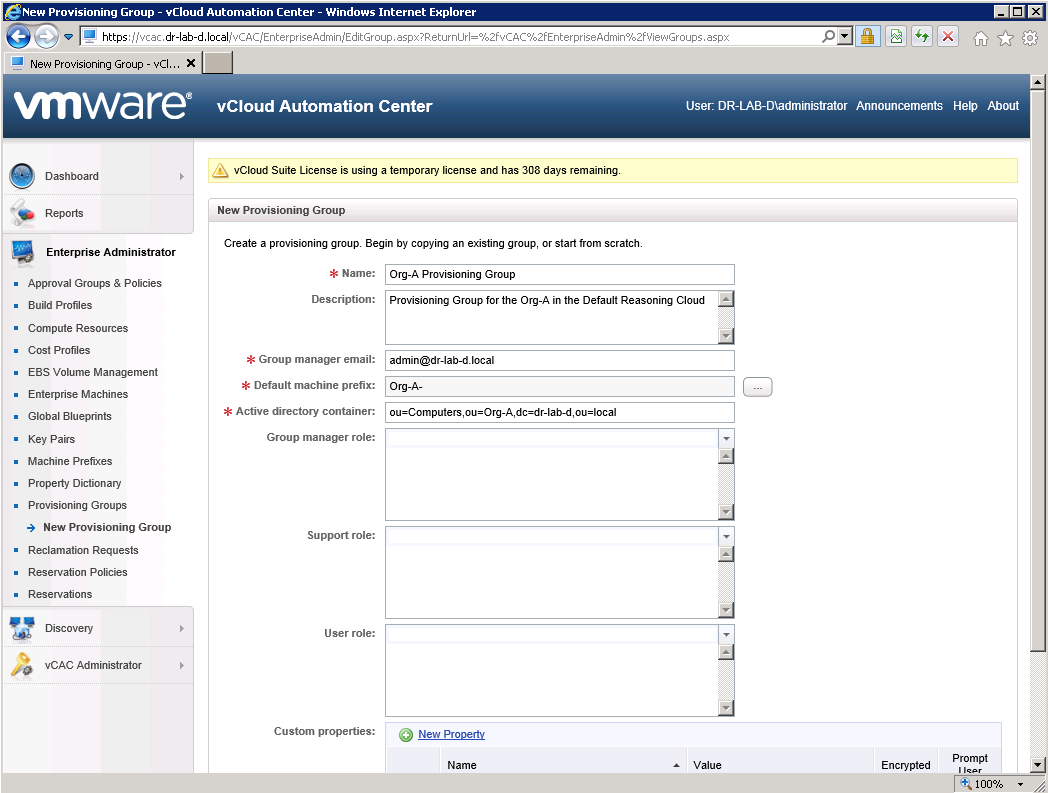
- Click New Provisioning Group on the top right.
- Enter a name, description (optional), group manager email address, default machine prefix (use existing one or create a new one), Active Directory container for the provisioned machines and the group manager role. Leave the other options as is and click OK to create a new provisioning group.
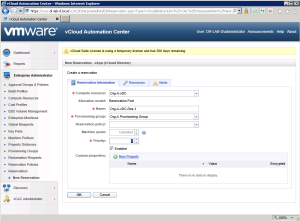
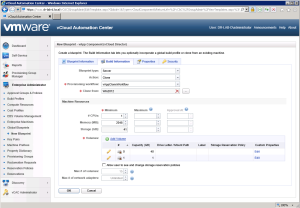
Create vCloud Director Reservation
The next step is to create resource reservation in the vCloud Director. Note that only one vCloud Automation Center reservation can be created for each vCloud Director compute resource or organization VDC.
- With the vCloud Automation Center Administration page still open, navigate to Enterprise Administrator on the left pane and select Reservations.
- Click New Reservation, Cloud and select vApp (vCloud Director) from the drop down menu.
- On the Reservation Information tab, select a Compute Resource (this is your vCD Organization), a Provisioning Group and set the priority. Make sure the reservation is enabled.
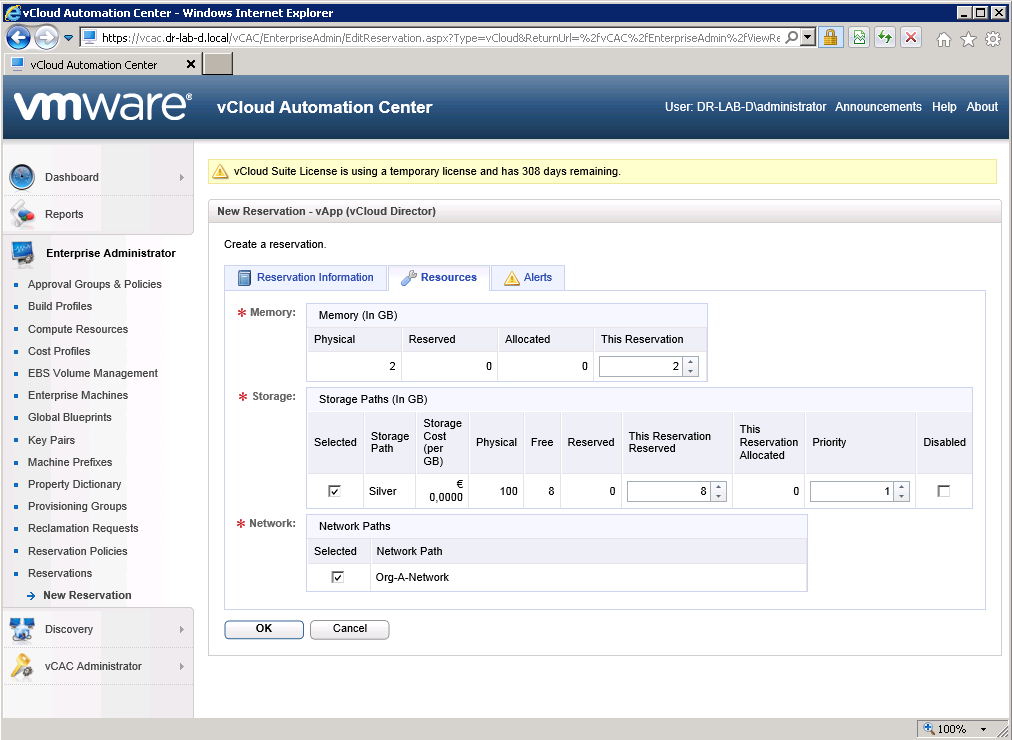
- Next, select the Resources tab.
- Enter the desired values for the memory, storage and select networks that can be used.
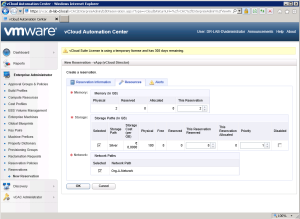
- Click OK to create the new reservation.

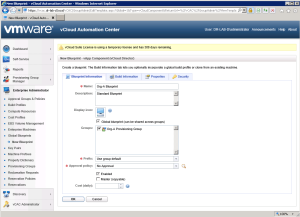
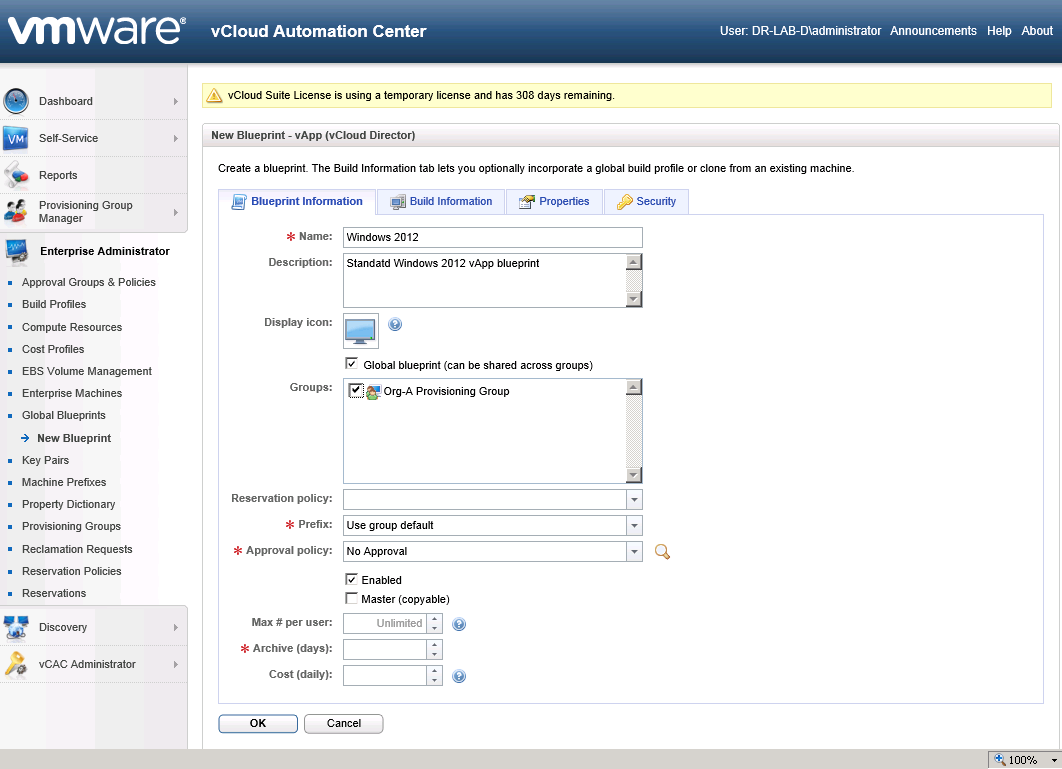
Create vCloud Director Blueprints
The blueprints will be available to users for cloning vApps from an existing vApp template.
- With the vCloud Automation Center Administration page still open, navigate to Enterprise Administrator on the left pane and select Global Blueprints.
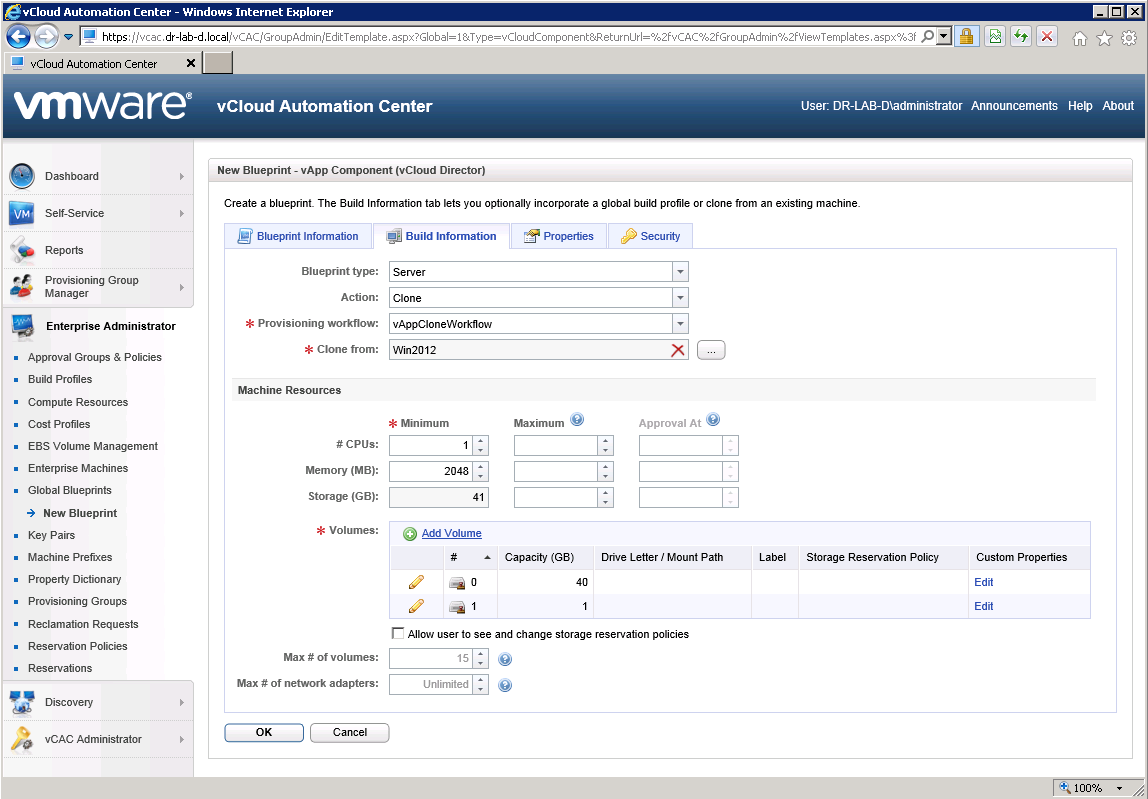
- Click New Blueprint, Cloud and select vApp Component (vCloud Director) from the drop down menu.
- On the Blueprint Information tab, provide a name, description (optional), select the group that can use this blueprint, prefix (or leave it to default) and the approval policy.
- Continue to the Build Information tab, select the blueprint type, action to perform, leave the provisioning workflow as default and select a pre-existing vApp on the clone from part. Note that the Machine Resources will be populated when you select a vApp template.
- Click OK to create a new vApp component blueprint.
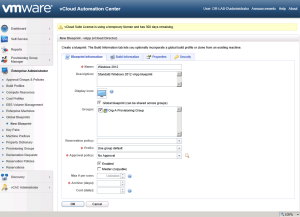
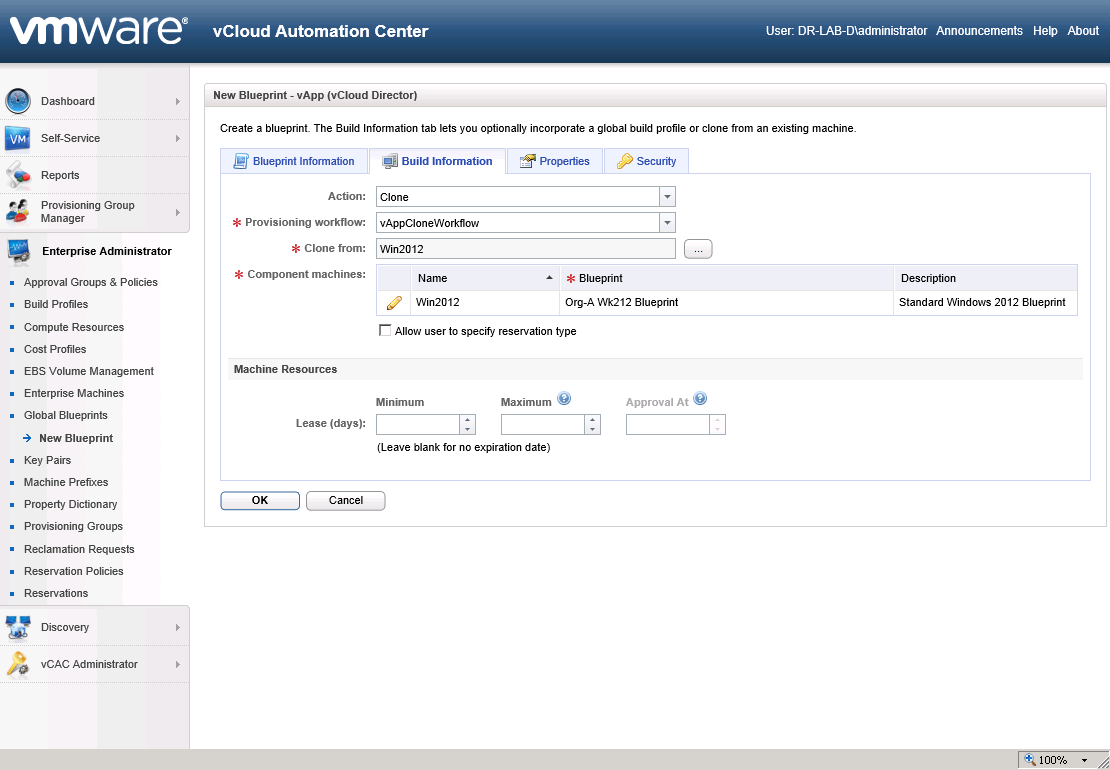
- Next, we have to create a vApp blueprint that will be visible to users in the Self Service Portal.
- On the Global Blueprints page, navigate to New Blueprint, Cloud and select vApp (vCloud Director).
- Enter a name, description (optional), select the group that can use this blueprint, select prefix, approval policy and number of days to keep the archive of this vApp.
- Next, select the Build Information tab.
- Leave the Action and Provision Workflow to its defaults. Select the vApp template in the Clone From section and link it to the component blueprint by clicking the pencil (edit) button. When you are done editing, click the green OK button to save your changes.
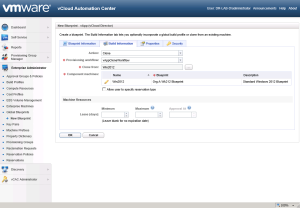
- Click OK to create the vApp blueprint.

This concludes the vCloud Director and vCloud Automation Center integration.
Continue to part 20 where we request new resources using the Self Service Portal website.
Cheers!
– Marek.Z
- vCloud Suite POC Part 1: Introduction
- vCloud Suite POC Part 2: Installing vCloud Director Cell
- vCloud Suite POC Part 3: vCloud Director Configuration
- vCloud Suite POC Part 4: Creating a new Provider vDC
- vCloud Suite POC Part 5: Creating new Organization
- vCloud Suite POC Part 6: Add and Publish Catalogs
- vCloud Suite POC Part 7: Create New vApp
- vCloud Suite POC Part 8: Add vCloud Connector
- vCloud Suite POC Part 9: Move VM to the Cloud
- vCloud Suite POC Part 10: Add vCenter Chargeback Manager
- vCloud Suite POC Part 11: Install and Configure vCenter Chargeback Manager
- vCloud Suite POC Part 12: vCenter Chargeback Manager Cost Analysis and Reporting
- vCloud Suite POC Part 13: Add vCenter Operations Manager
- vCloud Suite POC Part 14: Configure vCenter Operations Manager
- vCloud Suite POC Part 15: Create Custom UI in vCenter Operations Manager
- vCloud Suite POC Part 16: Add vCloud Automation Center
- vCloud Suite POC Part 17: Install and Configure vCloud Automation Center
- vCloud Suite POC Part 18: Install and Configure vCAC Self-Service Portal Website
Hi Marek,
Just one question , how long it takes to complete the POC?
txs.
Hi,
If you do it from scratch, have everything in place and do not encounter any significant errors, you should be set it up in 2-3 weeks.
Cheers!